Your shopping cart is empty!
/tumb.PNG)
Getting Started with Maker Feather AIoT S3 (Arduino IDE)
- Khairul Nizam Razak
- 06 Dec 2022
- Tutorial
- 1095
Getting Started with Maker Feather AIoT S3 (Arduino IDE)
Setting up the Arduino IDE
- Download Arduino IDE 2.0.
Before you start to do anything to your board, download the Arduino IDE software here to your computer if you don't have one.
/flash.png )
- Installing ESP32 Add-on in Arduino IDE
To install the ESP32 board in your Arduino IDE, follow these next instructions:
a. In your Arduino IDE, go to File> Preferences
b. Enter the following into the “Additional Board Manager URLs” field:
https://raw.githubusercontent.com/espressif/arduino-esp32/gh-pages/package_esp32_index.json
Then, click the “OK” button:
- Open Board Arduino Board Manager at Tool>Board>Board Manager. Drop down menu should like this.
- Key in “ESP32” in the search bar and hit enter.
- Click install esp32 board and restart Arduino IDE.
- Reopen Arduino IDE and navigate into Tool>Board>ESP32 Arduino>Cytron Maker Feather AIOT S3
/2.png )
Uploading Code to Your Board
- Before you start to upload the code, you will need to enter the ROM Bootloader mode of the Maker feather AIoT S3.
- Connect the Maker Feather AIoT S3 to the computer.
- Press and hold the BOOT button.
- Press and release the RESET button. Make sure the BOOT button is still pressed while resetting the board.
- Now you can release the BOOT button. You should see a new COM port on your computer.
Note: You need to enter ROM Bootloader mode for first-time use only.
- Open your Arduino IDE, while your Maker Feather AIoT S3 is still connected to your computer, select the port under Tools > Port. You will notice it will show a random name of an ESP32 board other than the Cytron Maker Feather AIoT S3, it's okay and you may ignore that name and just select that port.
/3.png )
- Change the USB Mode to Hardware CDC and JTAG.
/Upload code.jpg )
4. Upload any code to your Maker Feather AIoT S3, and you will be able to get this:
/4.png )
5. Once the process is done, press the RESET (for first-time use only) button on your Maker Feather AIoT S3 board and your Maker Feather AIoT S3 will start to run the code.
We have prepared some simple example code for you to learn and start tinkering with:
- Example 1: Blink
- Example 2: Lighting up the Neopixel RGB LED
- Example 3: Turn On the Music
- Example 4: Read Analog Sensor Value
- Example 5: Enter Sleep Mode on Maker Ports Using Timer Method
- Example 6: Displaying text on SSD1315 OLED Module via I2C
- Example 7: NTP Clock
Example 1: Blink
- Open Arduino IDE and go through “Setting up the Arduino IDE” and “Setting up the Board” step before continuing.
- Copy and paste the following code to your Arduino IDE editor.
void setup() {

pinMode (40, OUTPUT);} //any pinout that support digital output can be used instead of 40

void loop()

digitalWrite(40, HIGH); // turn ON the LED light

digitalWrite(40, LOW); // turn OFF the LED light

delay(1000);}
- Upload the codes by enterting the ROM Bootloader Mode on your Maker Feather AIoT S3 first. You may follow the instructions here for more details.
Example 2: Lighting up the Neopixel RGB LED
- Open Arduino IDE and go through “Setting up the Arduino IDE” and “Setting up the Board” step before continuing.
- Maker feather AIoT S3 have a build in RGB LED that wire up to D46 pinout line.
- For this code they are library that user need to download first
- Navigate into Sketch>Included Library>Manages Libraries
Key in “Adafruit_NeoPixel” in the search bar and install the latest set for that library.
4. Copy and paste the following code to your Arduino IDE editor.
#include adafruit_neopixel.h
#ifdef __AVR__
#include avr power.h
#endif
#define PIN 46 // pin for build in RGB LED on the board
Adafruit_NeoPixel strip = Adafruit_NeoPixel(60, PIN, NEO_GRB + NEO_KHZ800);
void setup() {
strip.begin();
strip.setBrightness(50);
strip.show();} // Initialize all pixels to 'off'
void loop() {
colorWipe(strip.Color(255, 0, 0), 50); // Red
colorWipe(strip.Color(0, 255, 0), 50); // Green
colorWipe(strip.Color(0, 0, 255), 50); // Blue
}
// Fill the dots one after the other with a color
void colorWipe(uint32_t c, uint8_t wait) {
for(uint16_t i=0; i
strip.show();
delay(wait);
}
- Upload the codes by enterting the ROM Bootloader Mode on your Maker Feather AIoT S3 first. You may follow the instructions here for more details.
Example 3: Turn On the Music
- Open Arduino IDE and go through “Setting up the Arduino IDE” and “Setting up the Board” step before continuing.
- Maker feather AIoT S3 have a build in piezo buzzer that wire up to D12 pinout line.
- Copy and paste the following code to your Arduino IDE editor.
#define NOTE_C4 262

#define NOTE_C5 523

#define NOTE_A3 220

#define NOTE_A4 440

#define NOTE_AS3 233

#define NOTE_AS4 466

#define NOTE_F3 175

#define NOTE_F4 349

#define NOTE_D3 147

#define NOTE_D4 294

#define NOTE_DS3 156

#define NOTE_DS4 311

#define NOTE_CS4 277

#define NOTE_GS3 208

#define NOTE_G3 196

#define NOTE_FS4 370

#define NOTE_F4 349

#define NOTE_E3 165

#define NOTE_GS4 415

#define NOTE_B3 247

//all note needed to play this song

int melody[] = {

  NOTE_C4, NOTE_C5, NOTE_A3, NOTE_A4,

  NOTE_AS3, NOTE_AS4, 0,

  0,

  NOTE_C4, NOTE_C5, NOTE_A3, NOTE_A4,

  NOTE_AS3, NOTE_AS4, 0,

  0,

  NOTE_F3, NOTE_F4, NOTE_D3, NOTE_D4,

  NOTE_DS3, NOTE_DS4, 0,

  0,

  NOTE_F3, NOTE_F4, NOTE_D3, NOTE_D4,

  NOTE_DS3, NOTE_DS4, 0,

  0, NOTE_DS4, NOTE_CS4, NOTE_D4,

  NOTE_CS4, NOTE_DS4,

  NOTE_DS4, NOTE_GS3,

  NOTE_G3, NOTE_CS4,

  NOTE_C4, NOTE_FS4, NOTE_F4, NOTE_E3, NOTE_AS4, NOTE_A4,

  NOTE_GS4, NOTE_DS4, NOTE_B3,

  NOTE_AS3, NOTE_A3, NOTE_GS3,

  0, 0, 0

};

// note durations: 8 = quarter note, 4 = 8th note, etc.also know as temp

int noteDurations[] = {       //duration of the notes or tempo

  12, 12, 12, 12,

  12, 12, 6,

  3,

  12, 12, 12, 12,

  12, 12, 6,

  3,

  12, 12, 12, 12,

  12, 12, 6,

  3,

  12, 12, 12, 12,

  12, 12, 6,

  6, 18, 18, 18,

  6, 6,

  6, 6,

  6, 6,

  18, 18, 18, 18, 18, 18,

  10, 10, 10,

  10, 10, 10,

  3, 3, 3

};

int speed=90;  //higher value, slower notes

void setup()

Serial.begin(115200);

for (int thisNote = 0; melody[thisNote]!=-1; thisNote++) {  //function to advand into next note

int noteDuration = speed*noteDurations[thisNote];  //Note duration with tempo added

tone(12, melody[thisNote],noteDuration*.95);

delay(noteDuration);

}

}

void loop() {

// no need to repeat the melody.

}
- Upload the codes by enterting the ROM Bootloader Mode on your Maker Feather AIoT S3 first. You may follow the instructions here for more details.
Example 4: Read Analog Sensor Value
- Open Arduino IDE and go through “Setting up the Arduino IDE” and “Setting up the Board” step before continuing.
- Maker feather AIoT S3 have 3 maker port build in on the board but we just going to used one Maker Port for this example.
3.Copy and paste the following code to your Arduino IDE editor.
const int Pin_Sensor = A5;

int Val_ Sensor = 0; //Sensor read value will be stored here

void setup() {

Serial.begin(115200);} //Serial communication begins

void loop() {

Val_ Sensor = analogRead(Pin_ Sensor); //Reading Sensor value

Serial.println(Val_ Sensor) //Prints Sensor value

delay(1000);} //delay of 1 sec
- Upload the codes by enterting the ROM Bootloader Mode on your Maker Feather AIoT S3 first. You may follow the instructions here for more details.
Example 5: Enter Sleep Mode on Maker Ports Using Timer Method
Note: GPIO LED, RGB LED, Piezo Buzzer and Maker Port (H) are powered by the Vperipheral. Make sure it’s enabled by turning on D11 before using them.
- Open Arduino IDE and go through “Setting up the Arduino IDE” and “Setting up the Board” step before continuing.
- Copy and paste the following code to your Arduino IDE editor.
const int Pin_Potentiometer = A5;//Potentiometer connected at GPIO 25 (Analog ADC2_CH8)

int Val_Potentiometer = 0; //Potentiometer read value will be stored here

void setup() {

Serial.begin(115200);   //Serial communication begins

pinMode (11, OUTPUT); // 11 is on off switch for Maker Port for this board

}

void loop() {

Val_Potentiometer = analogRead(Pin_Potentiometer); //Reading potentiometer value

  Serial.println(Val_Potentiometer);        //Prints Potentiometer value

  delay(1000);

  digitalWrite(11, HIGH); // Turn ON switch for Maker Port for this board

  delay(5000);

  digitalWrite(11, LOW); // Turn OFF switch for Maker Port for this board

  delay(5000);
- Upload the codes by enterting the ROM Bootloader Mode on your Maker Feather AIoT S3 first. You may follow the instructions here for more details.
Example 6: Displaying text on SSD1315 OLED Module via I2C
- Open Arduino IDE and go through “Setting up the Arduino IDE” and “Setting up the Board” step before continuing.
- Maker feather AIoT S3 have a build in I2C bus that wire up with one of the maker port on the board.
3. For this code they are 2 library that user need to download first
- Navigate into Sketch>Included Library>Manages Libraries
- Key in “Adafruit_GFX” in the search bar and install the latest set for that library.
c.Navigate into Sketch>Included Library>Manages Libraries
d.Key in “Adafruit_SSD1306” in the search bar and install the latest set for that library.
4.Copy and paste the following code to your Arduino IDE editor.
#include wire.h

#include adafruit_gfx.h

#include adafruit_ssd1306.h

#define SCREEN_WIDTH 128 // OLED display width, in pixels

#define SCREEN_HEIGHT 64 // OLED display height, in pixels

// Declaration for an SSD1306 display connected to I2C (SDA, SCL pins)

Adafruit_SSD1306 display(SCREEN_WIDTH, SCREEN_HEIGHT, &Wire, -1);

void setup() {

Serial.begin(115200);

//Address 0x3D for 128x64

if(!display.begin(SSD1306_SWITCHCAPVCC, 0x3C)) {

Serial.println(F("SSD1306 allocation failed"));

for(;;);

}

delay(2000);

display.clearDisplay();

display.setTextSize(1.5);     //define text size

display.setTextColor(WHITE);  //define text color

display.setCursor(0, 30);     //coordinate for text to start print (x,y)

display.println("Hello, Earth!!!");

display.display();

}

void loop() {

}
- Upload the codes by enterting the ROM Bootloader Mode on your Maker Feather AIoT S3 first. You may follow the instructions here for more details.
Example 7: NTP Clock
- Open Arduino IDE and go through “Setting up the Arduino IDE” and “Setting up the Board” step before continuing.
- Copy and paste the following code to your Arduino IDE editor.
#include wifi.h

#include ntpclient.h

#include wifiudp.h

// Replace with your network credentials

const char* ssid     = "**********";

const char* password = "**********";

// Define NTP Client to get time

WiFiUDP ntpUDP;

NTPClient timeClient(ntpUDP);

// Variables to save date and time

String formattedDate;

String dayStamp;

String timeStamp;

void setup() {

  // Initialize Serial Monitor

  Serial.begin(115200);

  Serial.print("Connecting to ");

  Serial.println(ssid);

  WiFi.begin(ssid, password);

  while (WiFi.status() != WL_CONNECTED) {

    delay(500);

    Serial.print(".");

  }

  // Print local IP address and start web server

  Serial.println("");

  Serial.println("WiFi connected.");

  Serial.println("IP address: ");

  Serial.println(WiFi.localIP());

// Initialize a NTPClient to get time

  timeClient.begin();

  // Set offset time in seconds to adjust for your timezone, for example:

  // GMT +1 = 3600

  // GMT +8 = 28800

  // GMT -1 = -3600

  // GMT 0 = 0

  timeClient.setTimeOffset(28800);

}

void loop() {

  while(!timeClient.update()) {

    timeClient.forceUpdate();

  }

  // The formattedDate comes with the following format:

  // 2018-05-28T16:00:13Z

  // We need to extract date and time

  formattedDate = timeClient.getFormattedDate();

  Serial.println(formattedDate);

  // Extract date

  int splitT = formattedDate.indexOf("T");

  dayStamp = formattedDate.substring(0, splitT);

  Serial.print("DATE: ");

  Serial.println(dayStamp);

  // Extract time

  timeStamp = formattedDate.substring(splitT+1, formattedDate.length()-1);

  Serial.print("HOUR: ");

  Serial.println(timeStamp);

  delay(1000);

}
- Upload the codes by enterting the ROM Bootloader Mode on your Maker Feather AIoT S3 first. You may follow the instructions here for more details.
Hardware Components
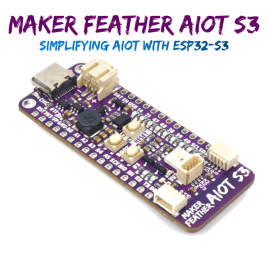
Maker Feather AIoT S3: Simplifying AIoT with ESP32
$19.95++ $19.95
 International
 Singapore
 Malaysia
 Thailand
 Vietnam
/esp 1.PNG )
/esp 2.PNG )
/board.PNG )
/esp32.PNG )
/SENSOR1.PNG )
/OLED1.PNG )
/GFX.PNG )
/SSD.PNG )

