 International
 Singapore
 Malaysia
 Thailand
 Vietnam
Your shopping cart is empty!
Boot up Raspberry Pi CM4 on CM4 Maker Board
- Abdul Salam A Haris
- 08 Mar 2023
- Tutorial
- 1307
You can boot the Raspberry Pi Compute Module 4 (CM4) in three ways:
1. microSD Card
2. SSD
3. eMMC
Figure 1 shows the CM4 Maker Board with Raspberry Pi CM4 Wireless 4G RAM Lite (no eMMC) with microSD Card.
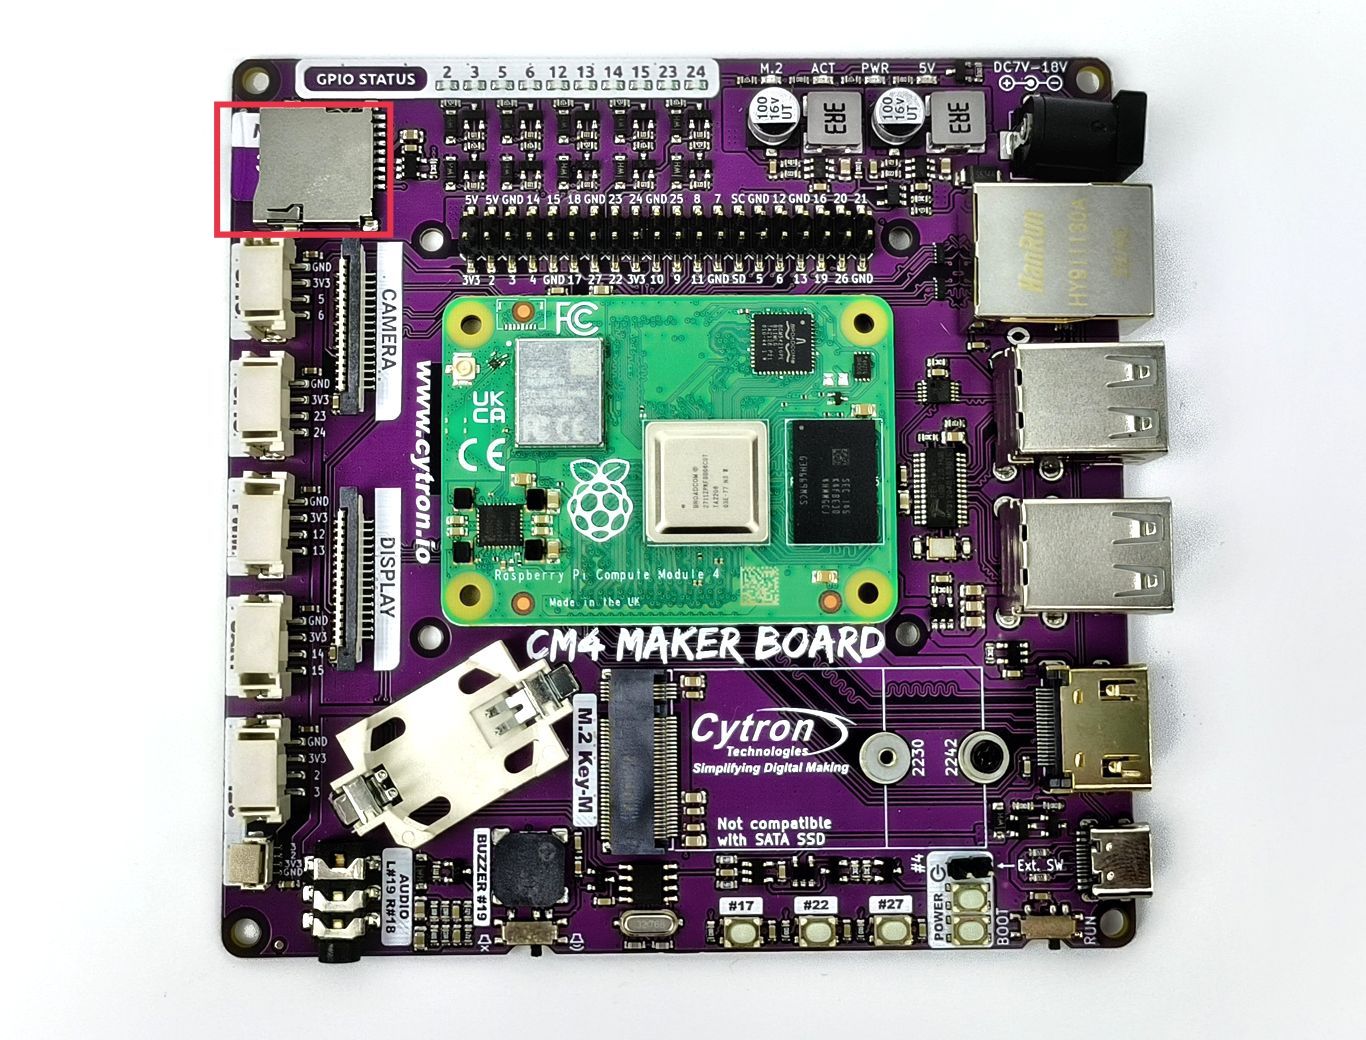
Figure 1: SD Card on CM4 Maker Board.
Figure 2 shows the CM4 Maker Board with Raspberry Pi CM4 Wireless 4G RAM Lite (no eMMC) with NVMe 2242 B+M-Key M.2. The CM4 Maker Board supports NVME SSD size 2230 & 2242 (Bootable) and not supported M.2 SATA SSD.
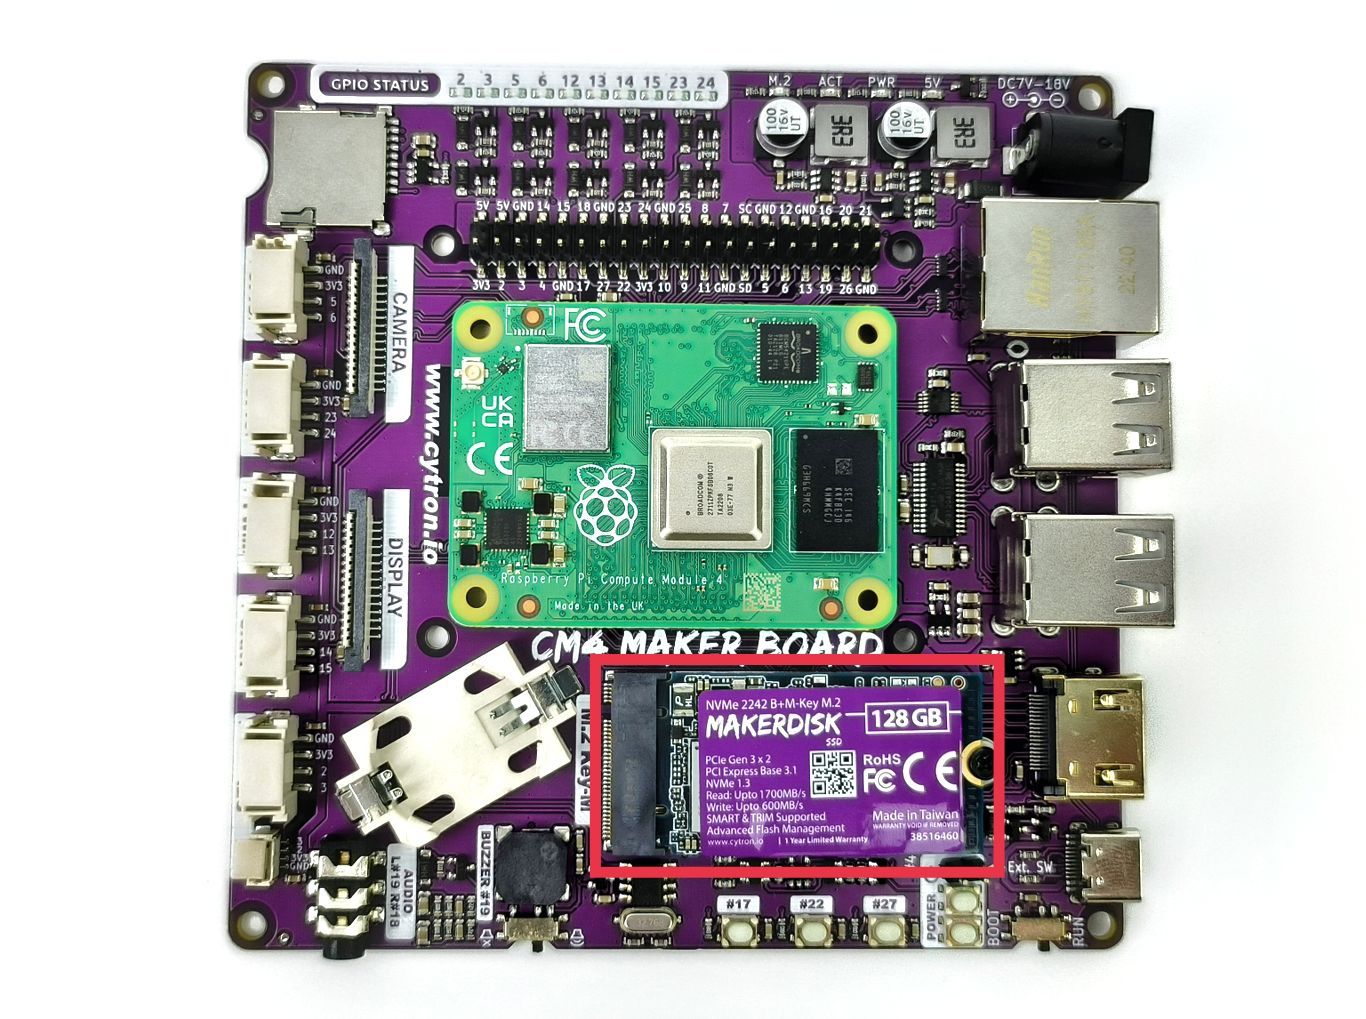
Figure 2: NVMe SSD on CM4 Maker Board.
Figure 3 shows the CM4 Maker Board with Raspberry Pi CM4 Wireless 8G RAM 16G eMMC.

Figure 3: CM4 with eMMC on CM4 Maker Board.
To boot the CM4 Maker Board from microSD Card or SSD you must make sure to switch the CM4 Maker Board to RUN.
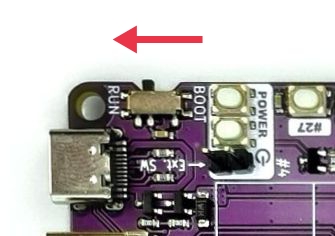
Figure 4: Switch to RUN.
For the MAKERDISK microSD Card or SSD from Cytron Technologies has been TESTED and APPROVED by the Raspberry Pi Foundation for use with Raspberry Pi Products, and already has pre-installed Raspberry Pi OS.
If you using another microSD Card or SSD the installation step is as follows:
Install Raspberry Pi on microSD Card
Download and install the Raspberry Pi Imager. After finishing installation you can launch it.
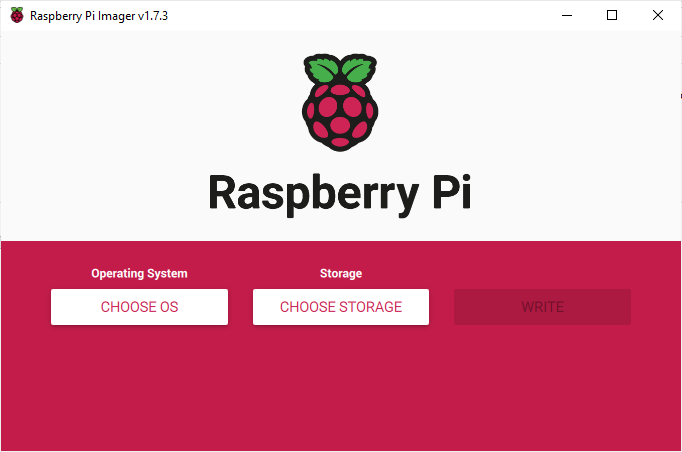
Figure 5: Raspberry Pi Imager.
Select the operating system (OS) to be installed, most commonly will use Raspberry Pi OS (32-bit).
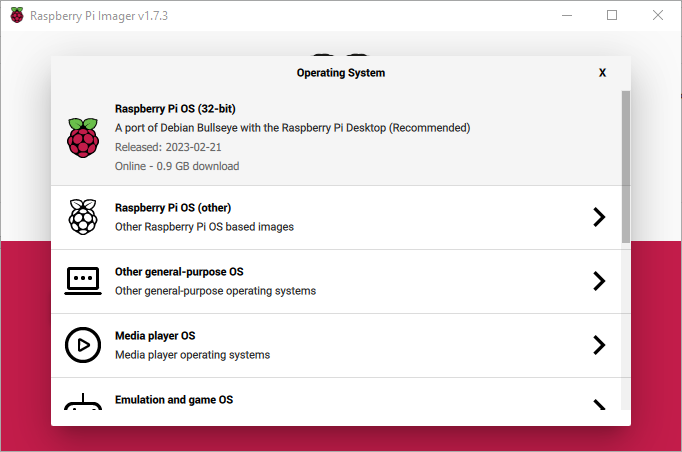
Figure 6: Select the Operating System.
Select the drive you want to install the operating system. Make sure you choose the right drive because it will format all your data on that drive.
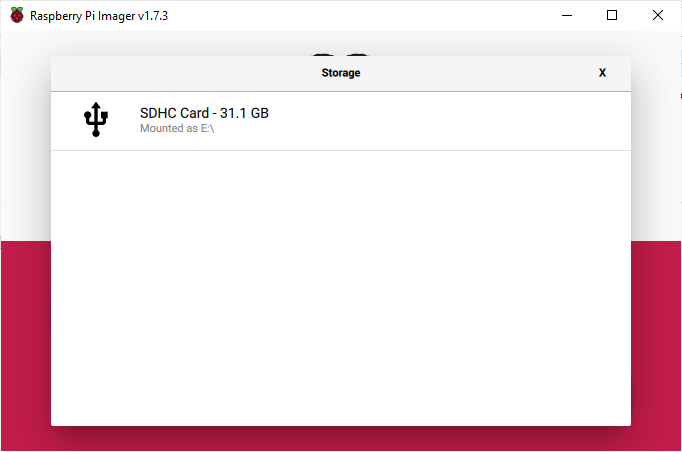
Figure 7: Select the SD Card.
Then, click the write button to initiate the installation.
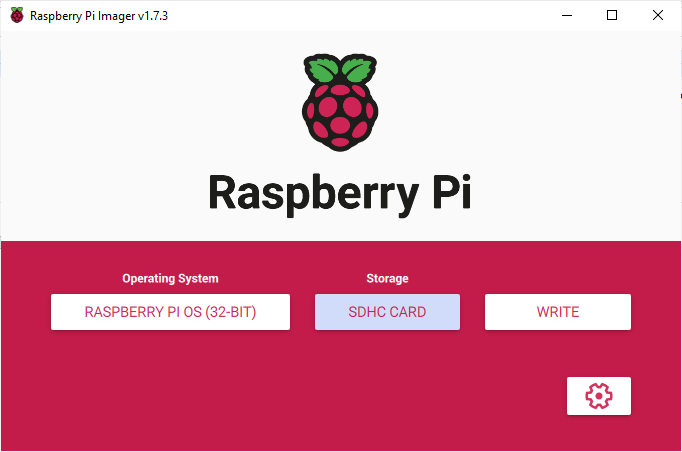
Figure 8: Write to the SD Card.
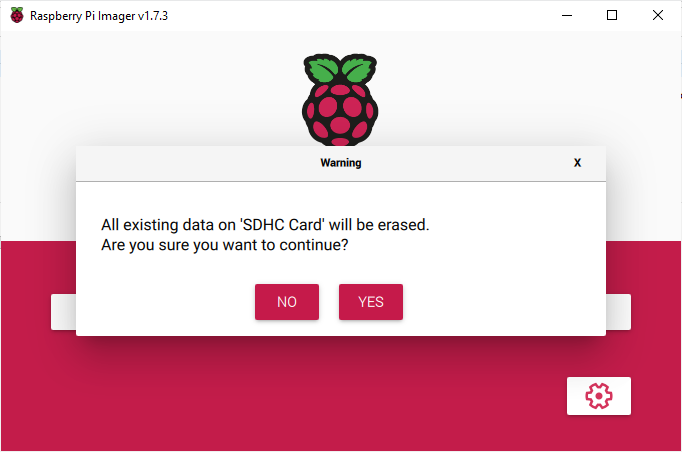
Figure 9: Click Yes to continue write.
If you have a problem unable to display it on the monitor connected to the CM4 Maker Board. Try to change the resolution on the monitor or use another monitor with a higher resolution to change its resolution.
To change the resolution you can navigate to the start menu > Preferences > Screen resolution.

Figure 10: Adjust the resolution.
Install Raspberry Pi OS on SSD
Installation on the SSD should be the same as microSD Card but need to use an external USB 3.0 to M.2 NVMe/SATA B+M Key Case with USB-C Cable.
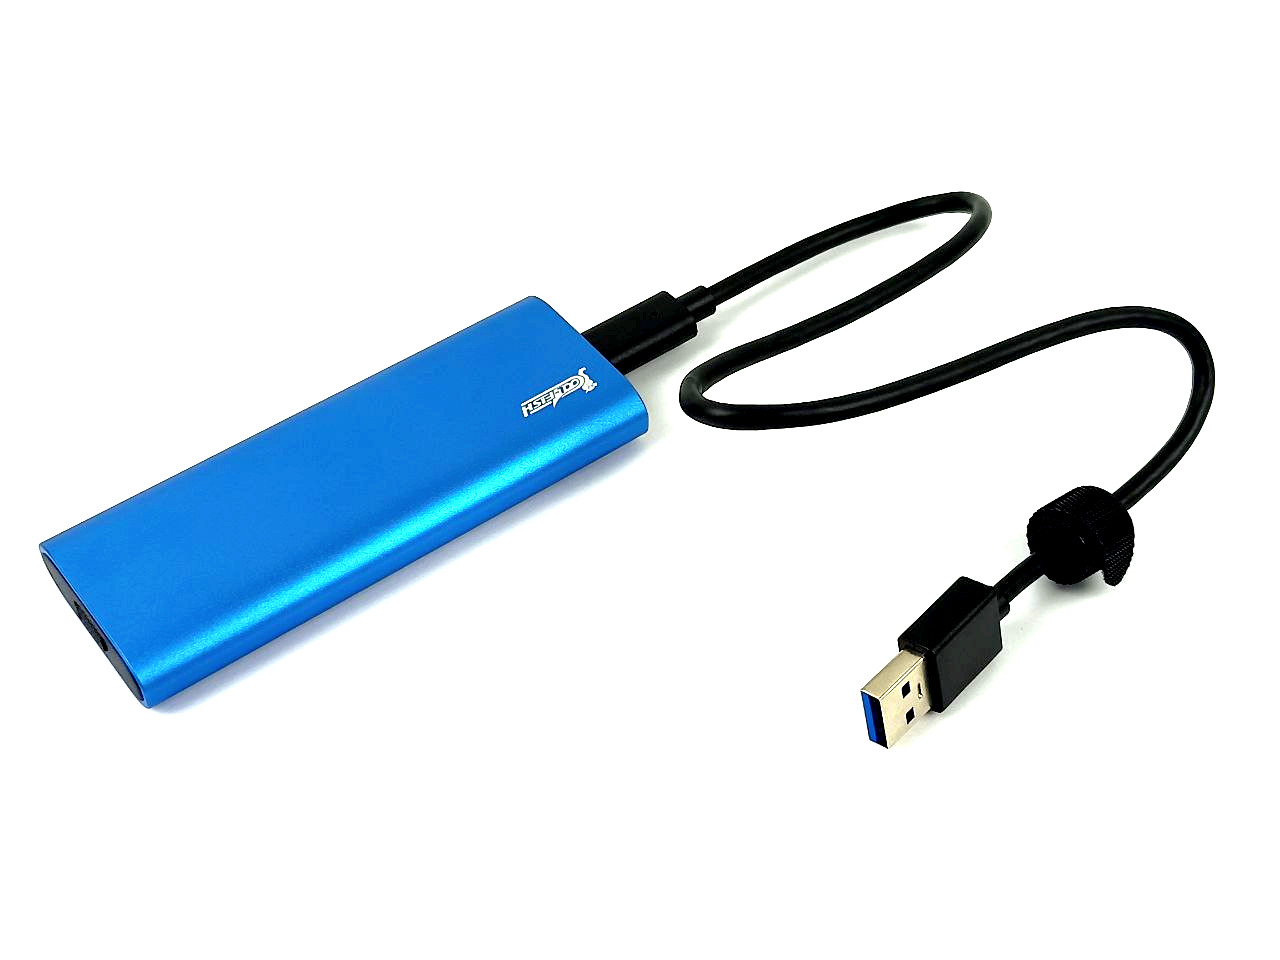
Figure 11: USB 3.0 to M.2 NVMe/SATA B+M Key Case with USB-C Cable.
Install Raspberry Pi OS on CM4 with eMMC
On the other hand, the CM4 with the eMMC needs several steps before installing the Raspberry Pi OS.
Switch the CM4 Maker Board to boot mode.
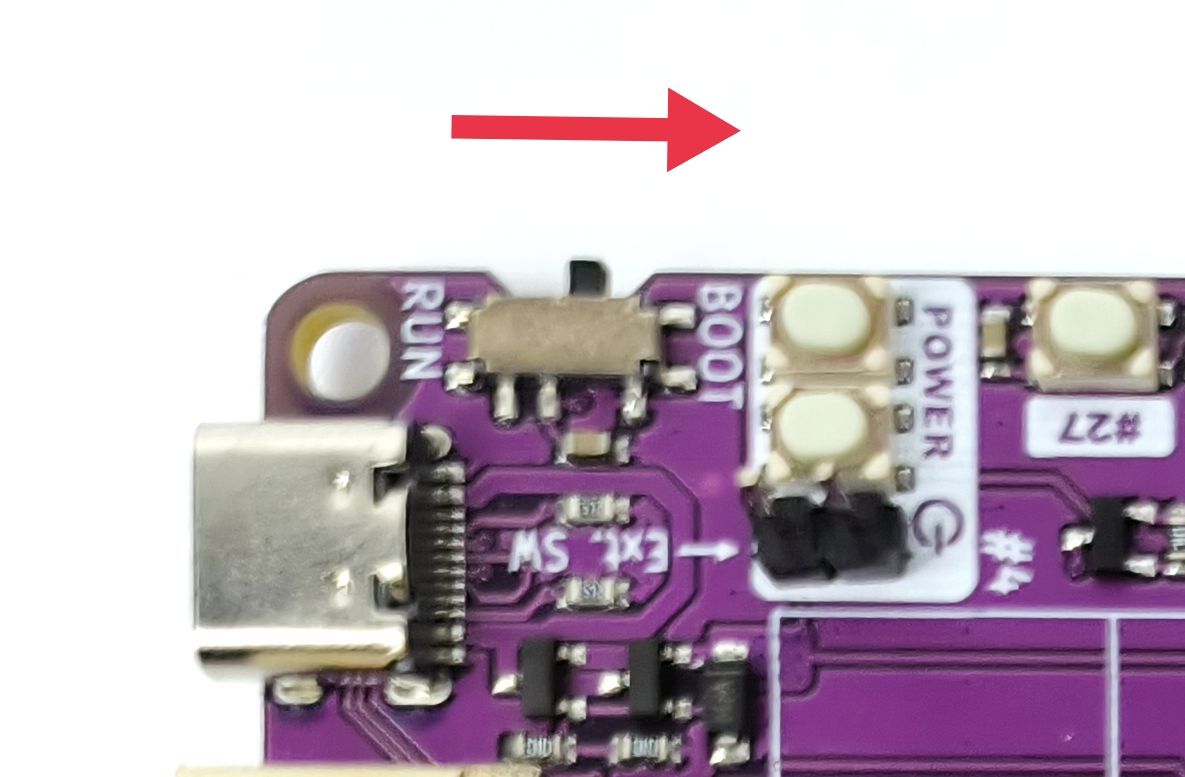
Figure 12: Switch to BOOT.
Download and install the rpiboot tool.
Connect the CM4 Maker Board to the computer using USB-C on the board. Then, search and open the rpiboot on the Windows start menu.
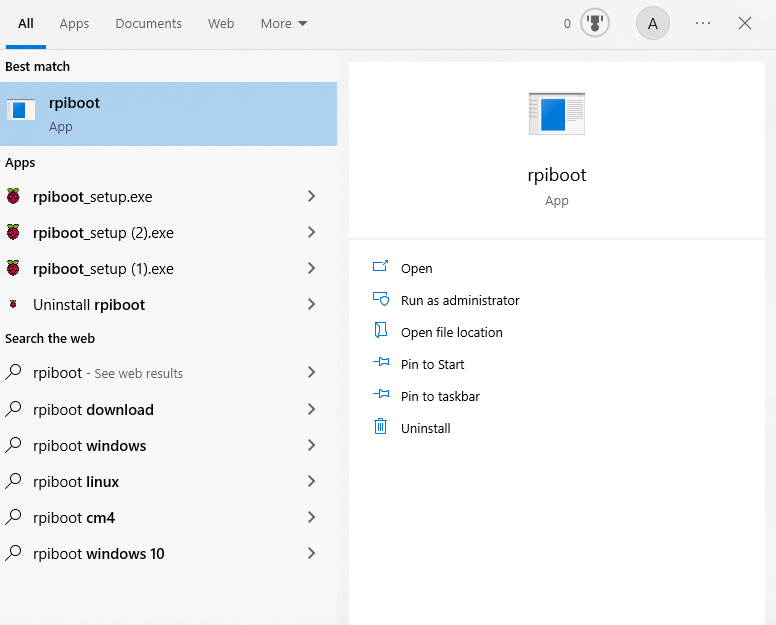
Figure 13: Open rpiboot.
After run the rpiboot the computer will detect the SDHC drive.
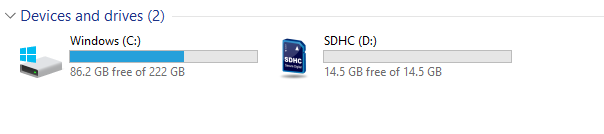
Figure 14: eMMC on drive D.
From this point, you can follow the installation for the microSD Card using Raspberry Pi Imager. After completing the installation you need to turn the switch to RUN.
Figure 15: Switch to RUN.
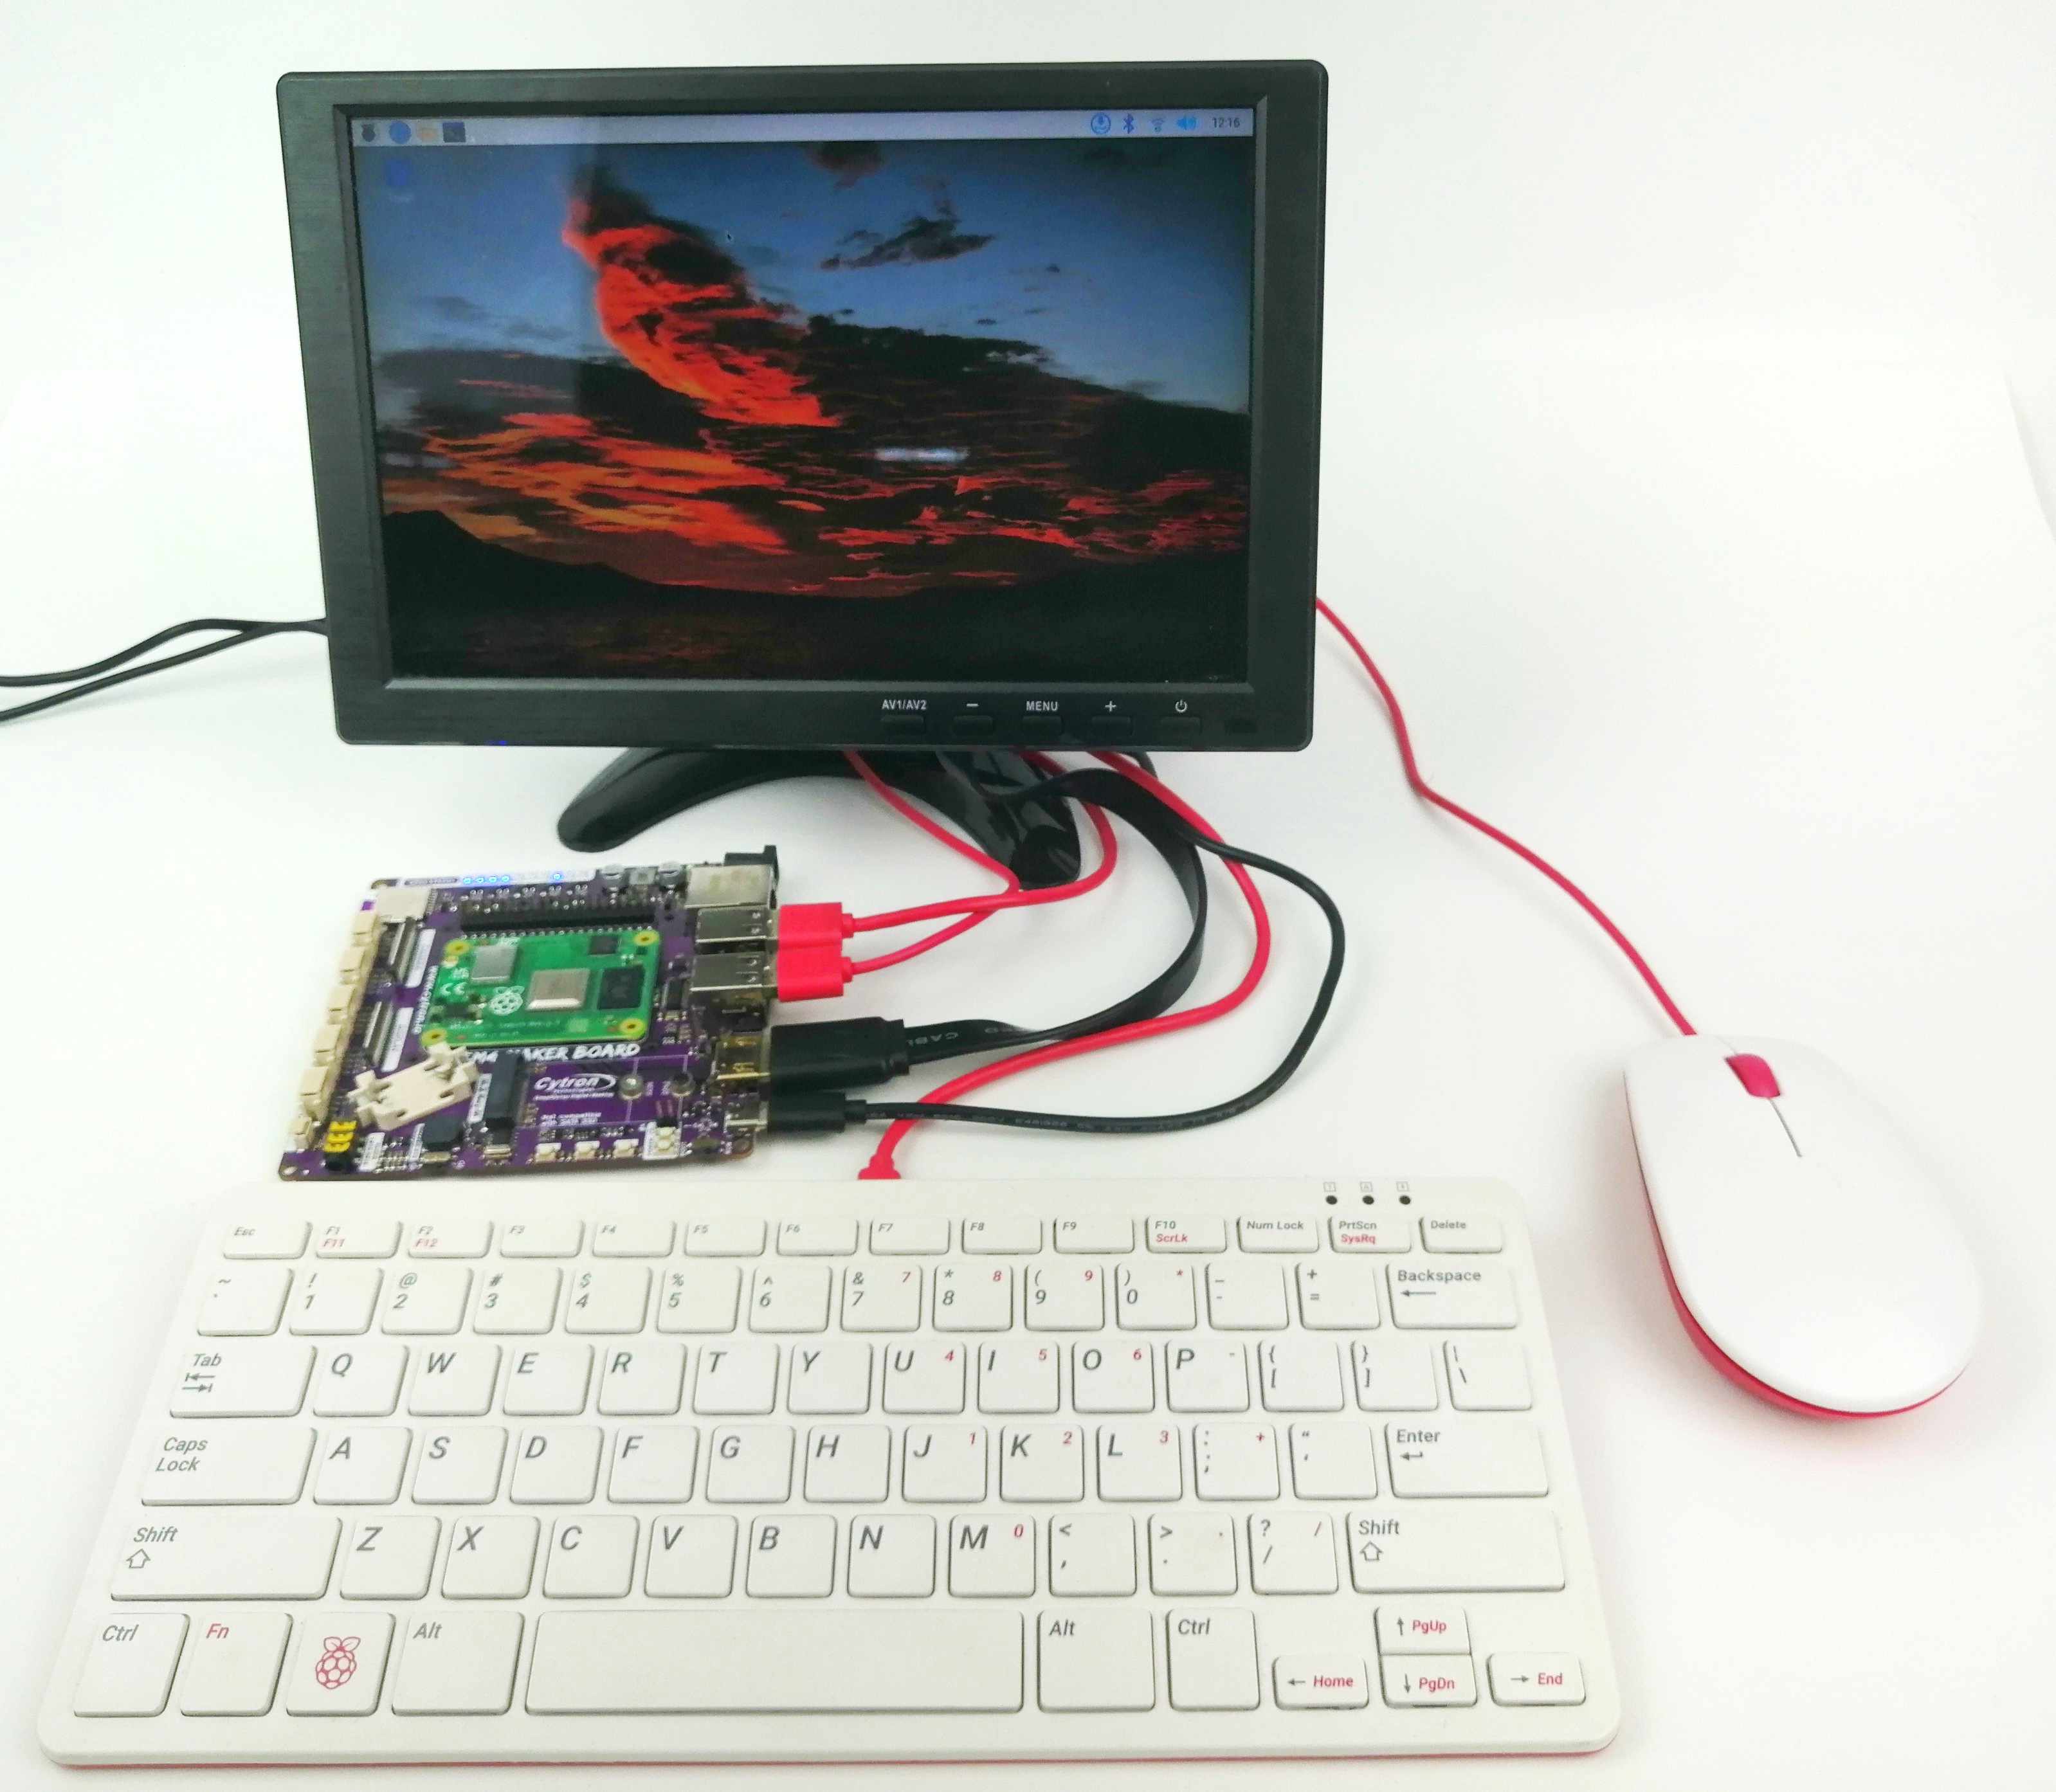
Figure 16: CM4 Maker Board with Monitor.
Thank you for starting your CM4 Maker Board journey with this first step! You are about to start an interesting and gratifying journey where you will discover how to use this potent tool to develop and create new projects. The CM4 Maker Board offers a fantastic platform for experimentation and learning, regardless of your level of experience with making. You have no restrictions when it comes to exploring and developing your ideas thanks to its flexible features and user-friendly design. Anybody wishing to deepen their understanding of the Raspberry Pi ecosystem and advance their projects will find the CM4 Maker Board to be a wise investment. So, fasten your seatbelts and get ready for an amazing journey!
Hardware Components
 Long Lead Time
RPi Compute Module 4 with Wireless 4GB RAM Lite
$60.50 $60.50
x 1 unit(s)

32GB Raspberry Pi Approved MakerDisk uSD with R...
$11.00 $11.00
x 1 unit(s)
")
NVMe 2242 B+M-Key MakerDisk SSD - 128GB (with R...
$36.25 $36.25
x 1 unit(s)

CM4 Maker Board & Kits : Maker’s Carrier Bo...
$56.00++ $56.00
x 1 unit(s)