 International
 Singapore
 Malaysia
 Thailand
 Vietnam
Your shopping cart is empty!
_11zon.jpg "How To Control LED with Blynk Using Maker Feather AIOT S3")
How To Control LED with Blynk Using Maker Feather AIOT S3
- Hussien Jawhar Sathik
- 06 Mar 2023
- Tutorial
- 362
Introduction
In this tutorial today, we would like to see how we can control the LED with Blynk using Maker Feather AIOT S3. Since we will be using the onboard LED, there are no other components required.
Hardware
1x Maker Feather AIOT S3
Steps To Set-Up The Blynk
1. The first step is to create an account in the Blynk software. For this, go to here and register.

2. Once received the email, click the activation link follow the steps. Once done, then we are ready to set-up the Blynk for Maker Feather AIOT S3.
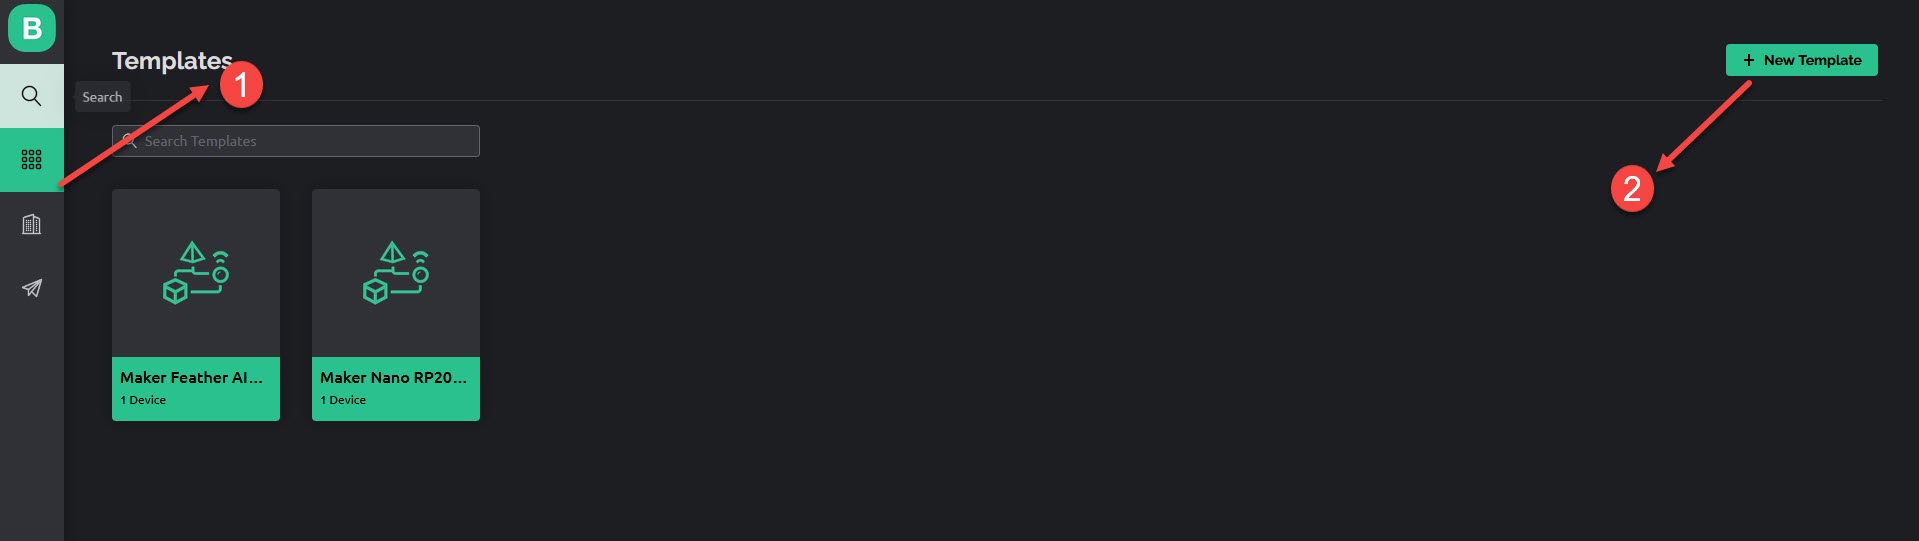
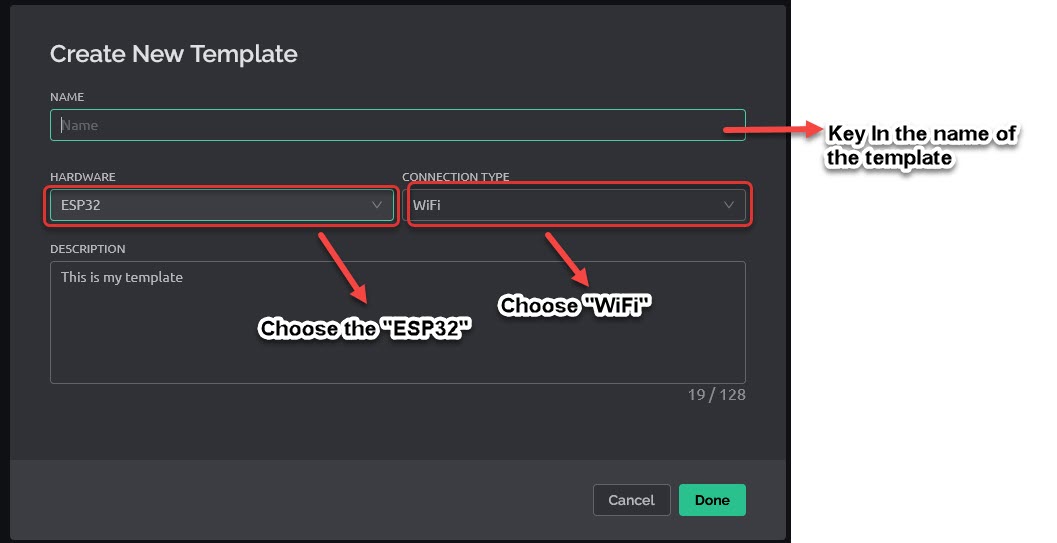
3. Next a new window will pop up and make the settings as shown in the figure below
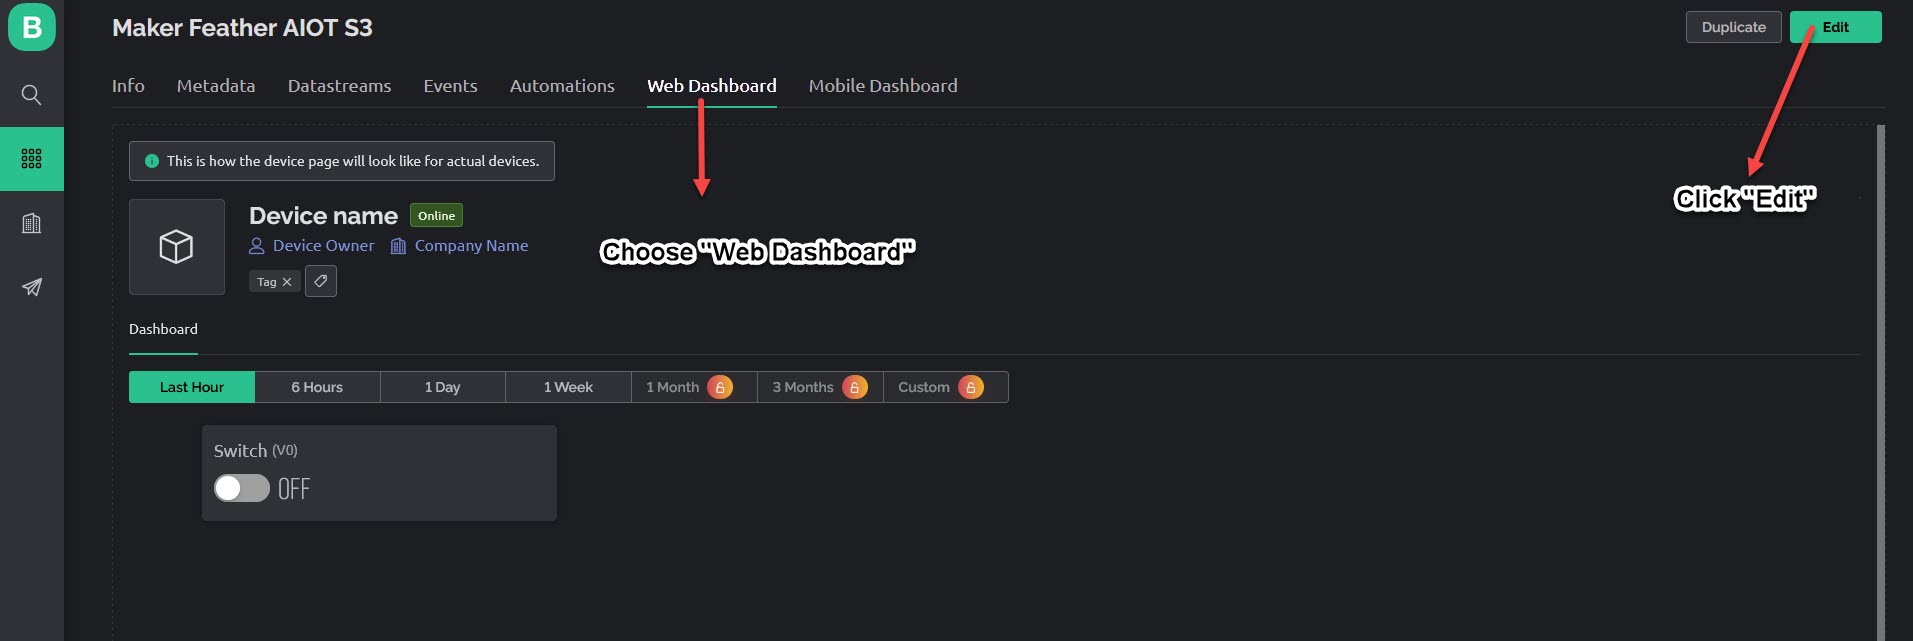
4. Next click "Web Dashboard" and click edit
5. In the next window, drag the switch widget and place it as shown in the figure below. And click the gear button

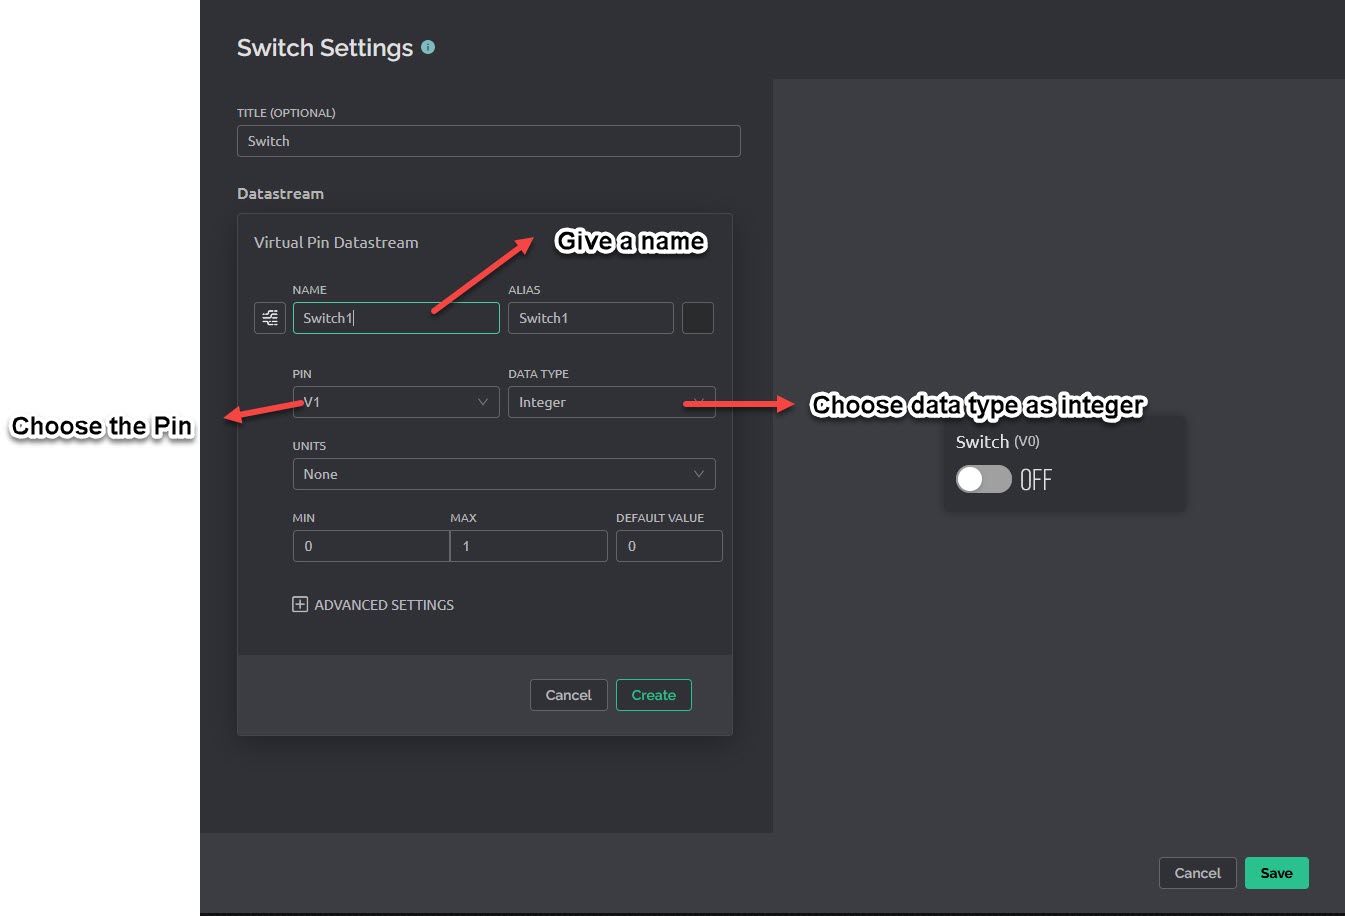
6. Next we will configure the switch settings as shown in figure below

7. Next we set the switch setting as shown in figure below
Once we are done with the settings, we are now ready to write the code.
Code
The code is written in Arduino IDE. Below is the code
Demo
Hardware Components
 Out Of Stock
Adafruit Sensirion SHT40 Temperature & Humi...
$11.25 $11.25
x 1 unit(s)

Maker Feather AIoT S3: Simplifying AIoT with ESP32
$19.95++ $19.95
x 1 unit(s)