 International
 Singapore
 Malaysia
 Thailand
 Vietnam
Your shopping cart is empty!

Interfacing Raspberry Pi Pico With 0.96
- Hussien Jawhar Sathik
- 08 Jun 2022
- Tutorial
- 1131
Introduction
In this tutorial today, we shall see how to interface the Raspberry Pi Pico with 0.96" IPS display and dht22 sensor using the Arduino ide.
Video
Hardware Preparation
For this tutorial we will need the following components
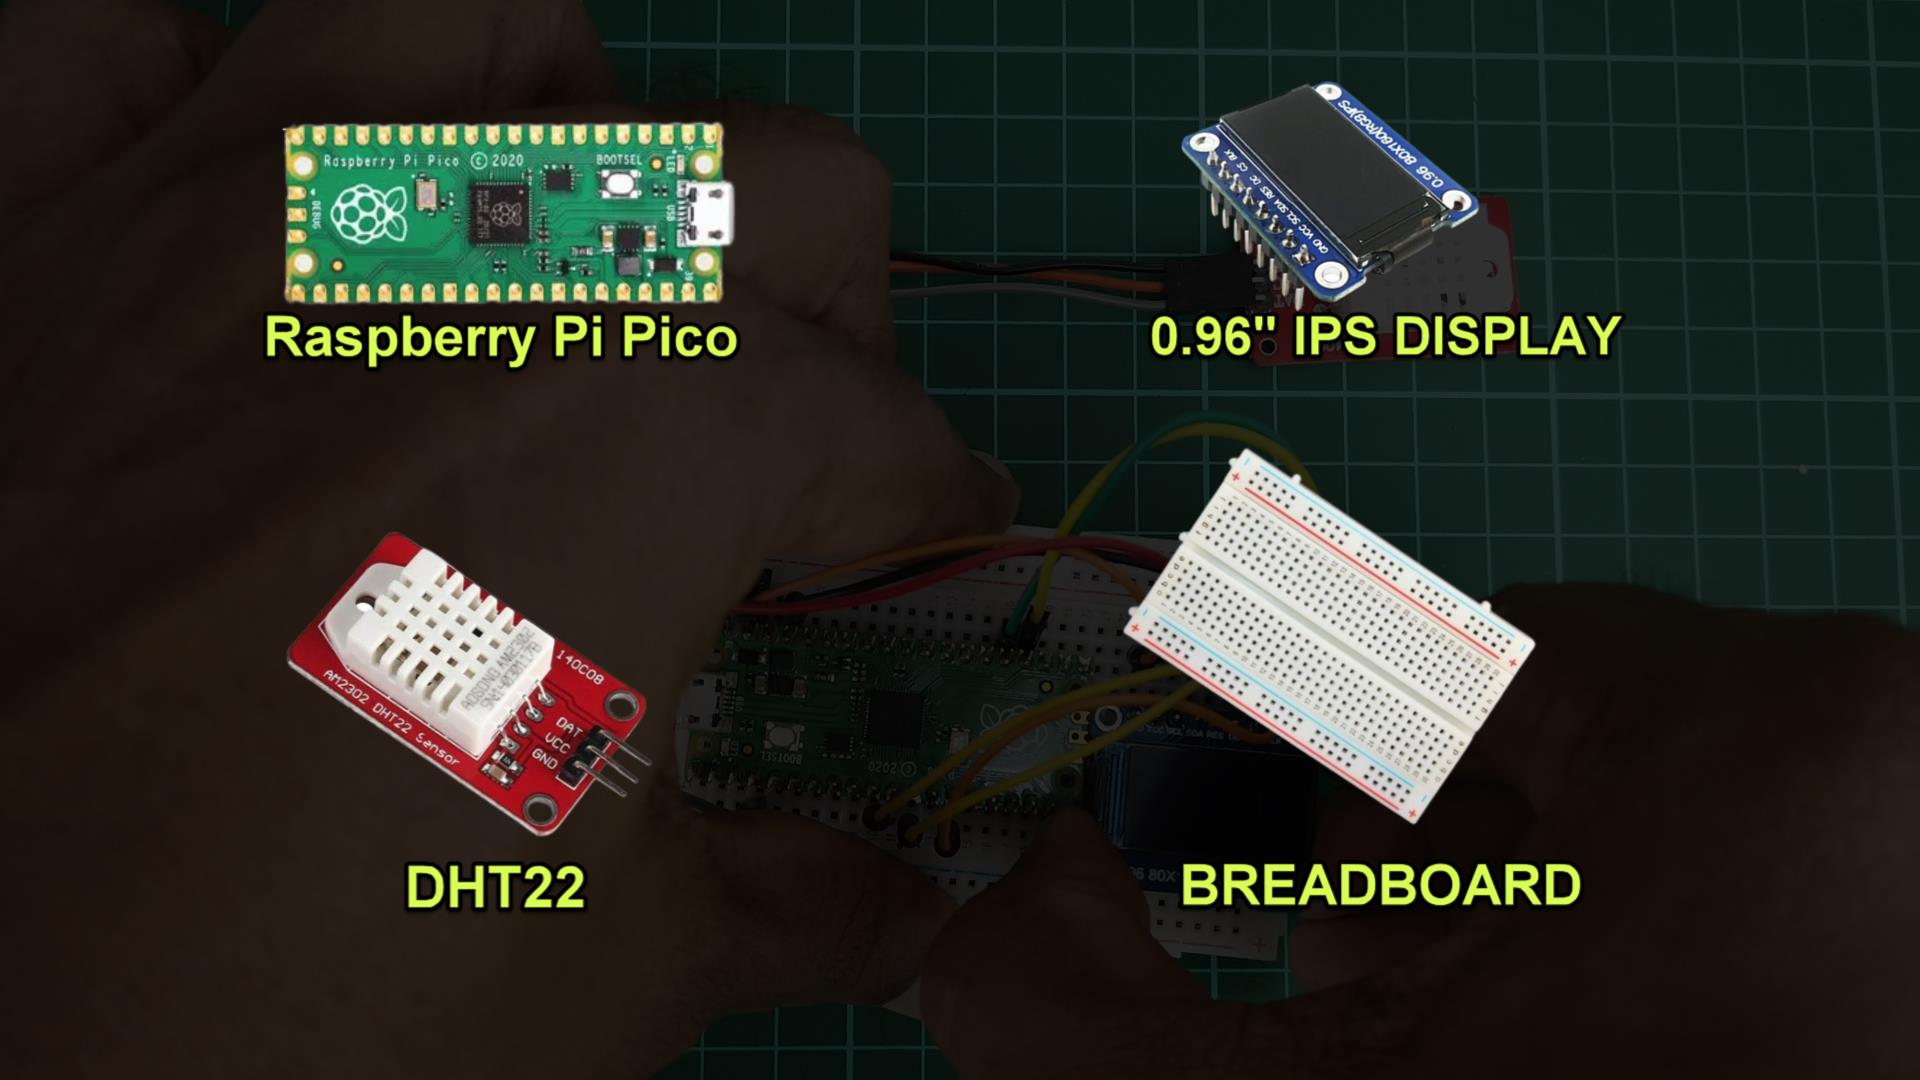
Building The Circuit
The connection between the Raspberry Pi Pico, 0.96" IPS display and DHT22 are as shown below.
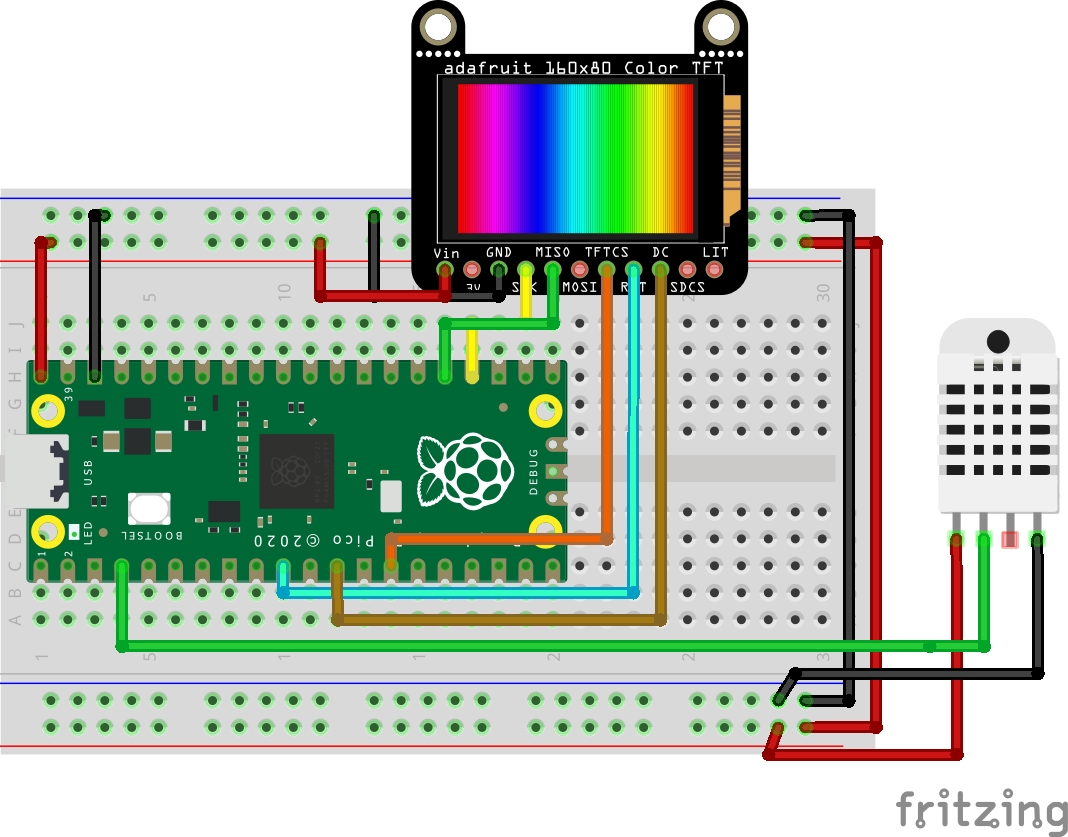
Please do note that the Arduino shown in the image above is the classic Arduino Nano. I have this, because there is no library for Maker Nano RP2040 yet inside the Fritzing.
Code
Below is the complete code that we have used in this tutorial
#include     // Core graphics library
#include  // Hardware-specific library
#include
#include "DHT.h"

#define DHTPIN 2
#define DHTTYPE DHT22

#define TFT_CS     10
#define TFT_RST    7
#define TFT_DC     9
Adafruit_ST7735 tft = Adafruit_ST7735(TFT_CS, TFT_DC, TFT_RST);

DHT dht(DHTPIN, DHTTYPE);

void setup(void) {
  tft.initR(INITR_MINI160x80); //Initializes ST7735.
  //Please note that use of 'MINI160x80' displays cyan instead of yellow and vice versa.
  dht.begin();

  tft.setRotation(3);
  tft.fillScreen(ST7735_BLACK);

  tft.setCursor(5, 5);
  tft.setTextColor(ST7735_RED);
  tft.setTextSize(2);
  tft.println("   Pi Pico   ");
  tft.setCursor(5, 25);
  tft.setTextColor(ST7735_GREEN);
  tft.setTextSize(2);
  tft.println("   DHT22   ");
  tft.setCursor(5, 45);
  tft.setTextColor(ST7735_BLUE);
  tft.setTextSize(2);
  tft.print("0.96 Display");

  delay(2000);

}

void loop()
{

  delay(200);
  tft.fillScreen(ST7735_BLACK);

   float h = dht.readHumidity();
  // Read temperature as Celsius (the default)
  float t = dht.readTemperature();
  // Read temperature as Fahrenheit (isFahrenheit = true)
  float f = dht.readTemperature(true);

  Serial.print(F("Humidity: "));
  Serial.print(h);
  Serial.print(F("%  Temperature: "));
  Serial.print(t);
  Serial.print(F("°C "));

  tft.setCursor(5, 20);
  tft.setTextColor(ST7735_RED);
  tft.setTextSize(2);
  tft.print("Temp:");
  tft.print(t);
  tft.print("C");


  tft.setCursor(5, 40);
  tft.setTextColor(ST7735_GREEN);
  tft.setTextSize(2);
  tft.print("Humid:");
  tft.print(h);


}
Thank You
Thanks for reading this tutorial. If you have any technical inquiries, please post at Cytron Technical Forum.
"Please be reminded, this tutorial is prepared for you to try and learn.
You are encouraged to improve the code for a better application."