 International
 Singapore
 Malaysia
 Thailand
 Vietnam
Your shopping cart is empty!

3D Printed Battery Holder for Maker Soil Moisture Sensor
Overview
The Maker Soil Moisture Sensor in its simplest form can be used with only a power source, i.e., a battery or a powerbank. This is useful for users that don't want to bother with programming, and just want to measure the approximate moisture level of the soil through the LED indicators. It can also serve as a portable sensor, if you have multiple pots of soil to be tested occasionally.
Components Used
Preparation
Software you might need:
- Autodesk Fusion 360 (Register as hobbyist/student/educator)
- Ultimaker Cura
Design files can be found here: https://www.thingiverse.com/thing:5278599
- MakerSoilMoistureBatteryHolder.f3d - Open the file using Fusion 360 and edit Sketch 1 according to the size of your battery holder/powerbank (see Fig. 1). Save the design as .stl (see Fig. 2), open the .stl file in Cura and generate the g-code with your 3D printer settings.
- BatteryHolder.stl - If you're using this battery holder (like in the tutorial), you can open this file in Cura and generate the g-code with your 3D printer settings.
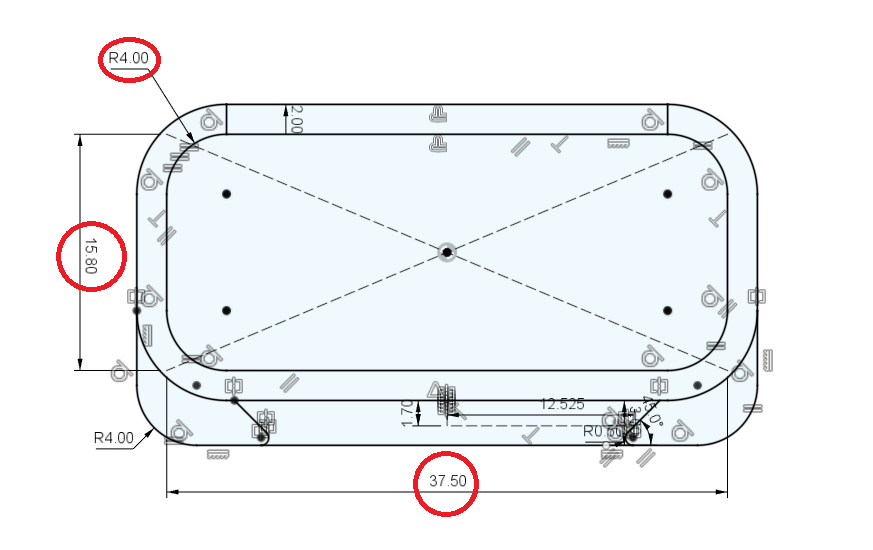
Fig. 1: Battery Holder Dimensions
The red circles indicate the dimensions that you need to experiment for different battery holders or powerbank. As a rule of thumb, you need to add 0.3-0.4mm to the dimension that you measured, since the 3D printer nozzle is 0.4mm in diameter. In this case, the length of the battery holder is measure to be 37.2mm (using a digital vernier calipers), so in the design, the slot for the battery holder is set to be 37.5mm.
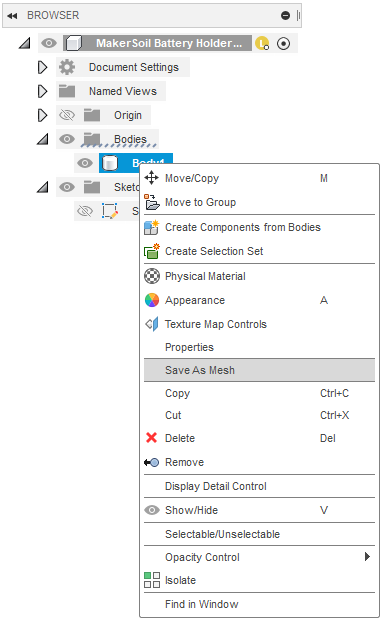 Fig. 2: Save as Mesh - choose format as STL (Binary)
Now, you can generate the g-code for your 3D printer using Ultimaker Cura or other slicer program of your choice.
Assembly
- Connect the Grove 4 Pin Buckled to Female Cable to the Maker Soil Moisture Sensor.
- Connect the VCC of the Maker Soil Moisture Sensor to the positive terminal of the battery (Red wire)
- Connect the GND of the Maker Soil Moisture Sensor to the negative terminal of the battery (Black wire)
- Slot in the Maker Soil Moisture Sensor to the 3D printed battery holder.
- Slot in the battery or battery holder to the 3D printed battery holder.
- Tidy the wires using a wrapping wire or rubber band.