 International
 Singapore
 Malaysia
 Thailand
 Vietnam
Your shopping cart is empty!

Edge Impulse with Raspberry Pi Pico Application Using Ultrasonic Sensor
- Khor Jia Yong
- 17 Jan 2024
- Project
- Intermediate
- 748
Introduction
Edge Impulse has expanded its functionality to offer support for devices equipped with the built-in RP2040 chip. In this particular project, the Raspberry Pi Pico, featuring the RP2040 chip, is employed to develop an ultrasonic ranger system. This project is specifically designed to consider and process data in the context of distance measurement.
Hardware Components
- Raspberry Pi Pico Microcontroller Board
- Grove ultrasonic sensor
Software Requirements
- Please refer to this tutorial because it shares the same applications
Project Development
Early setup
- After installing the mentioned software applications, install the CLI tools in the command prompt using the command:
npm install -g edge-impulse-cli --force
- Connect the Raspberry Pi Pico board to your computer using a micro-USB cable. Press the BOOTSEL button at the same time to enable USB Mass Storage Mode on the Raspberry Pi Pico. (Refer to the documentation for more details)
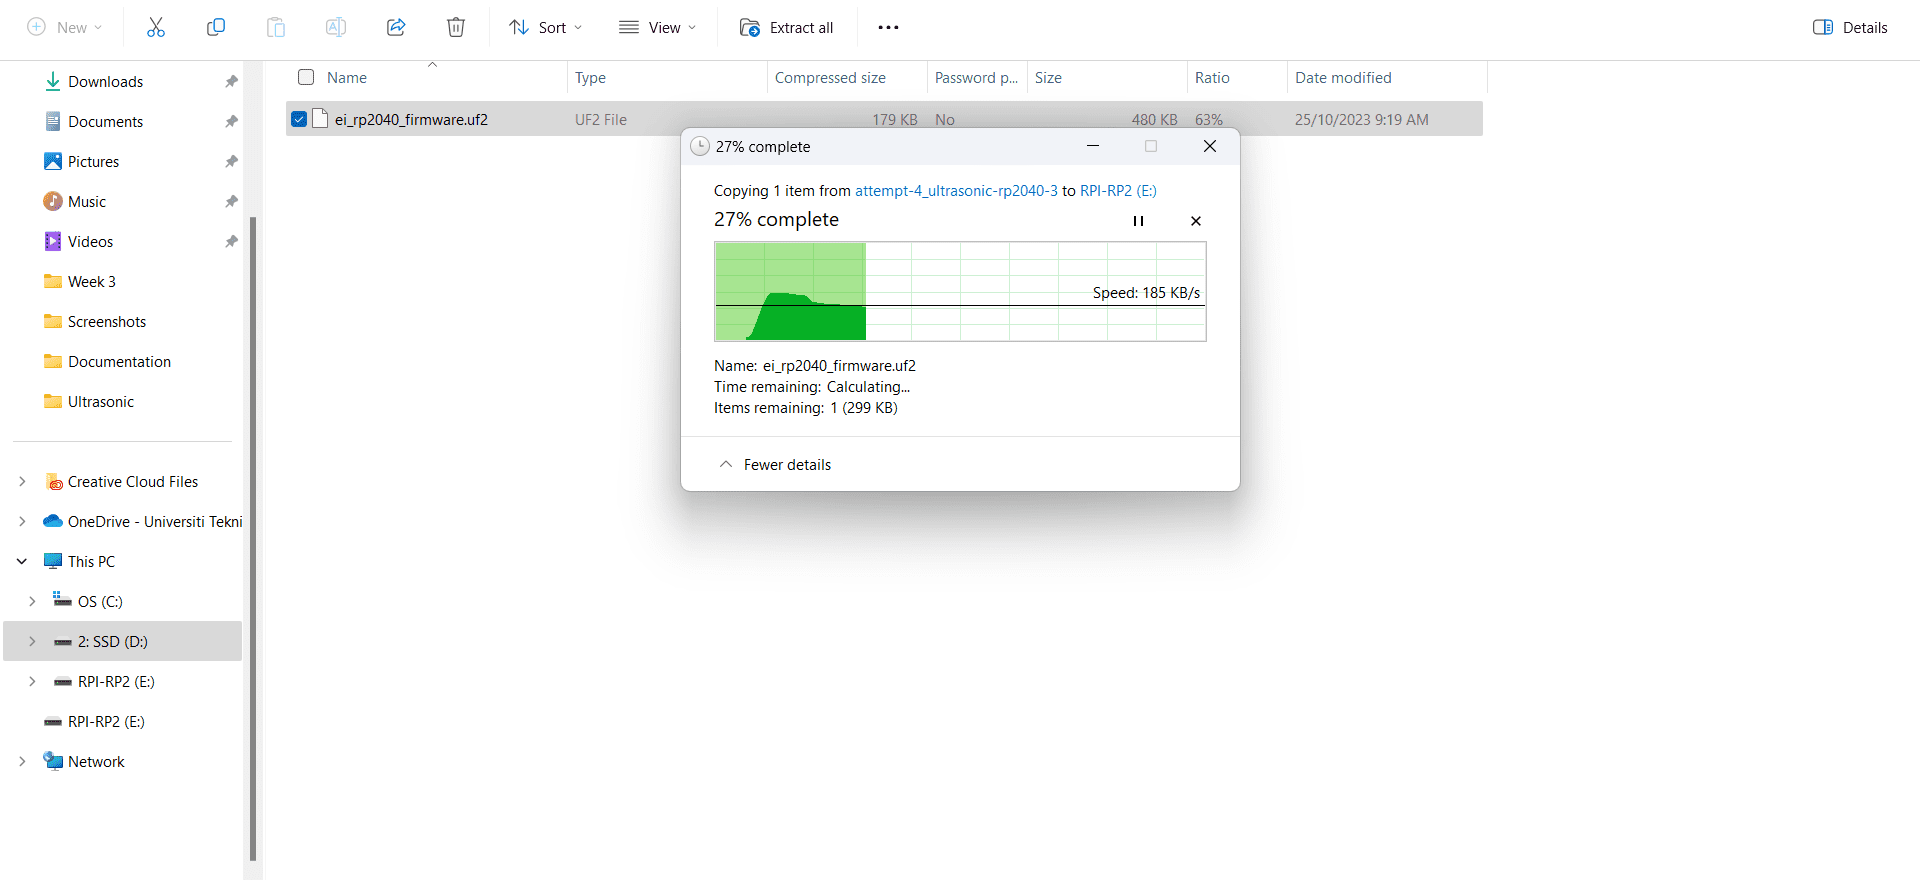
- Download and unzip the latest Edge Impulse firmware, then move the firmware file into the USB Mass Storage device.
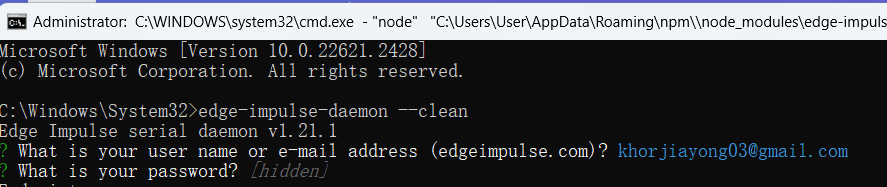
- On the command prompt, run:
edge-impulse-daemon
Note: If the command runs without any errors, it indicates that you have successfully installed Edge Impulse CLI on your computer. Otherwise, you can refer to this page for troubleshooting assistance.
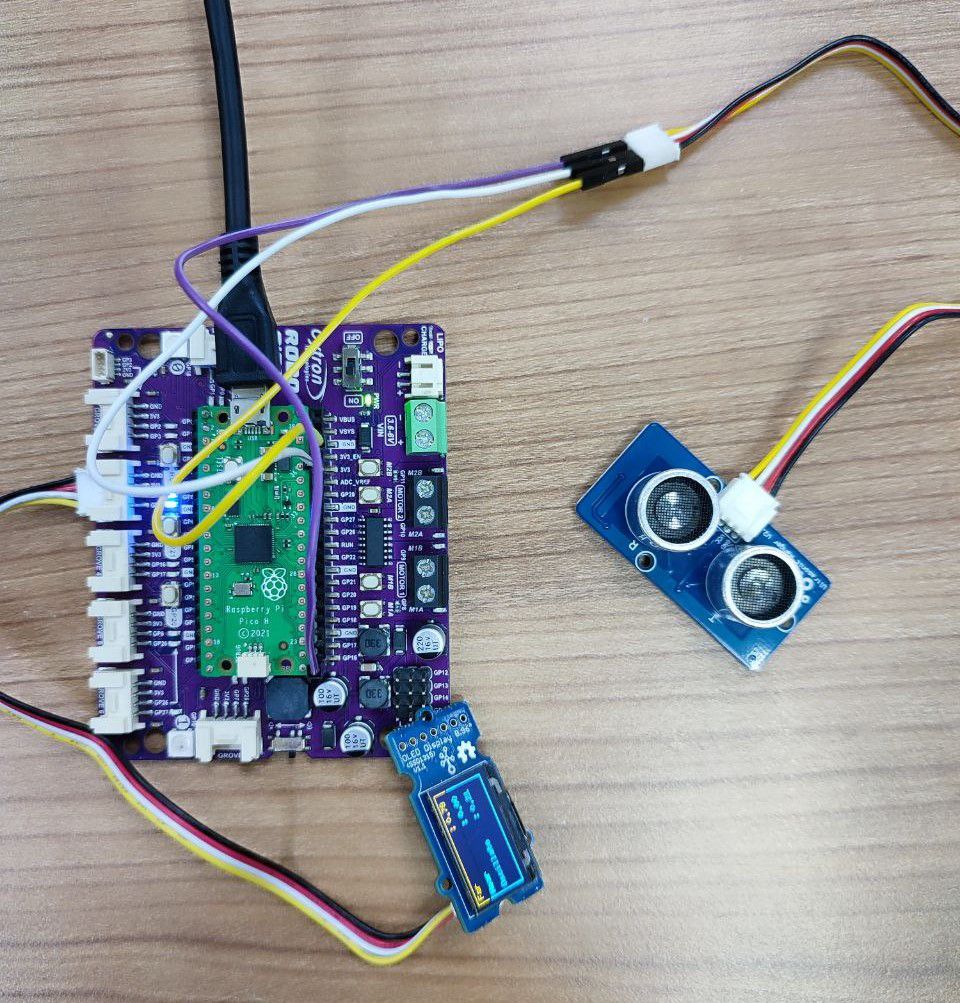
Hardware setup
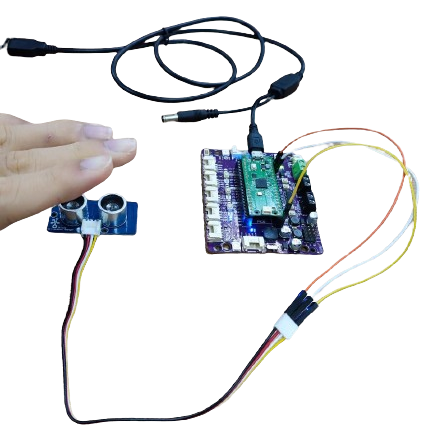
- Connect the ultrasonic sensor module to the Raspberry Pi Pico.

Software setup
Within Edge Impulse, there are seven sequential stages to go through:
1. Device
Plug the Raspberry Pi Pico into your computer using a micro-USB cable.
Activate USB Mass Storage Mode on the Raspberry Pi Pico and move the Edge Impulse firmware file to the USB Mass Storage device.
Configure the Raspberry Pi Pico by entering the command "edge-impulse-daemon" or "edge-impulse-daemon --clean" in the command prompt.
Enter the command in the terminal, fill in the details, choose the connected port and your project. Keep the command prompt window open while collecting data.
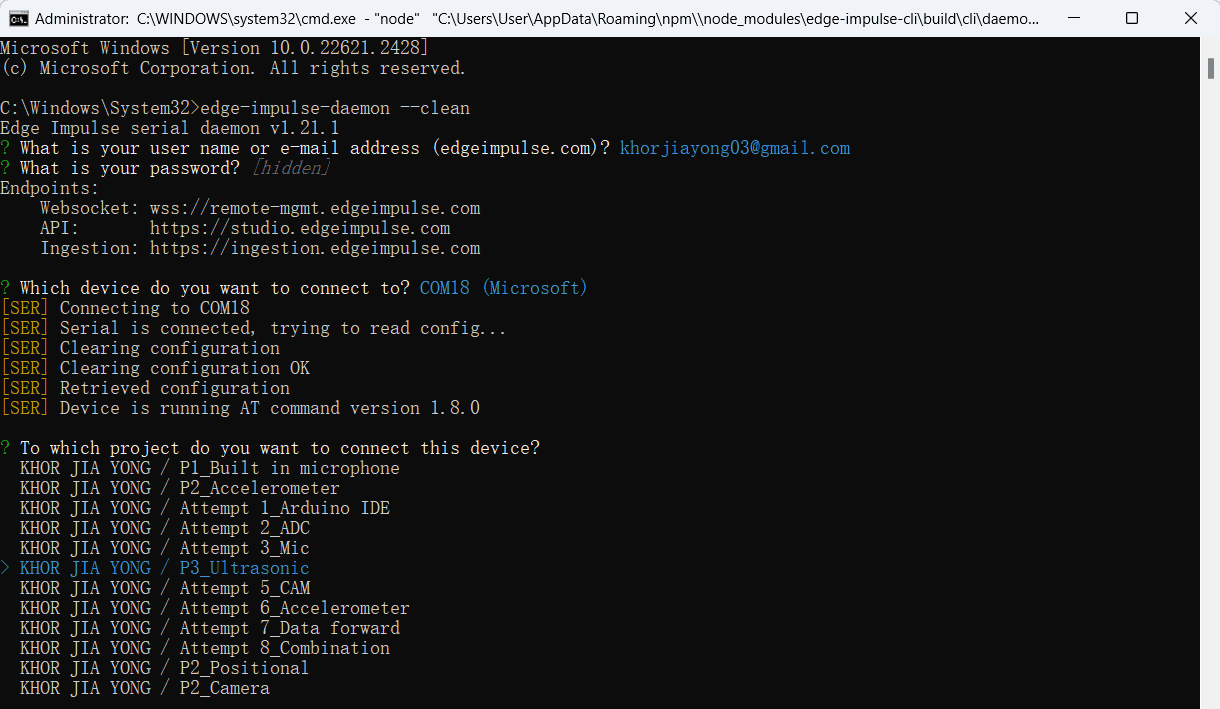
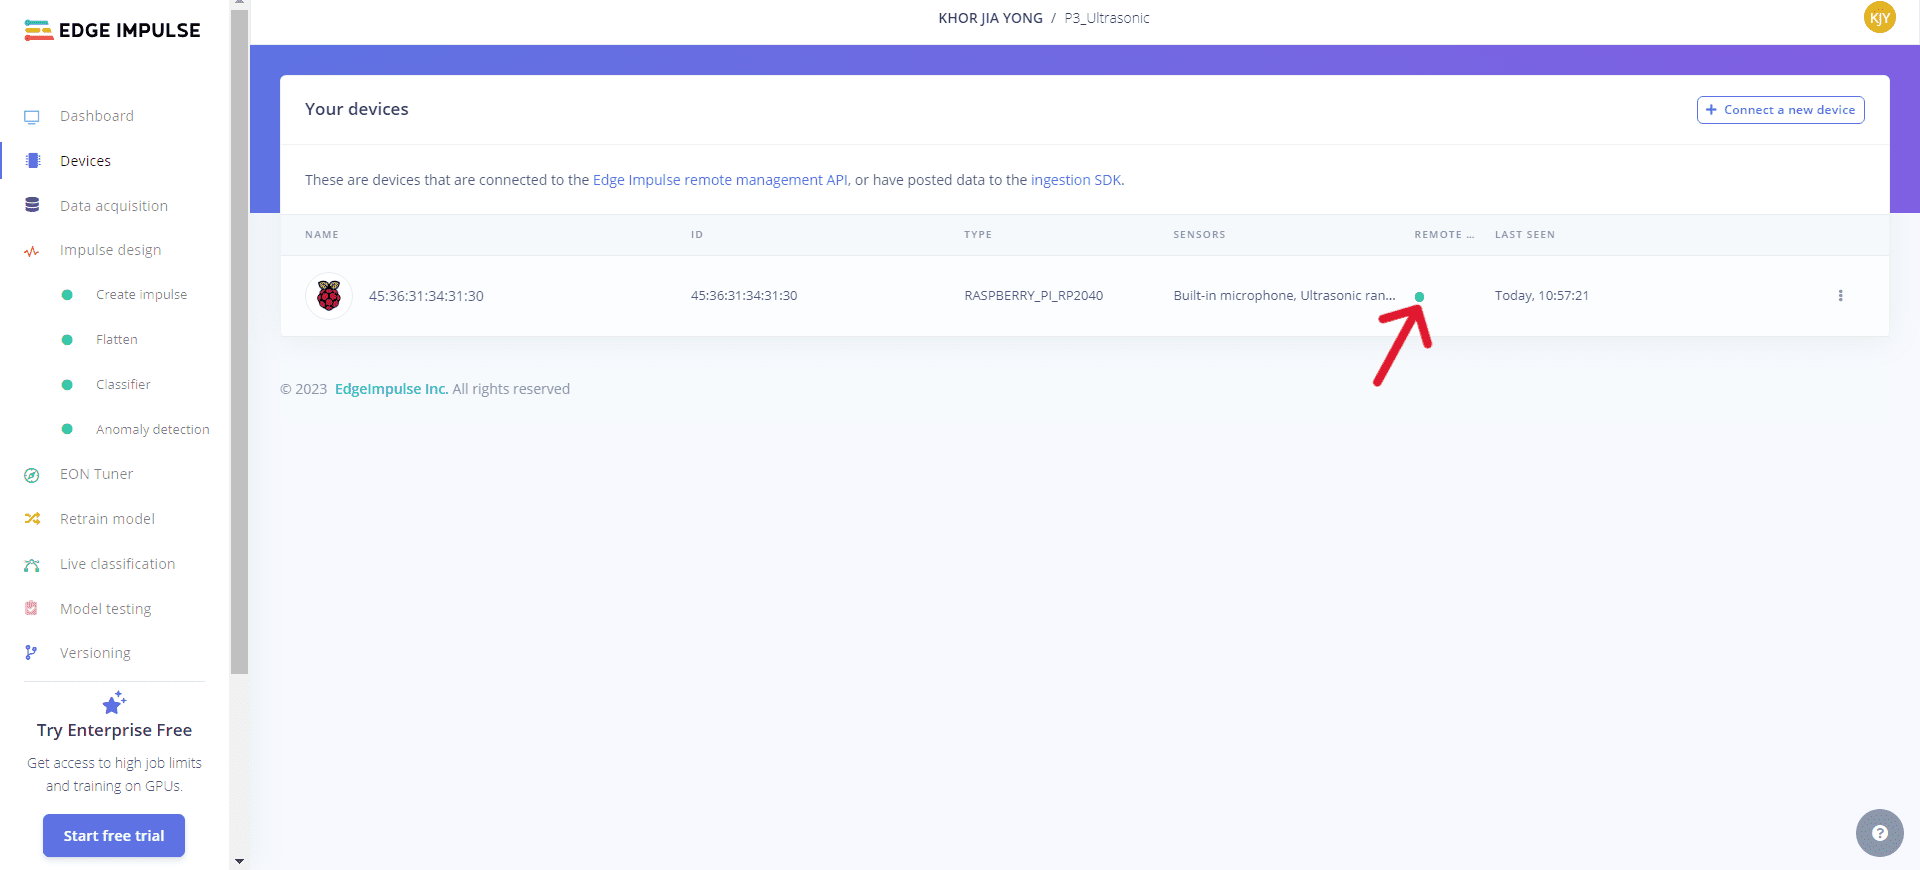
When the Raspberry Pi Pico icon changes from red to green, it means the device is successfully connected to Edge Impulse.
2. Data Acquisition
Choose the Ultrasonic Ranger sensor type from the list and adjust the sample length on the same page. (Make sure to set up the hardware circuit with the ultrasonic ranger sensor beforehand)
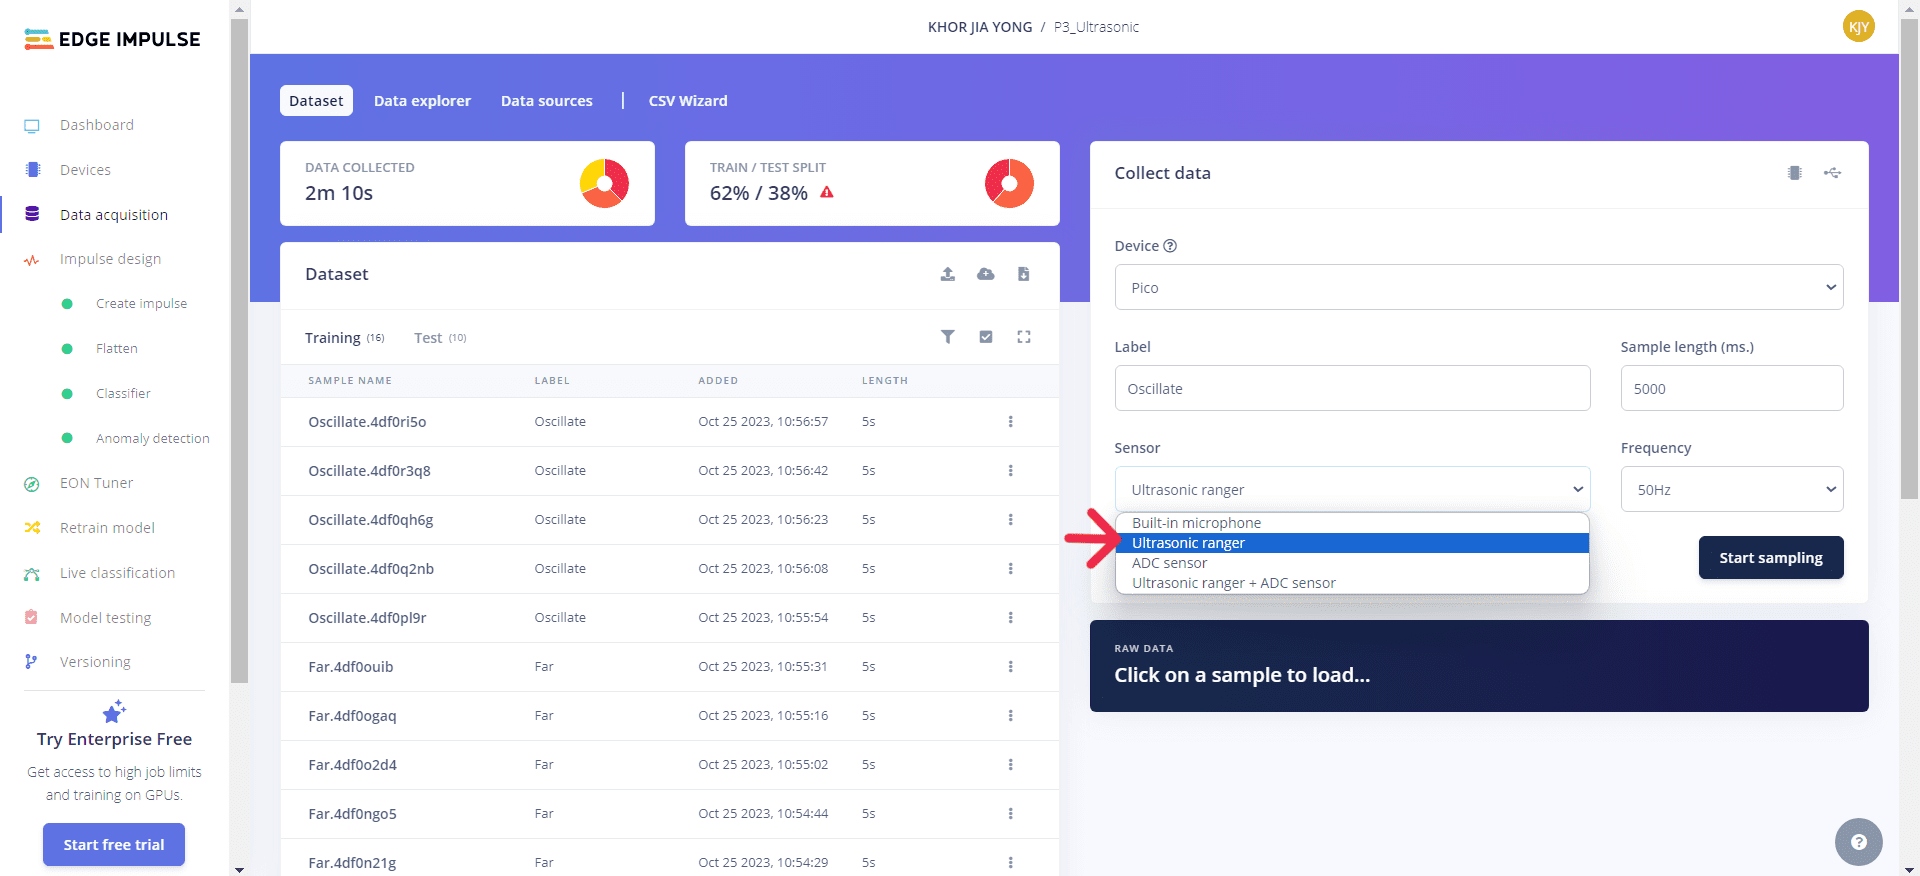
Click "Start sampling" to collect data for measuring distance. The hardware circuit, including the ultrasonic sensor, records parameters like "far," "near," and "oscillate" in this case.
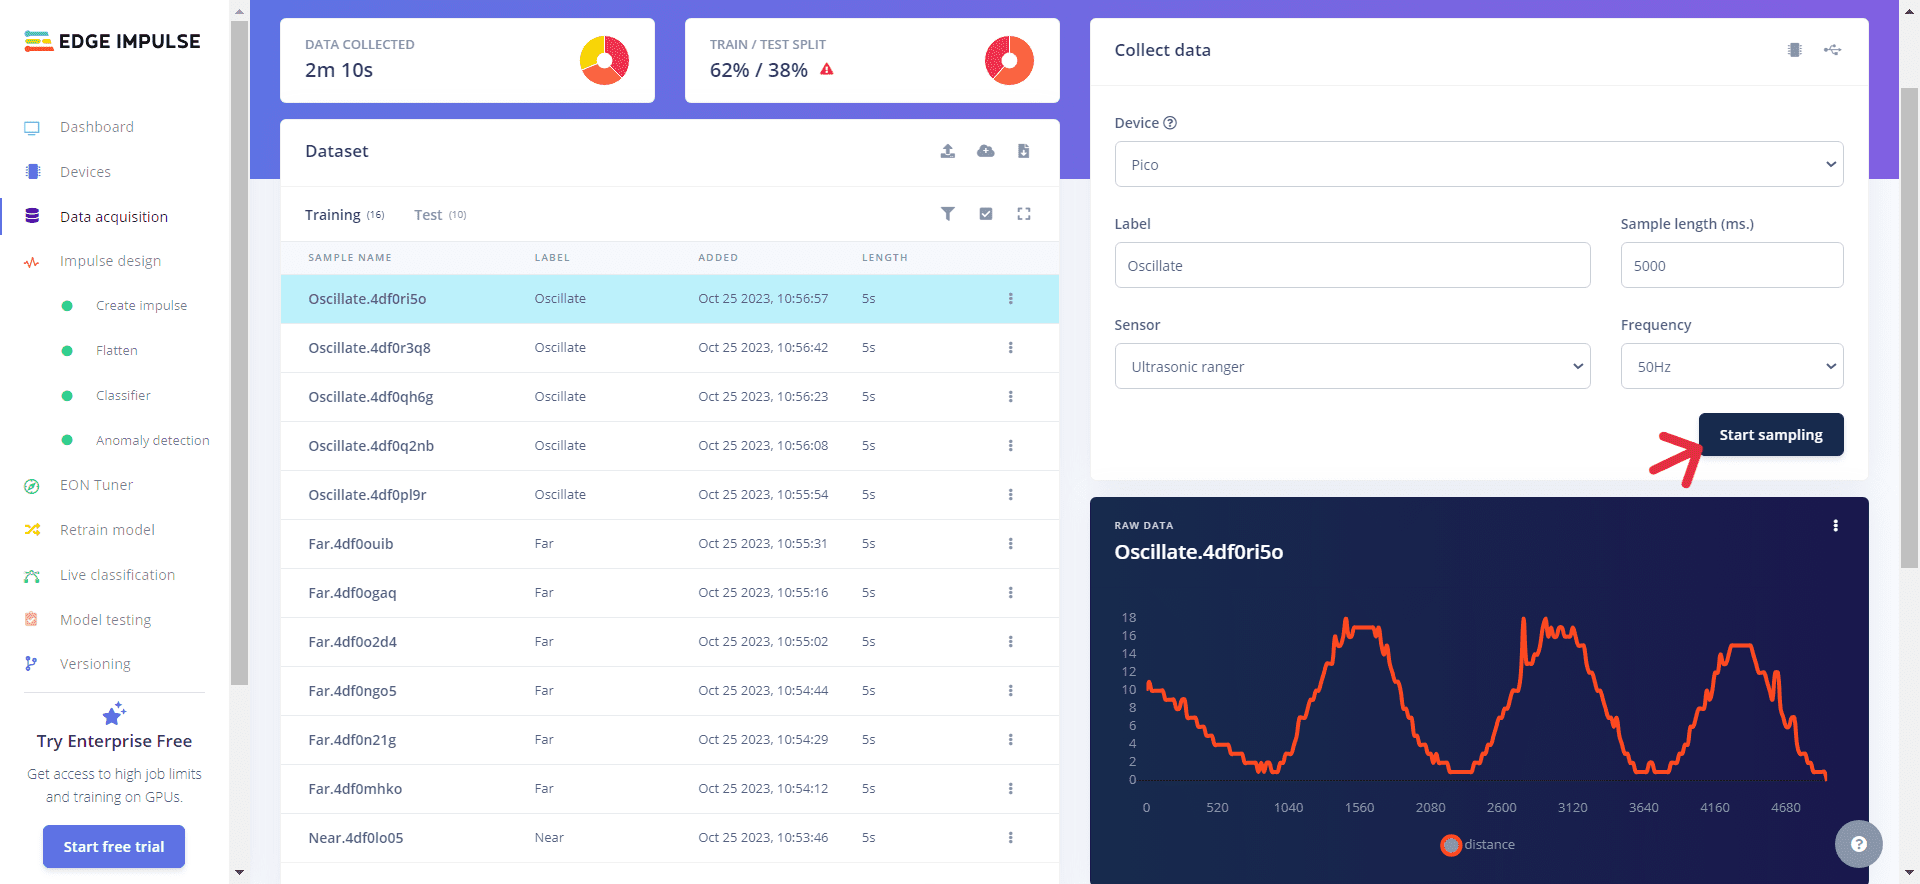
Modifying the "label" of the data allows for a change in the data type.
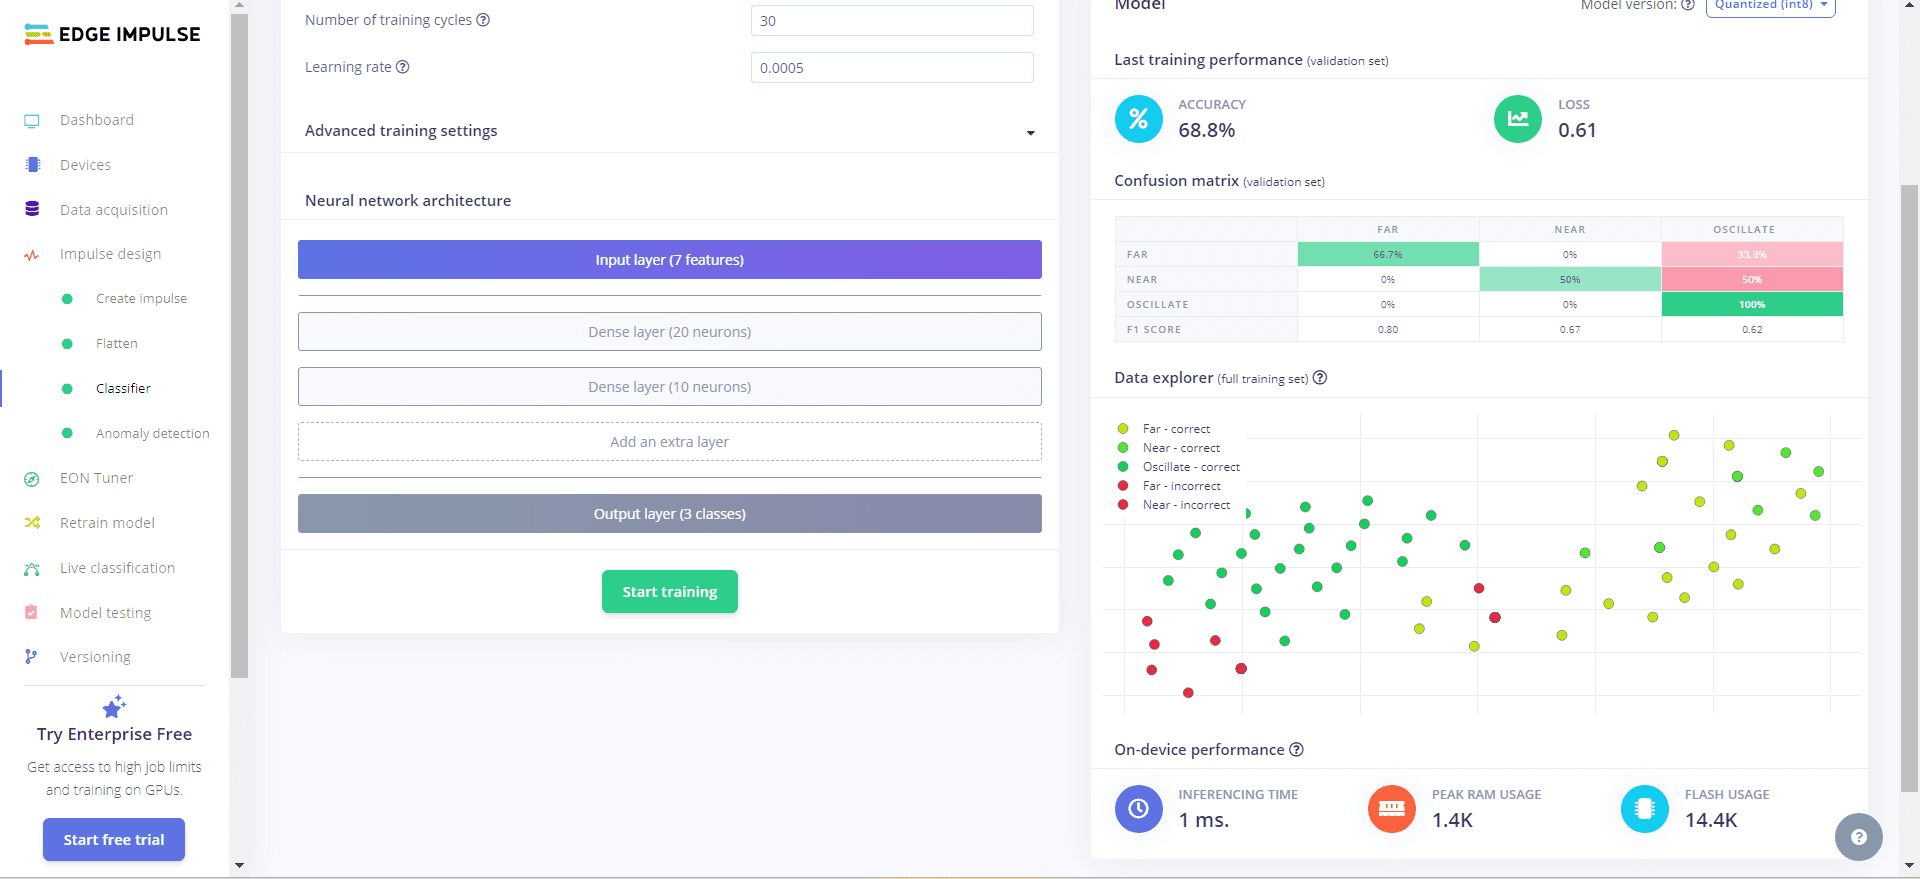
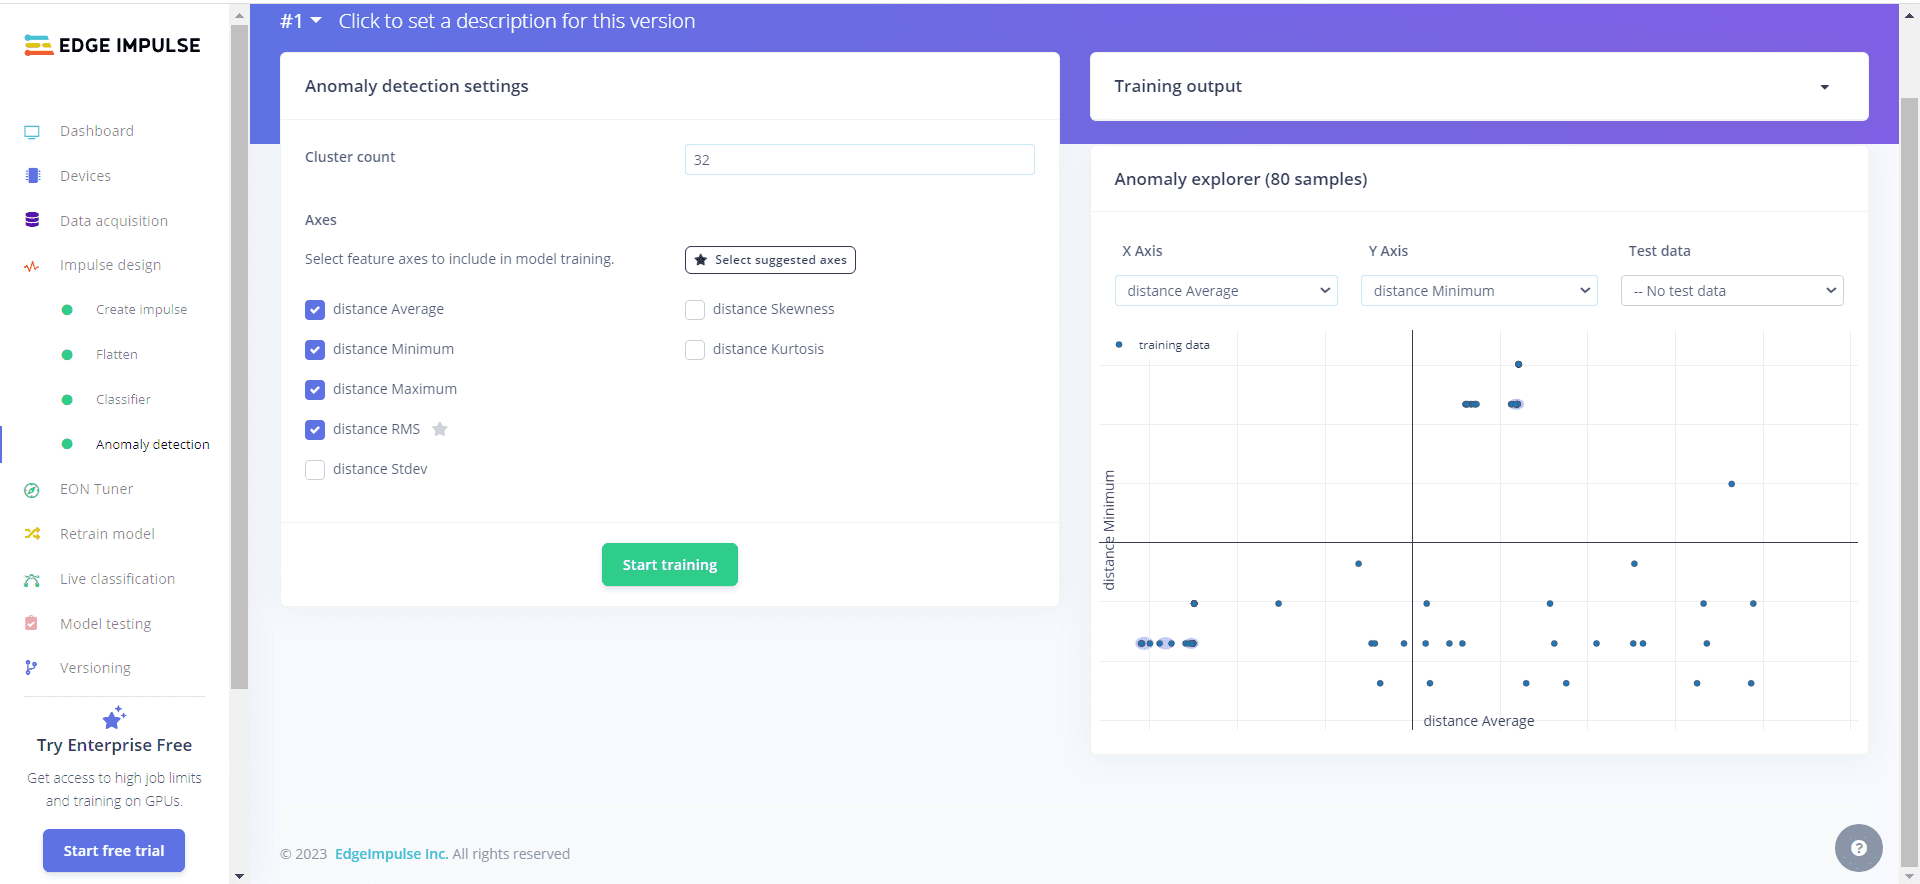
3. Impulse Design
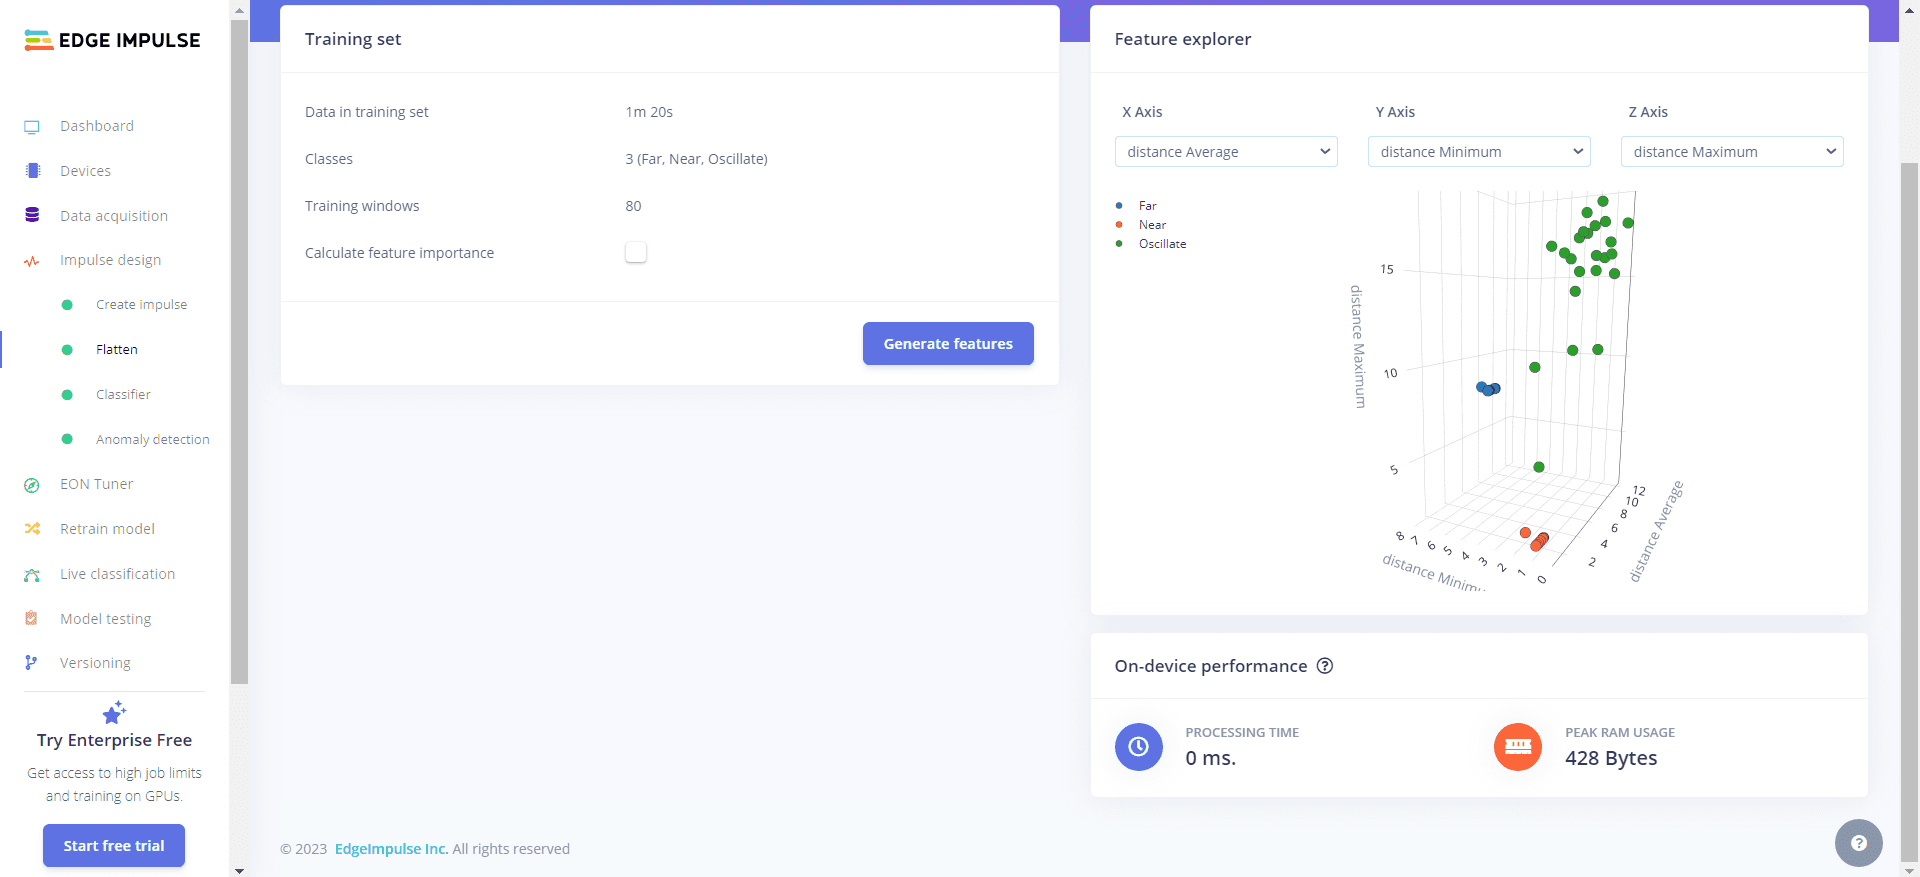
To display the data visually using a chart or table, start by creating and configuring the impulse or feature. Choose them from the suggested list. Set up two block models - the processing block and the learning block. Don't forget to save the created impulse. (Adjust the number as needed)
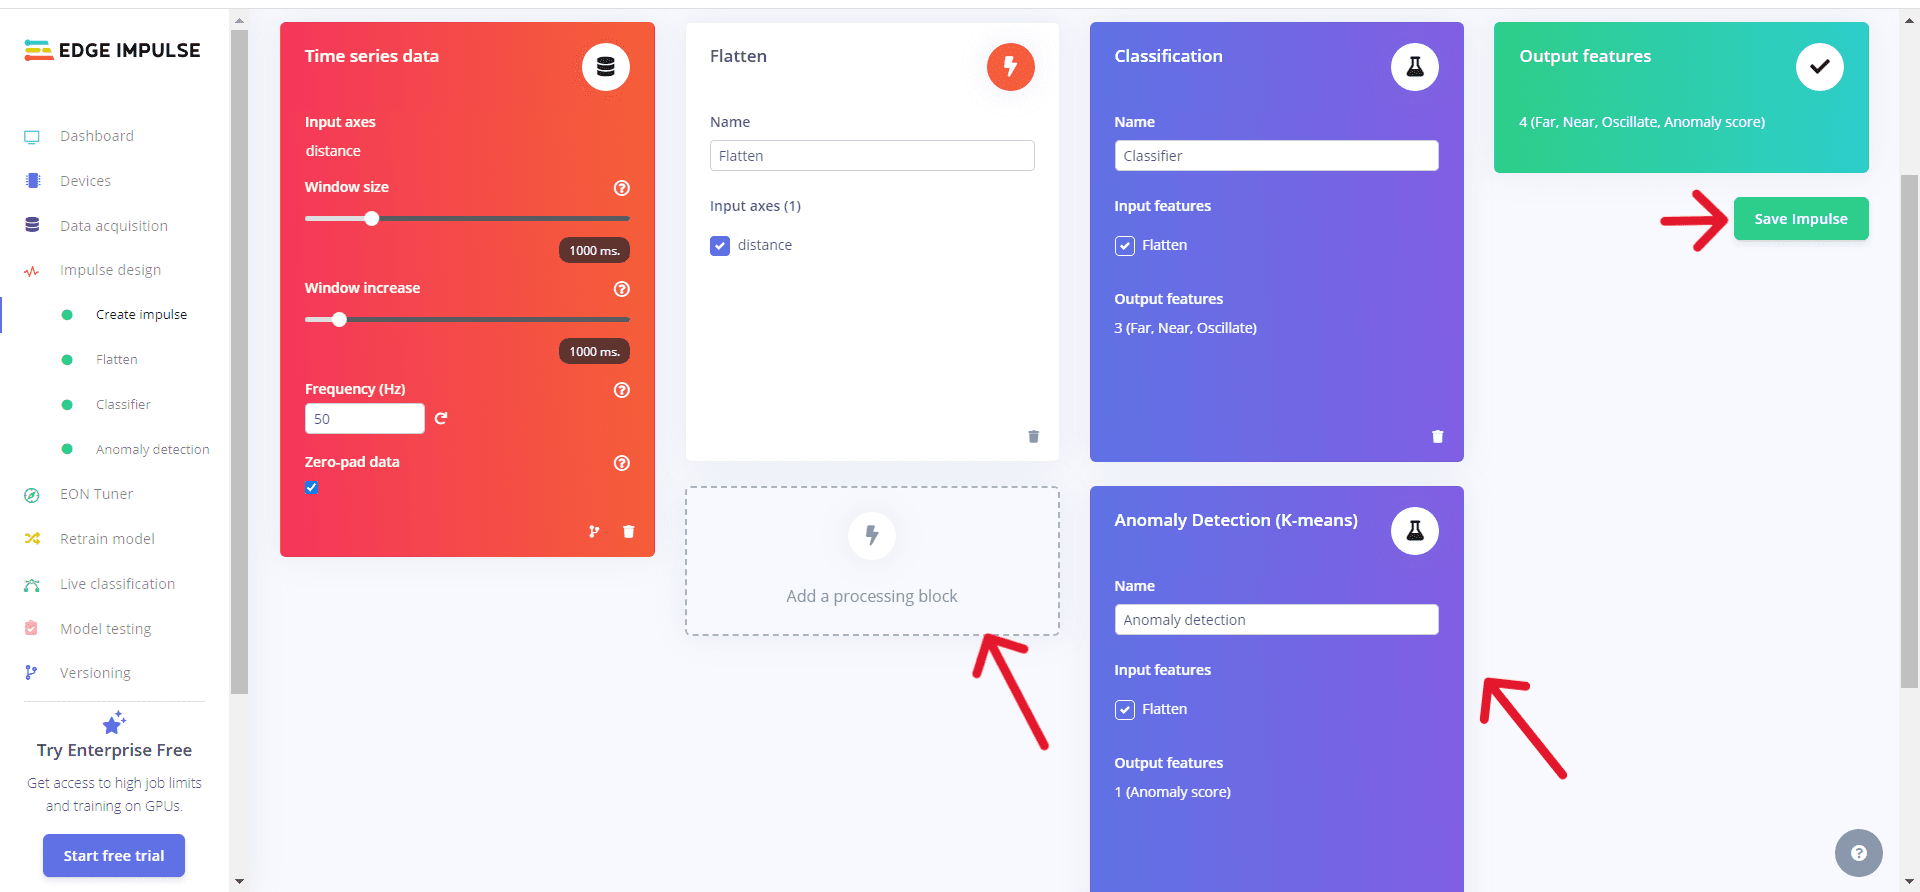
Each created impulse must be accessed and trained independently.
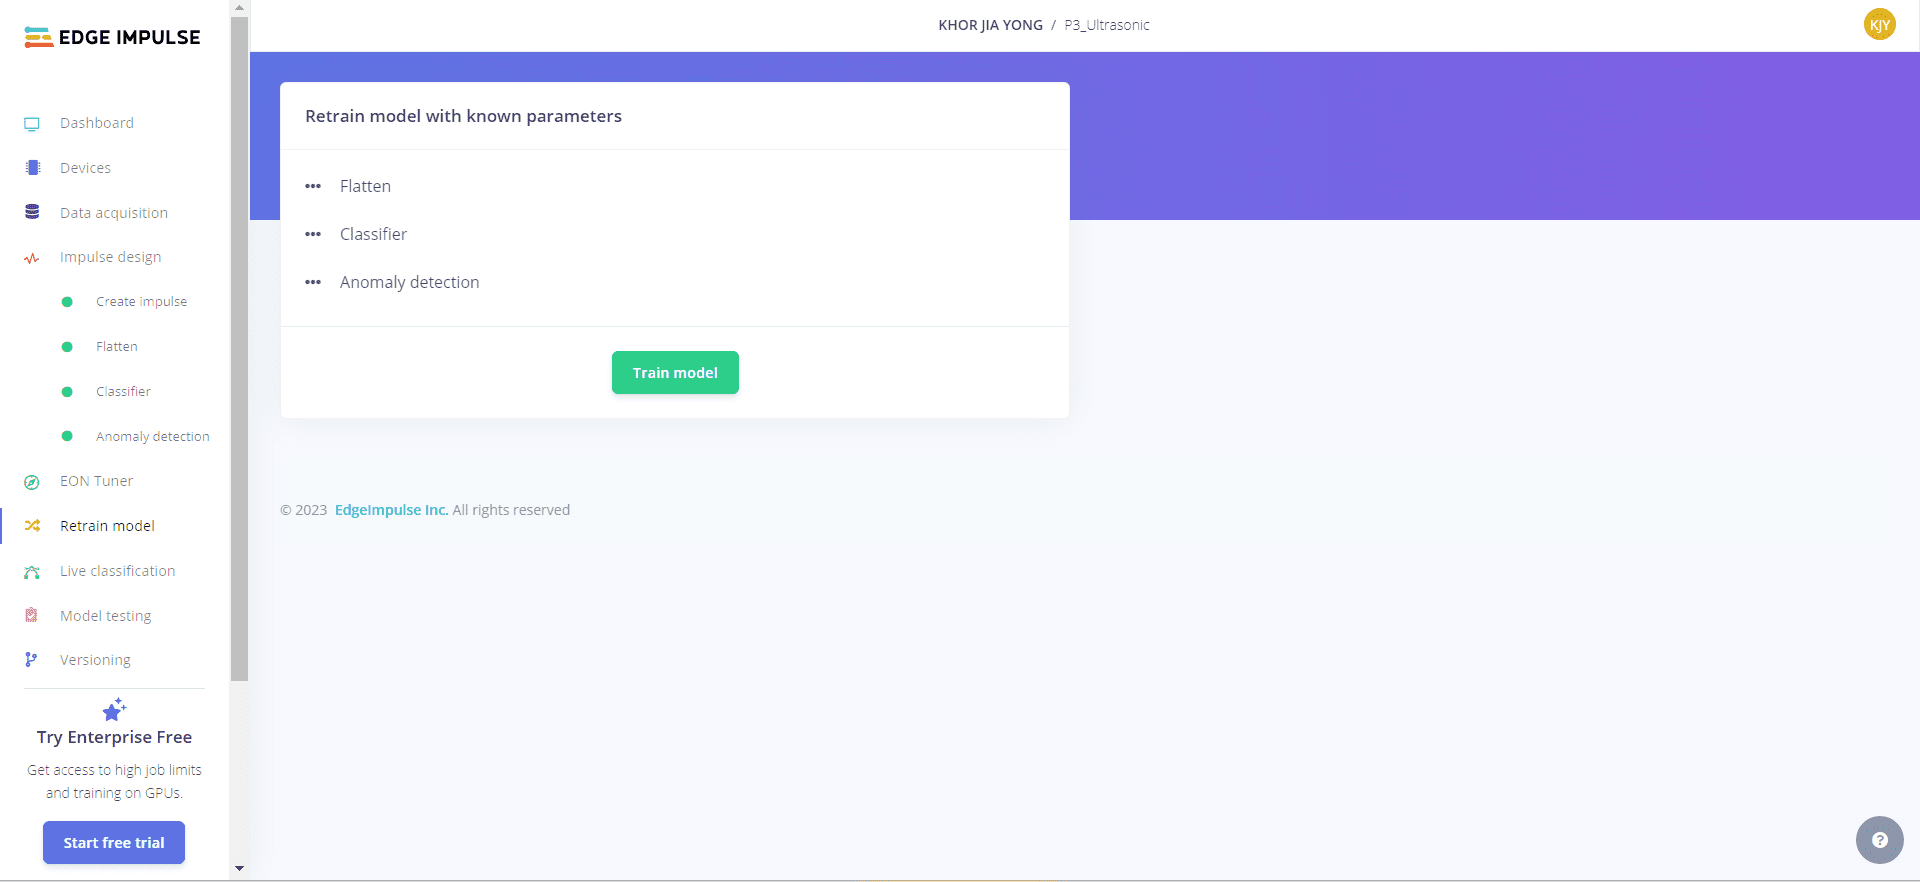
4. Retrain Model
The impulse or model can be retrained again with known parameters through retrain model.
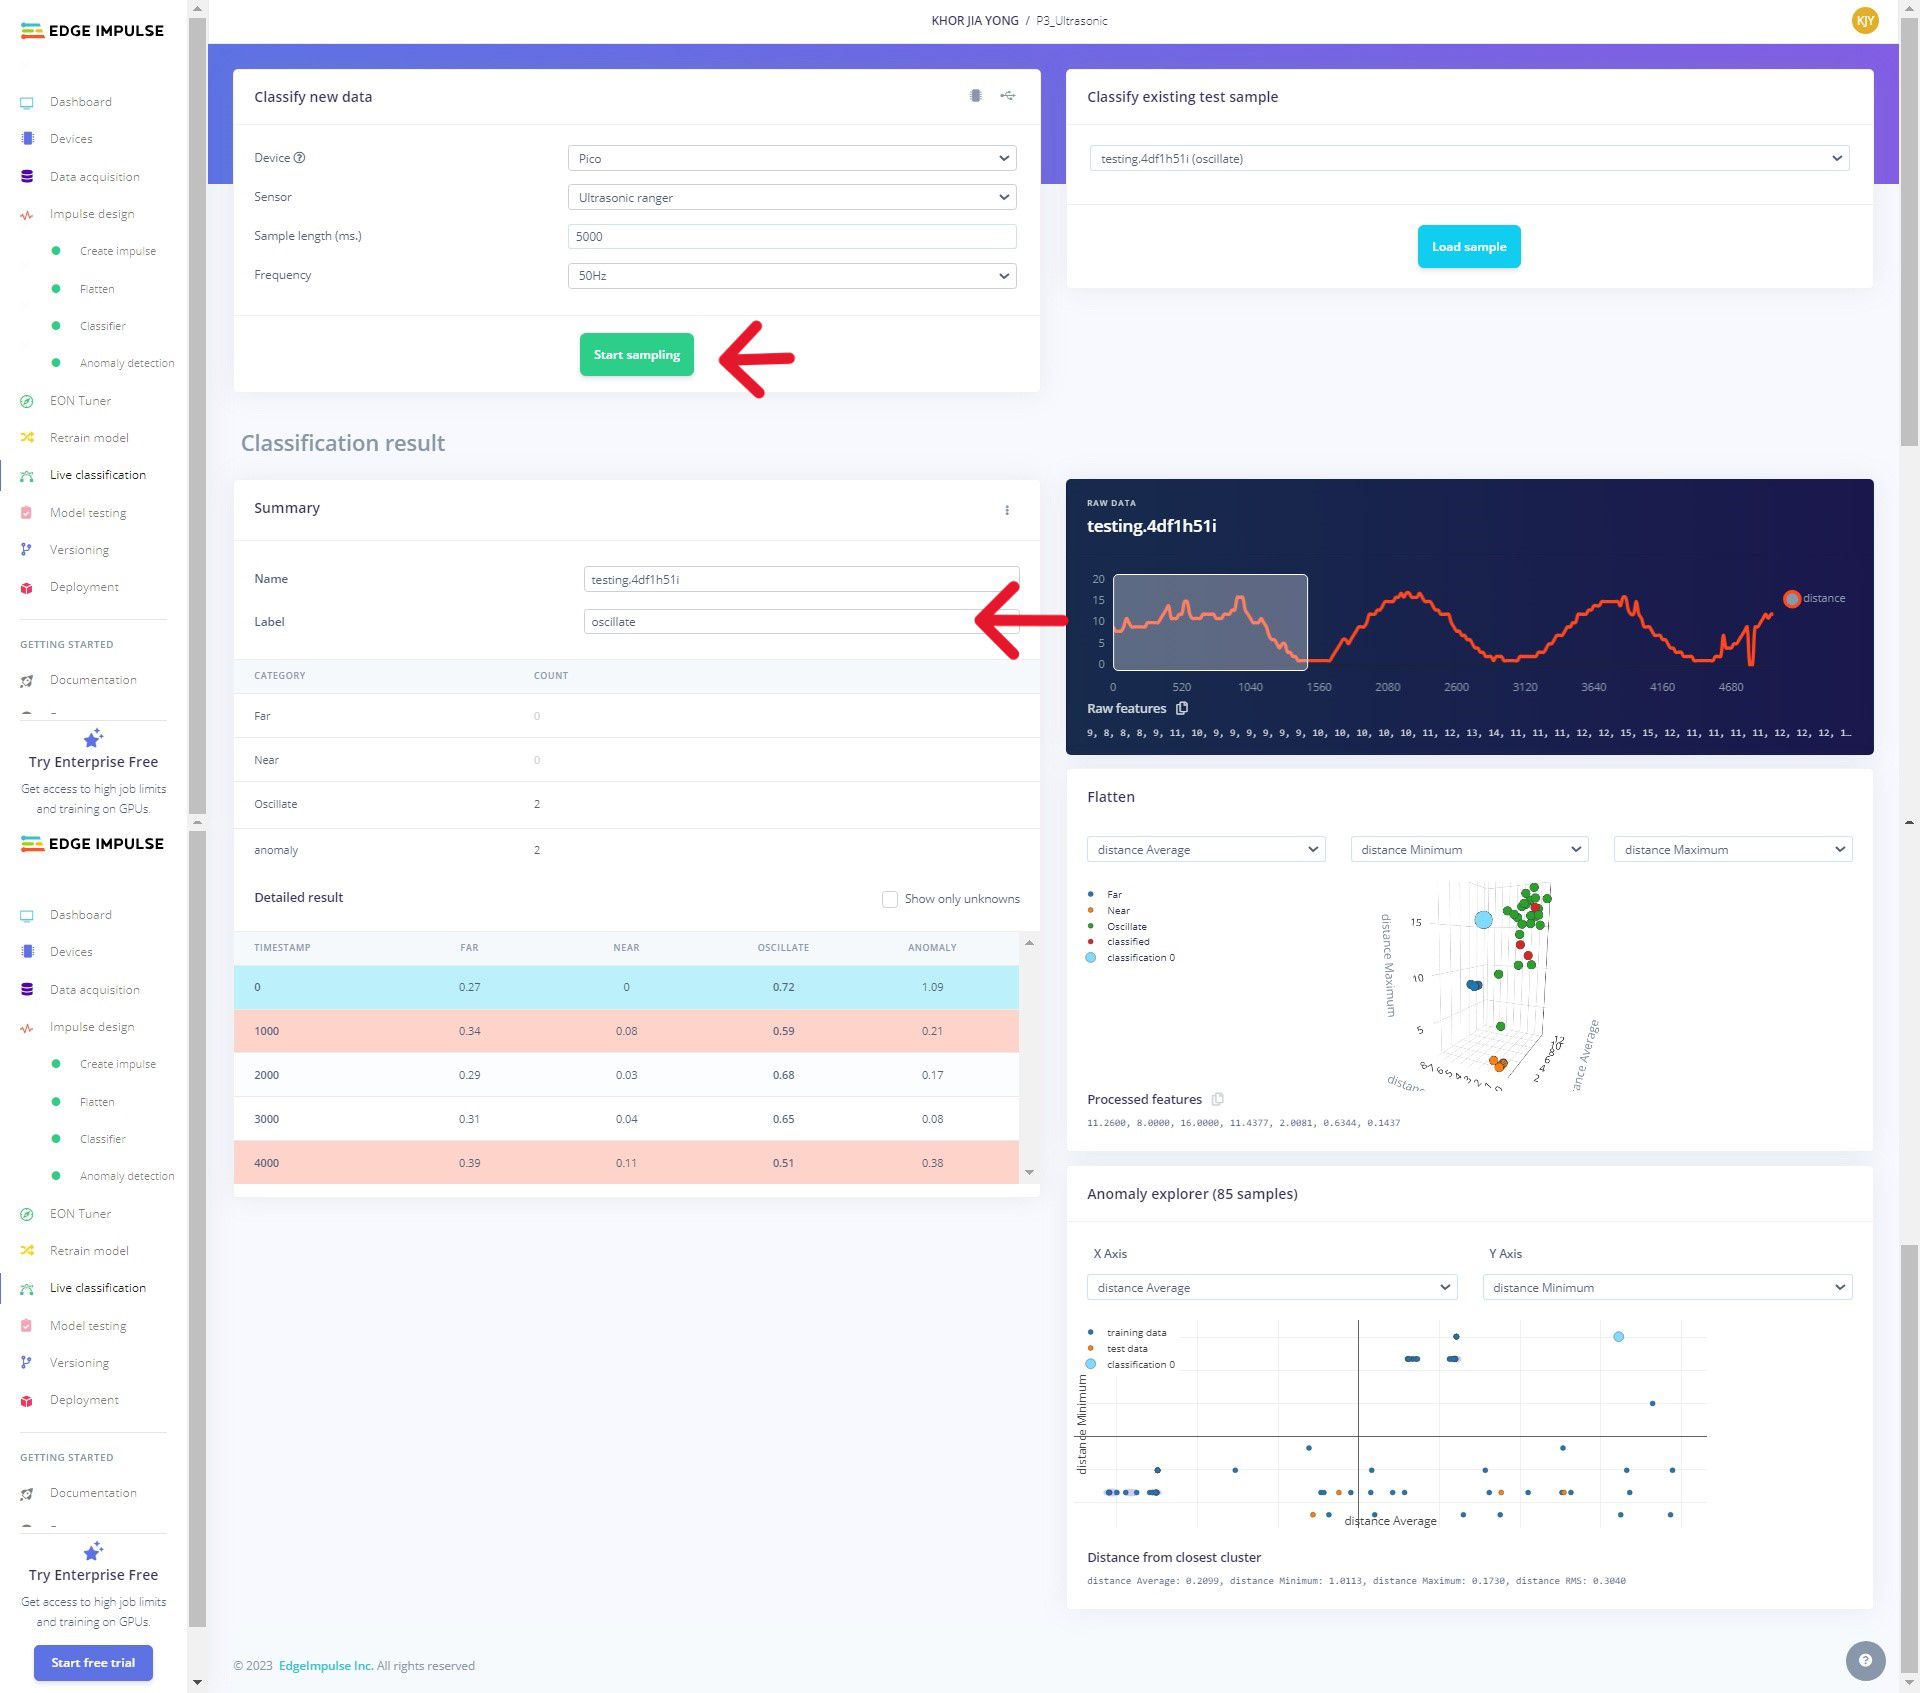
5. Live Classification
During the live classification stage, click "Start sampling" to collect and classify test data by using the ultrasonic sensor to measure distance. Make sure to label each test data with its expected outcome.
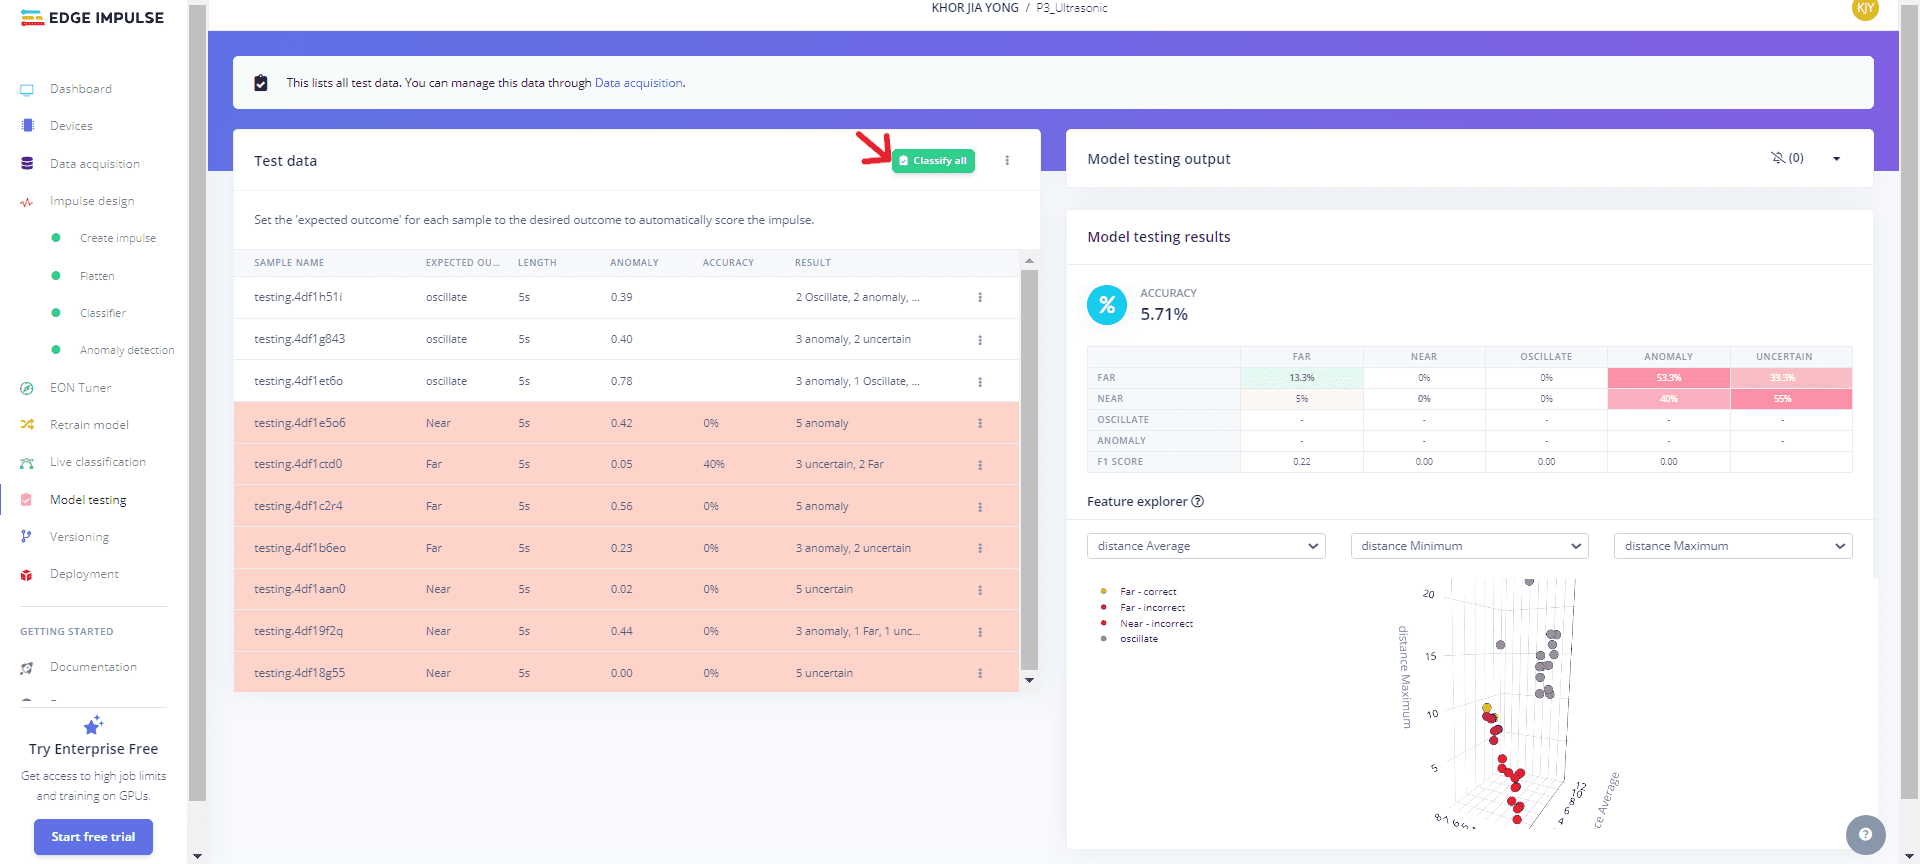
6. Model Testing
Click "Classify all" to perform model testing, allowing the characterisation of test data through graphical charts.
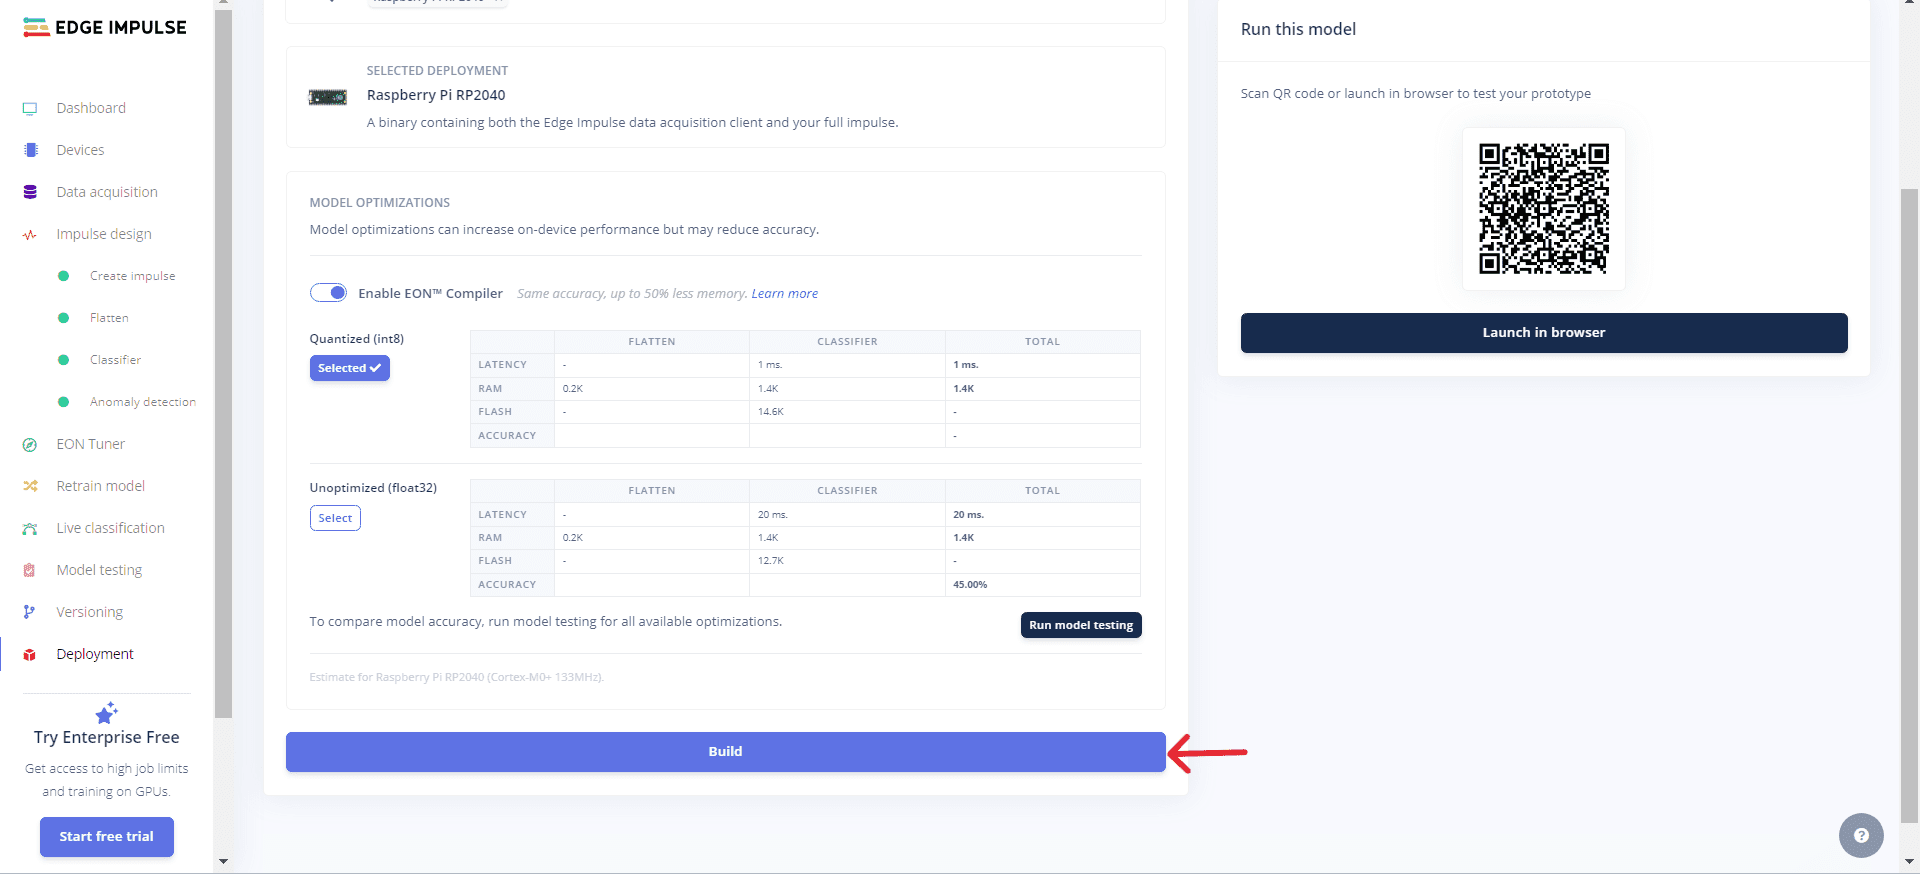
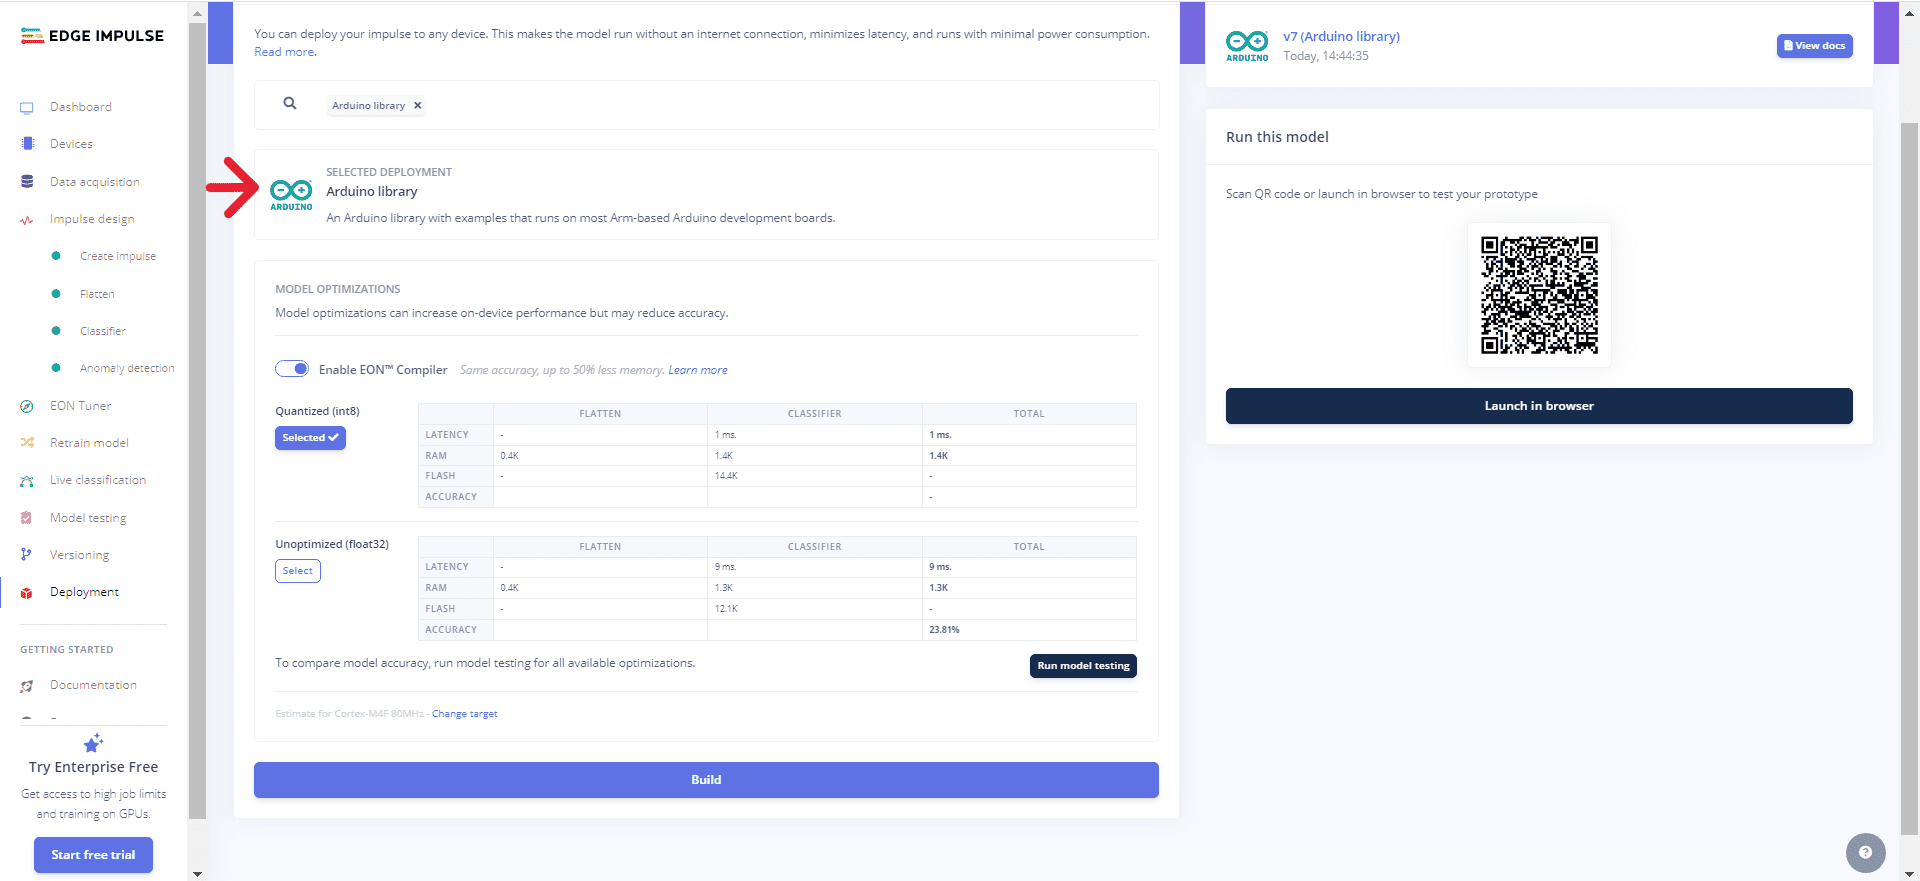
7. Deployment
For deployment, you can construct and export your deployment model based on the building project. Select the "Raspberry Pi RP2040" as the deployment option.
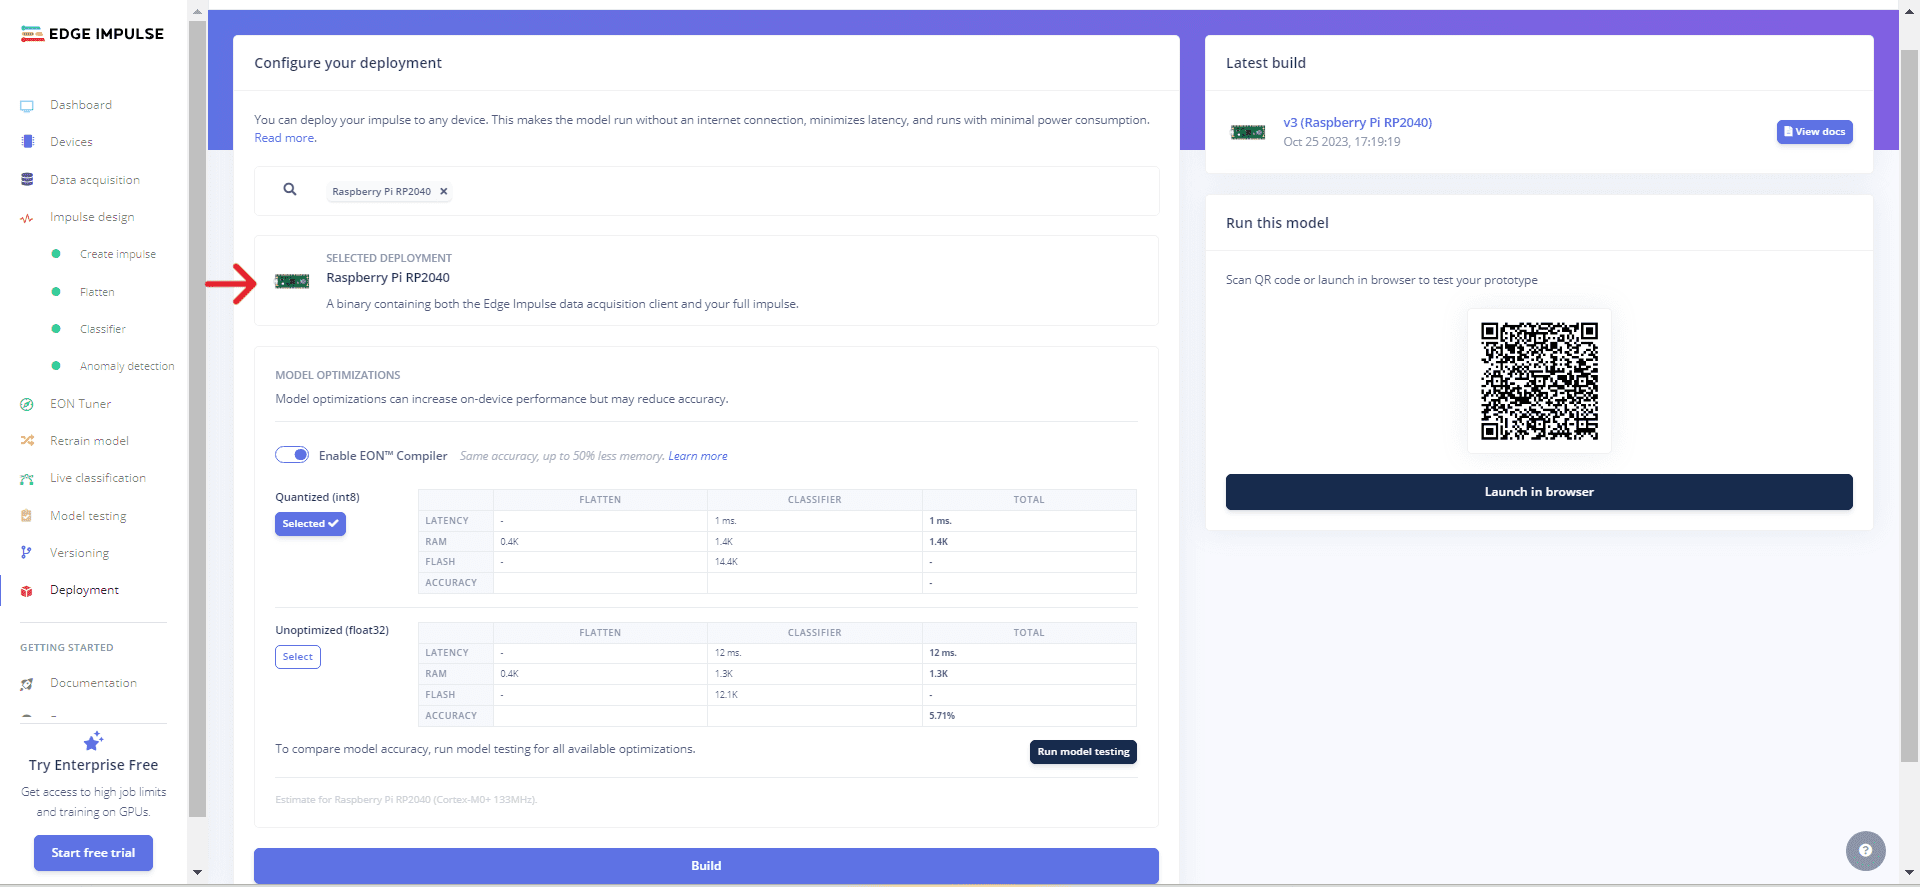
Clicking the "build" button will download the firmware for the deployment model.
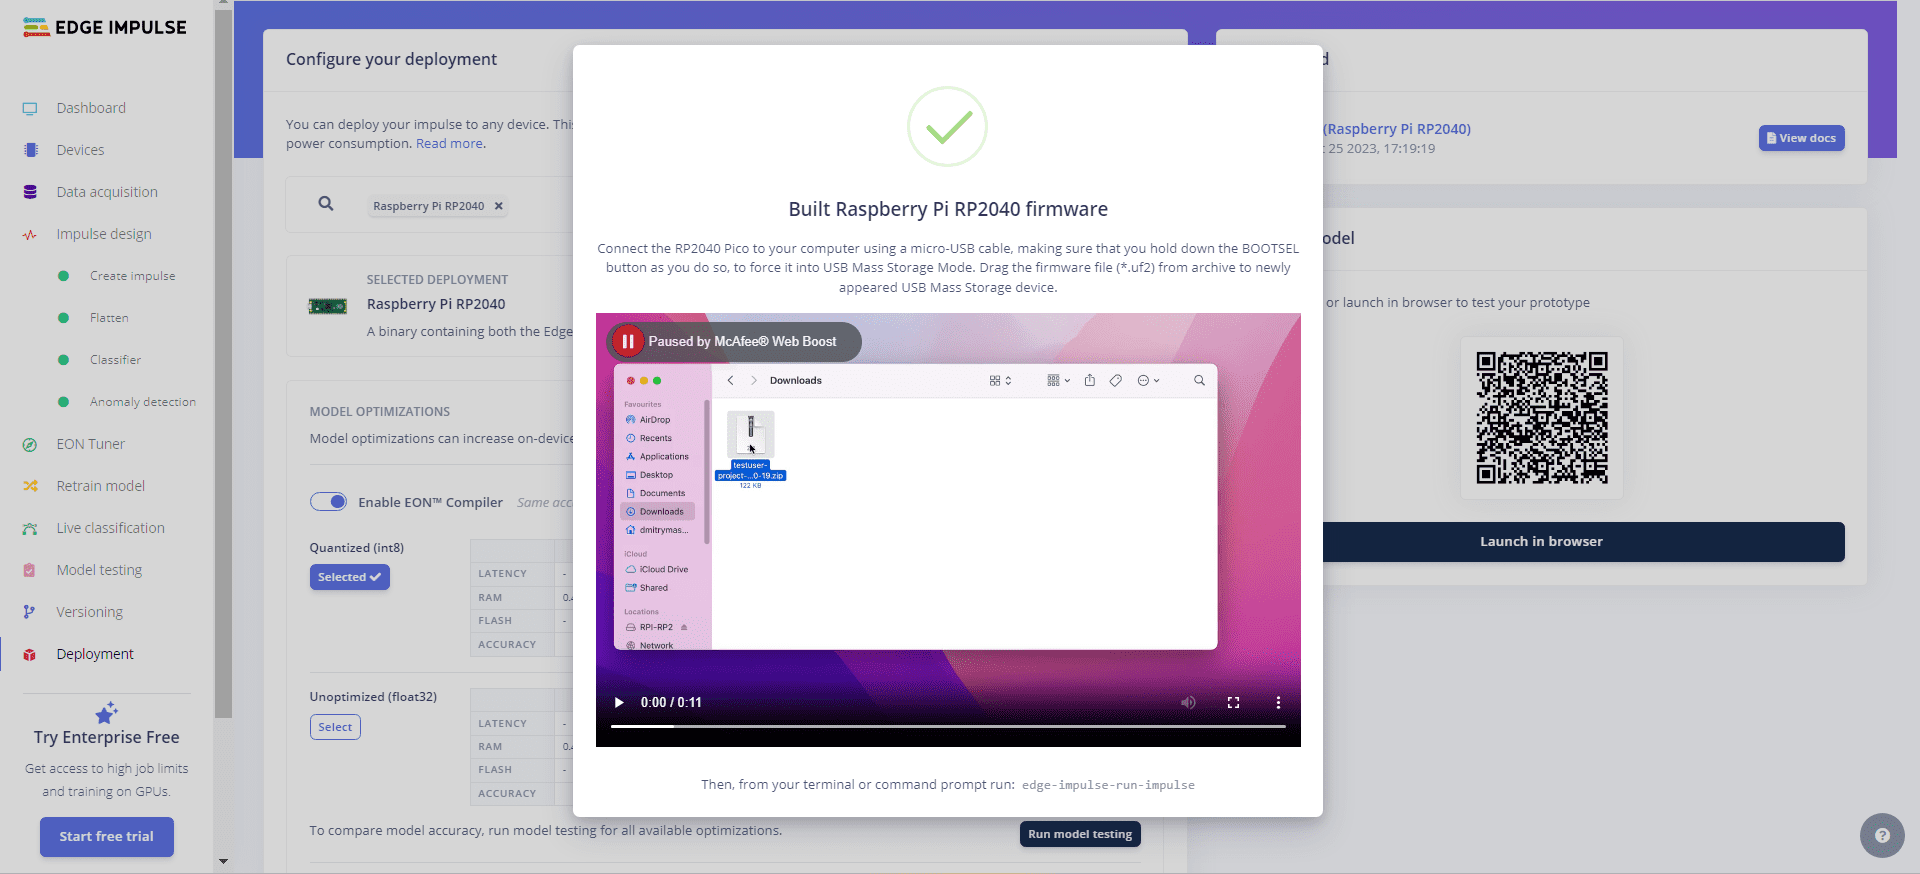
Hold down the BOOTSEL button on the Raspberry Pi Pico to enable USB Mass Storage Mode. Afterward, move the firmware file (*.uf2) from the archive to the newly shown USB Mass Storage device.
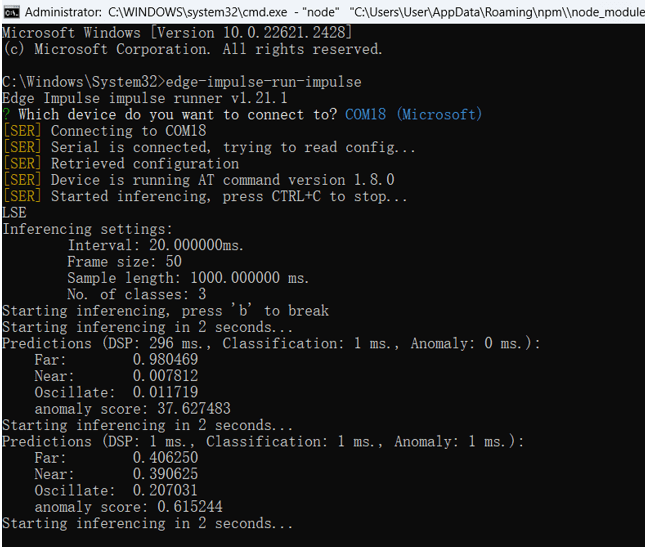
Once the transfer is done, open the command prompt and input the command:
edge-impulse-run-impulse

The result will show up in the command prompt, and the reading can be adjusted in real-time based on the measured distance from the ultrasonic sensor.
Real-life Implementation
Indeed, the data analysed by Edge Impulse can be practically implemented. This real-life implementation facilitates the utilisation of the machine learning model on the hardware circuit, specifically addressing the deployment stage within Edge Impulse.
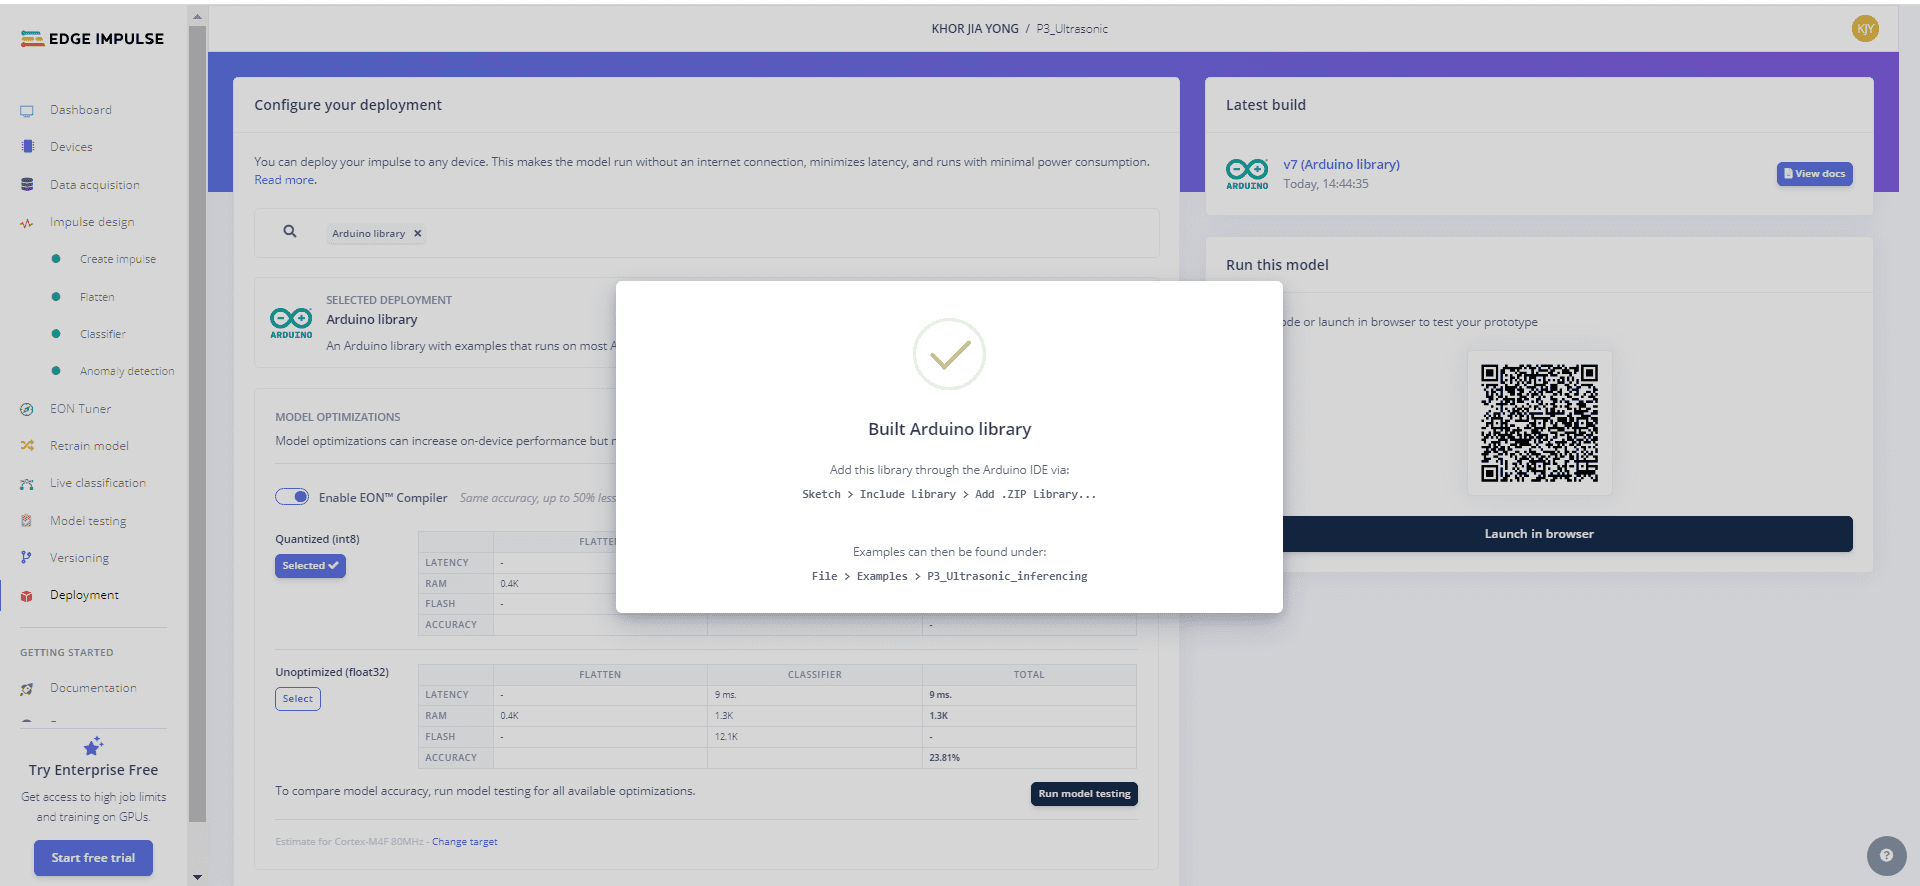
- Choose the Arduino Library model instead of the Raspberry Pi RP2040 as a deployment option and click "build" to download it.
On Arduino IDE,
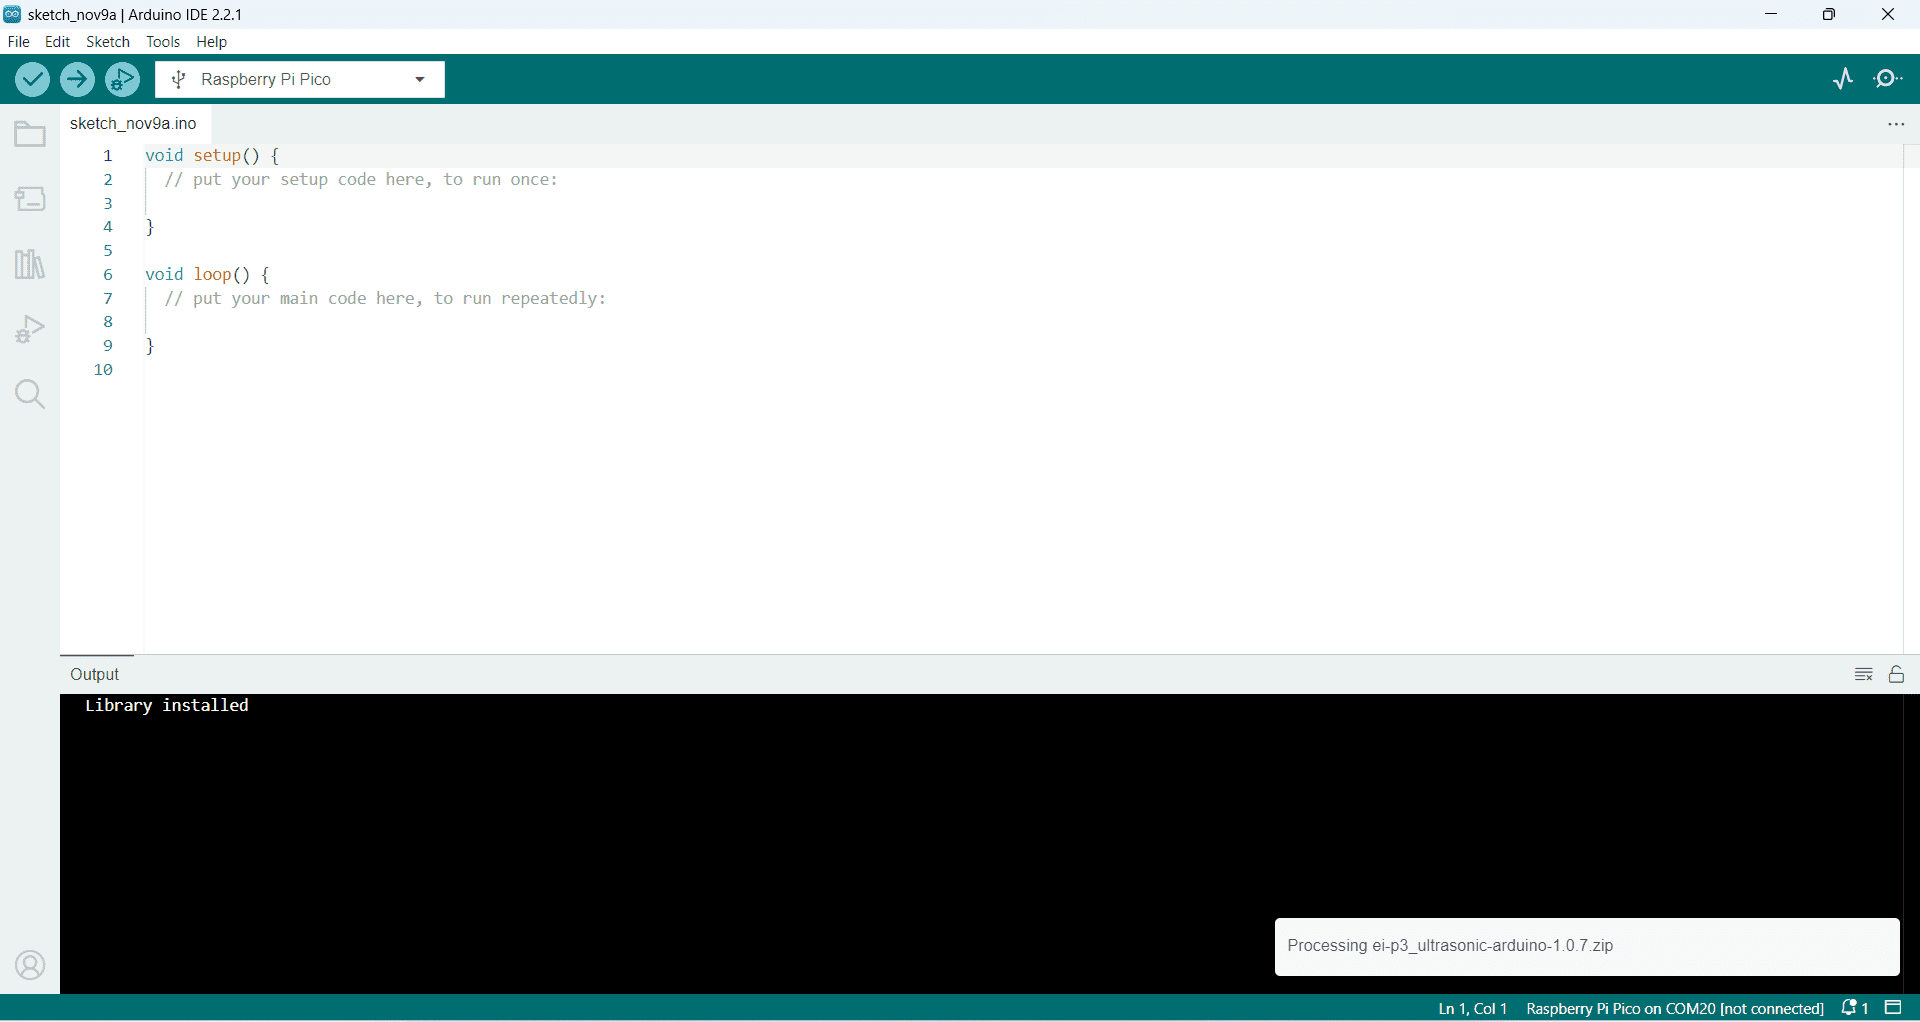
- Include or import the Arduino Library you downloaded in zip format by following these steps: Sketch > Include Library > Add ZIP Library.
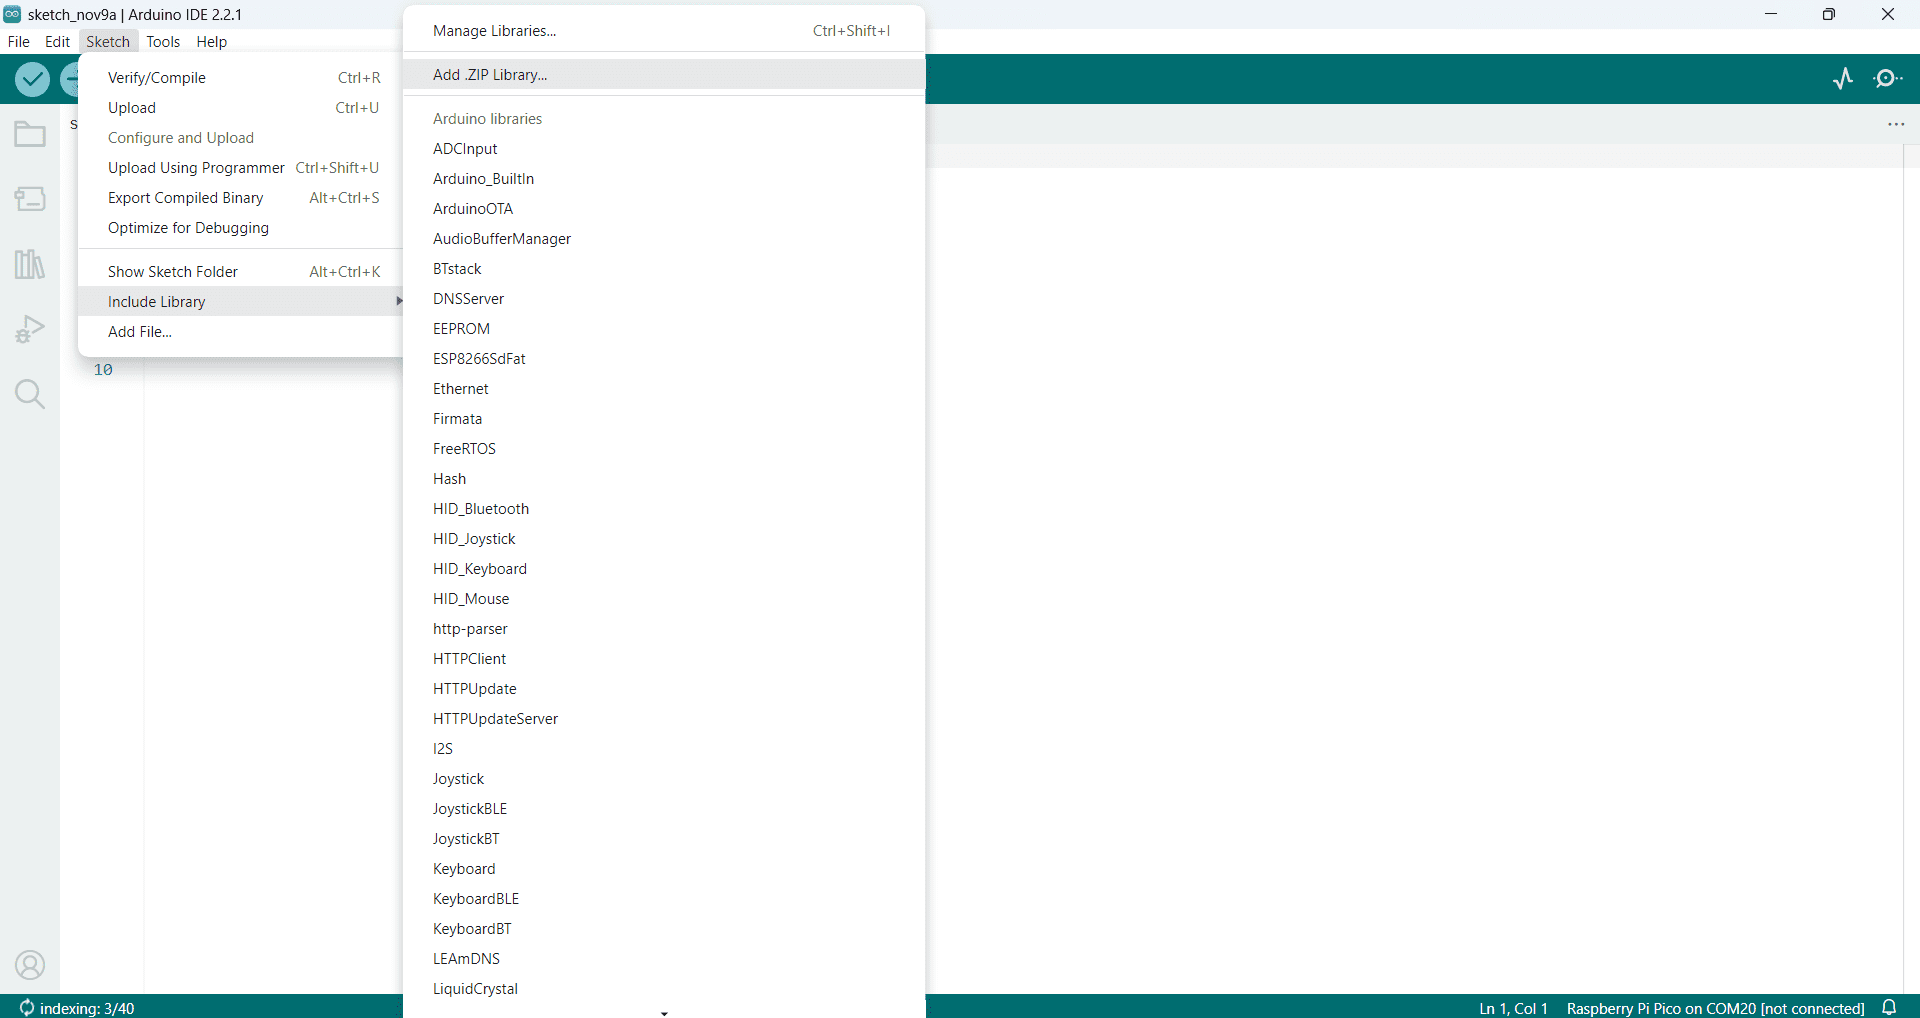
- Verify that the library has been installed correctly.
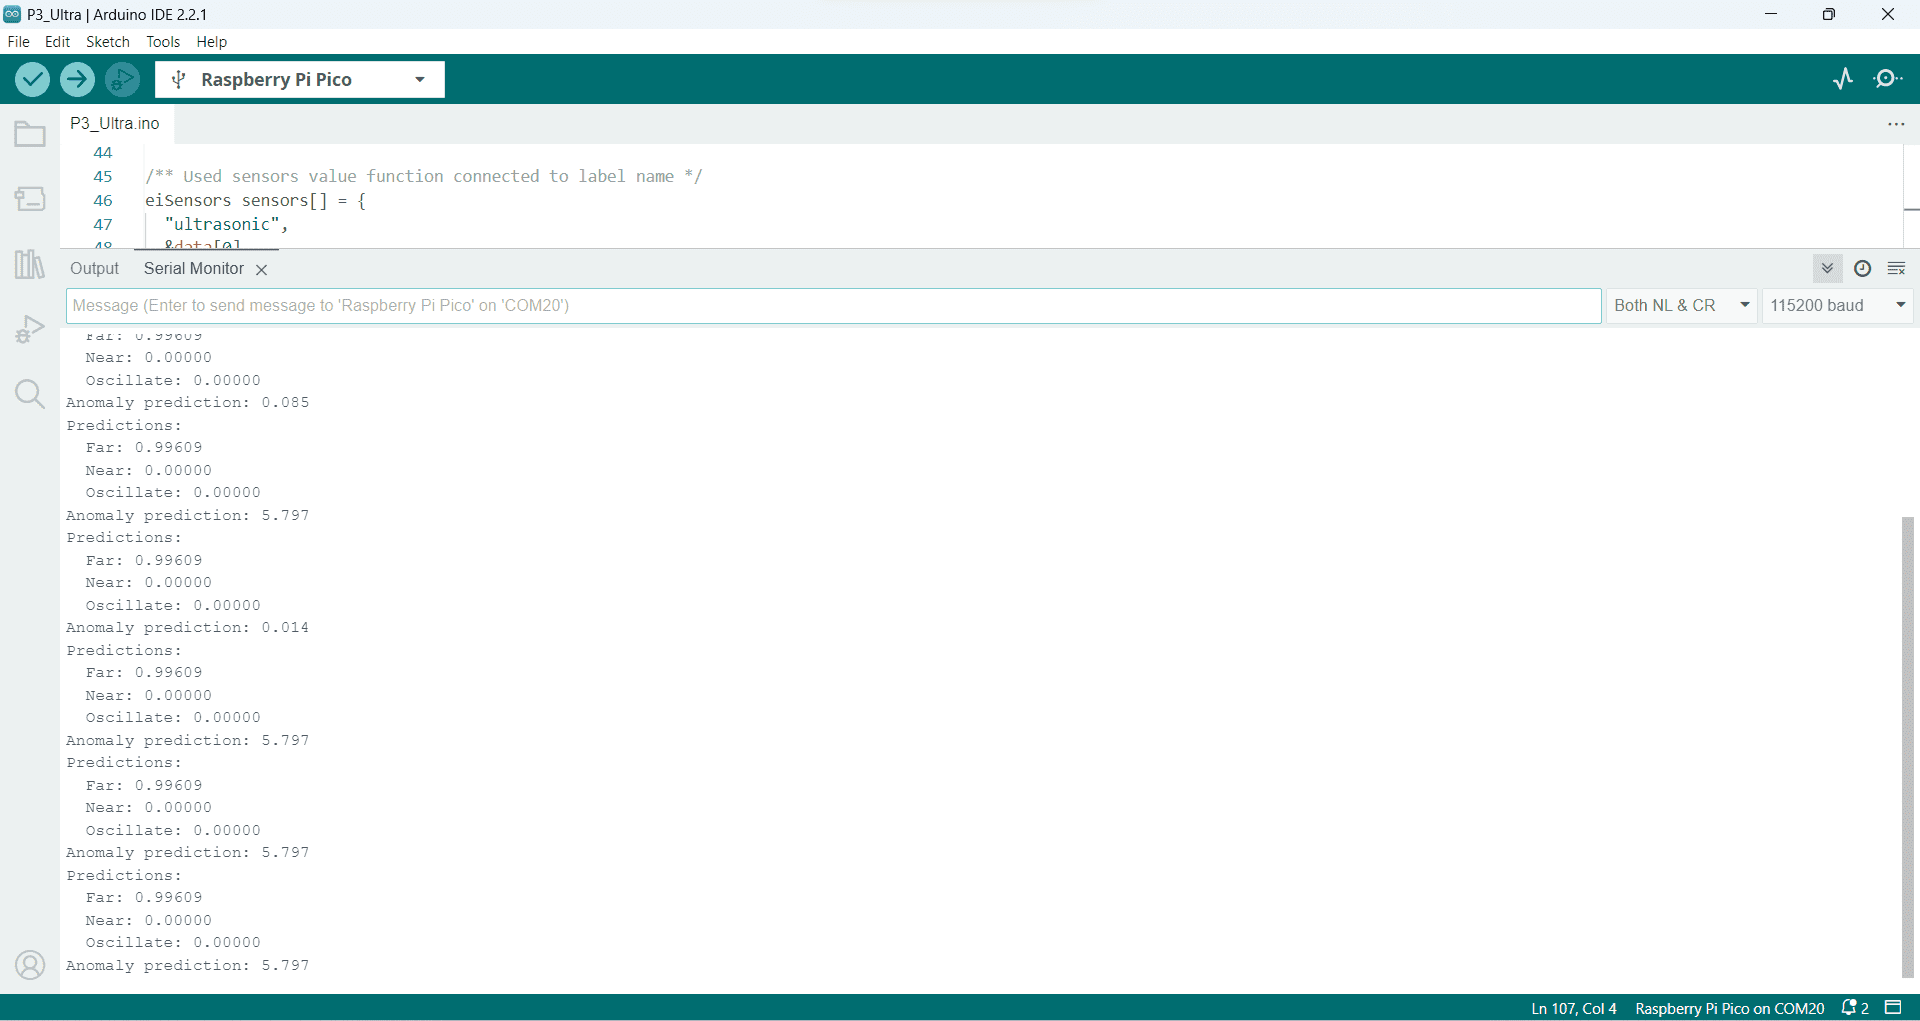
- Generate the essential source code for your project, including components such as OLED for output. Upload the code and select the Raspberry Pi Pico board, making sure to choose the correct port where the board is connected.
- Monitor the output on the hardware circuit and serial monitor.
Source Code
Hardware Components
 Best Seller
Grove - Ultrasonic Ranger
$5.73 $5.73
x 1 unit(s)
 Best Seller
Raspberry Pi Pico Microcontroller Board
$4.40++ $4.40
x 1 unit(s)
Related Posts

TinyML on Arduino using Edge Impulse
Edge Impulse is a platform that allows us to build projects related to machine learning on microcontrollers. This tutorial will be divided into a few parts, and we will update accordingly.....
Introduction to Edge Impulse
Edge Impulse guides embedded machine learning, helping developers optimize solutions with real-world data. It speeds up deployment, benefiting various industries...
Voice Recognition with Edge Impulse Using Computer Application
Edge Impulse empowers computer devices to function in their surroundings. In this setup, the computer serves as the primary tool for gathering data and deploying machine learning models...
Object Classification with Edge Impulse Using Raspberry Pi 4 and Camera Module
Raspberry Pi 4 seamlessly integrates with Edge Impulse, a versatile Linux board supporting the easy addition of a microphone or camera for efficient object classification projects...
Edge Impulse with Mobile Phone Application Using Accelerometer
Edge Impulse supports mobile devices, allowing the implementation of machine learning models directly on phones. This project emphasizes using the built-in accelerometer sensor in the phone...
Edge Impulse with Raspberry Pi Pico Application Using ADC Light Sensor
Edge Impulse has the ability to interface with the Raspberry Pi Pico device, equipped with the RP2040 chip. In this project, data is gathered using the light sensor to measure light intensity...