 International
 Singapore
 Malaysia
 Thailand
 Vietnam
Your shopping cart is empty!

How to 3D Print Multicolor Models with a Single Extruder Using Cura
- Abdulrahman Alhamed
- 19 Apr 2023
- Tutorial
- Beginner
- 3105
Creating 3D prints with multiple colors can enhance the visual impact of your designs and make them more appealing. However, traditional multicolor 3D printing can be expensive and requires machines with multiple extruders. Luckily, Cura's "Pause at height" feature provides a cost-effective solution for printing with multiple colors using just a single extruder. In this tutorial, we will discuss how to use this feature to create multicolor 3D prints and provide tips and best practices to help you achieve the best results.
Setting Up Cura for Multicolor Printing
Before you can start printing multicolor models with a single extruder using Cura, you need to make sure that your software and printer settings are properly configured. Follow these steps to set up Cura for multicolor printing:
1. Open Cura and import the 3D model that you want to print.
2. Click on "Slice" to start the slicing process.
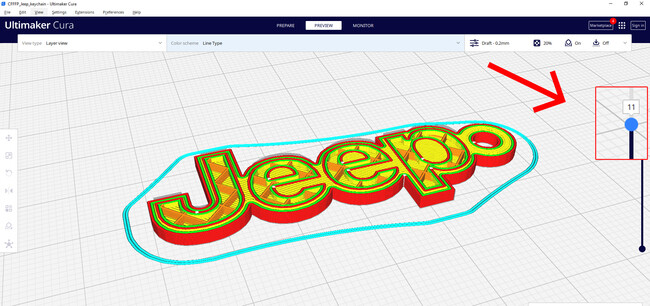
3. In the "Preview" mode, click on the "Layer View" button to see the model sliced layer by layer.
4. Choose the layer at which you want the printer to pause for a filament change. You can do this by clicking on the layer in the "Layer View" and noting the layer number.
Once you have set up Cura for multicolor printing, you are ready to move on to the next step: adding a "Pause at Height" script to the G-code.
Adding a "Pause at Height" Script in Cura

Once you have chosen the layer at which you want the printer to pause for a filament change, you need to add a "Pause at Height" script to the G-code. Here's how to do it in Cura:
- Go to the "Extensions" menu. Select "Post Processing" and then "Modify G-Code." This will open the "Modify G-Code" window, which allows you to add scripts to the G-code file that your printer reads.
- In the "Modify G-Code" window, click on "Add a script" and choose "Pause at height." This will open the "Pause at height" window.
- In the "Pause at height" window, you need to specify the layer number where you want the printer to pause. To do this, set the "Pause at" option to "Layer number." Then, enter the layer number in the "Pause layer" field. You can find the layer number by using the layer view in Cura, which shows the model sliced layer by layer.
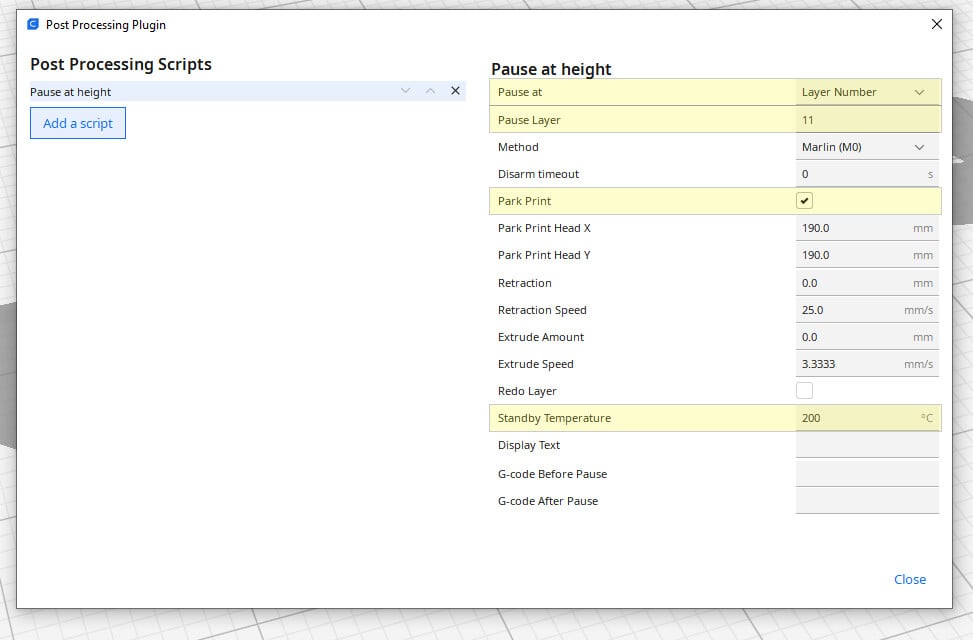
You also need to choose whether you want the printer to park the extruder or stay in place during the pause. If you choose to park the extruder, the printer will move it to a specific position so that it doesn't drip onto the model. If you choose to keep the extruder in place, it will remain stationary during the pause.
Set the standby temperature for the pause. This is the temperature at which the printer will wait for you to change the filament. It's important to choose a temperature that will keep the filament from cooling and solidifying in the extruder, but not so hot that it will damage the filament or the printer.
After you have configured the "Pause at height" settings, click "OK" to close the window. Then, save the modified G-code and send it to your printer to start the print.
Printing Multicolor Model
Once you have set up Cura for multicolor printing and added the "Pause at Height" script to the G-code, you are ready to start printing multicolor models with a single extruder. Here are the steps:
- Load the modified G-code file into your printer and start the print.
- Watch the print closely and wait for the printer to pause at the layer you specified in the "Pause at Height" script. The printer will move the extruder to a designated position, or keep it in place depending on your setting.
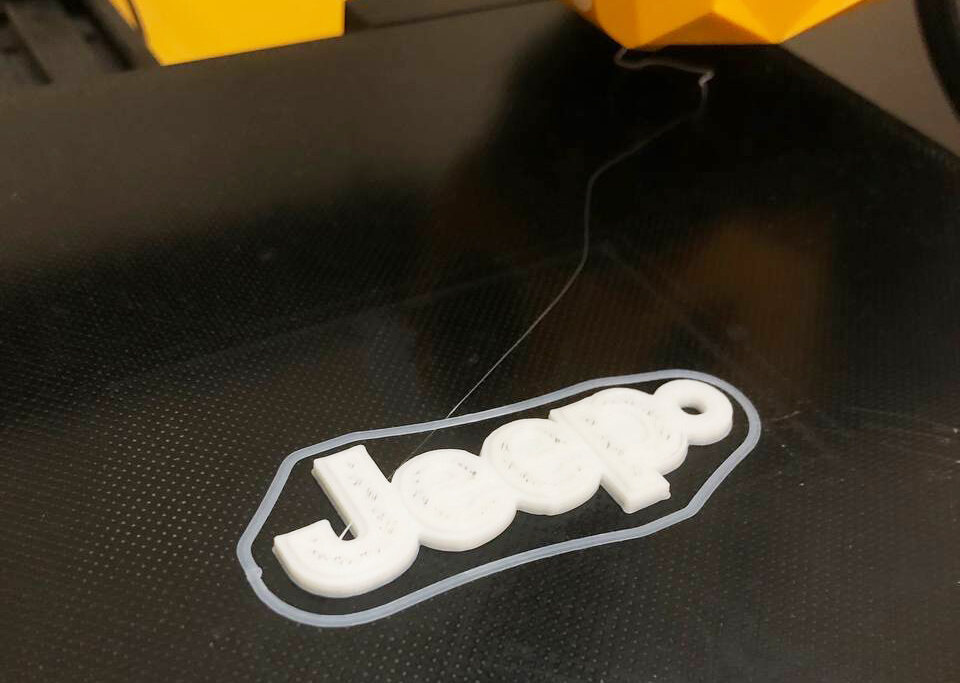
- When the printer pauses, manually change the filament to the desired color. Be sure to properly feed the new filament into the extruder and clear out any old filament left in the nozzle.
- After manually changing the filament to the desired color, you will need to press the printer's control knob or button to resume the print from where it left off.
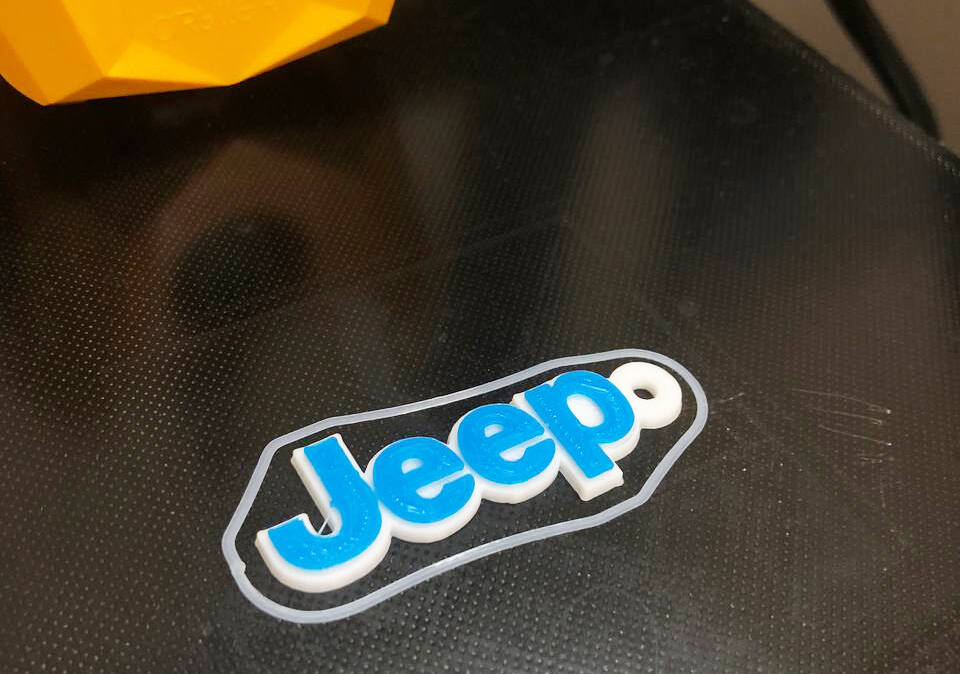
- Repeat the process for each color change, waiting for the printer to pause, changing the filament, and resuming the print.
By following these steps, you can print multicolor models with a single extruder. With some practice and experimentation, you can create impressive and vibrant multicolor prints.
Conclusion
Printing multicolor models with a single extruder is a great way to add complexity and depth to your 3D prints. While it may require a bit more effort and attention during the printing process, the end result is well worth it. By setting up Cura properly and adding a "Pause at height" script, you can easily print multicolor models with a single extruder. Just remember to manually change the filament at the designated pause points and to resume the print by pressing the knob on the printer. With a bit of practice and patience, you can create beautiful and intricate multicolor prints with just one extruder.