 International
 Singapore
 Malaysia
 Thailand
 Vietnam
Your shopping cart is empty!

5 Ways to Fix PLA Not Sticking to Bed
- Abdulrahman Alhamed
- 18 Jul 2022
- 2320
PLA is one of the most common materials for 3D printing, however, sometimes people face a problem with the first layer not sticking to the build plate, and this can create problems with printing because the remainder of the part will be built on this first layer foundation. In this article, we will share with you 5 ways that can help to avoid this issue.
#1 Level the Bed
If the bed is not level, one side of your bed may be too close to the nozzle, while the other side is too far away, therefore, PLA will not stick to the bed. Many printers come with an adjustable bed with screws or knobs to control the bed's position. If your printer has an adjustable bed and you’re having trouble getting your first layer to stick to the bed, the first thing you should check is that your printer's bed is flat and level. Check this article to learn more about how to level your bed.
To make your life easier, you can consider an automatic bed leveling sensor, which is a sensor that can be installed on your 3D printer to precisely measure the tilt of the bed surface and give you the best result of printing on a flat straight bed. BL touch is an excellent sensor for automatic leveling.
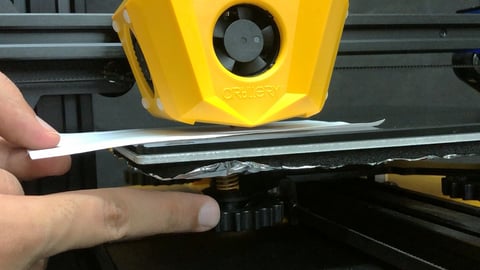
#2 Adjust Z Offset
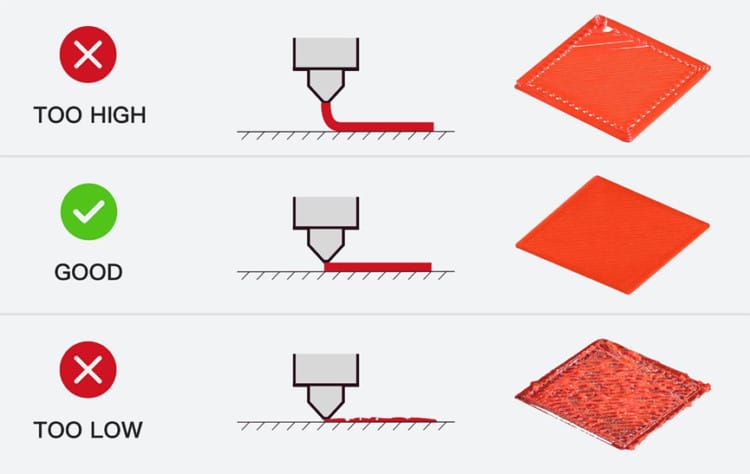
After leveling your bed properly, you need to make sure the Z offset is set correctly, wrong Z offset can lead to poor bed adhesion. If you don't know what is the Z offset, basically it is the distance between the nozzle and the home position of the Z-axis. Wrong Z offset will result in the nozzle being either too far above the bed or too close, both will affect negatively how the PLA is extruded and could possibly harm your bed.
To find the ideal Z offset for good bed adhesion, you have to adjust the Z offset value from the 3D printer setting and test it. While adjusting Z offset, make sure the nozzle is not too far from the bed and not too close.
#3 Clean the Bed
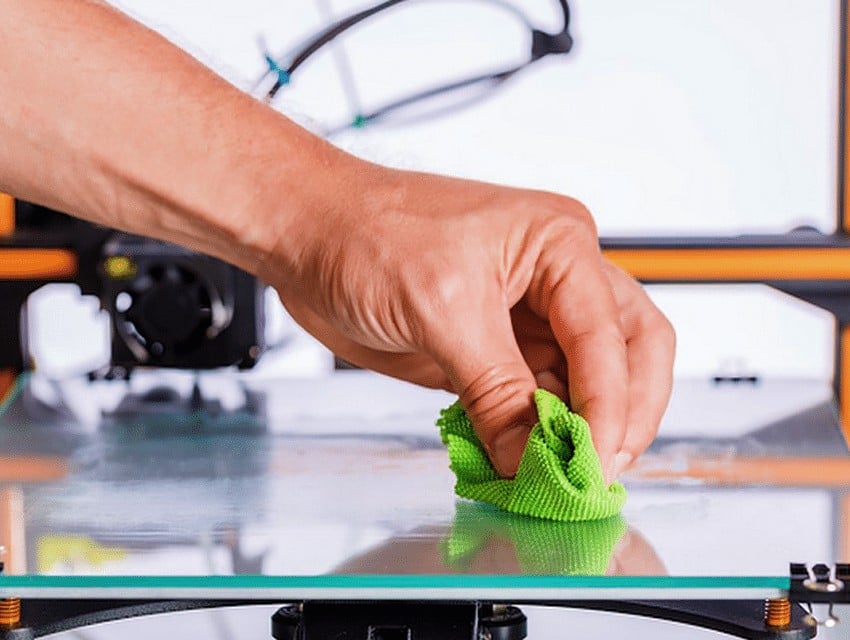
An unclean bed can negatively affect first layer adhesion because substances on the bed can make the surface uneven. Sometimes oils from your hands, dust, dirt, and more can remain on the bed surface. To maintain the bed clean you may use a damp cloth to wipe the bed, but make sure to dry the print bed afterward because water may prevent the bed adhesion.
#4 Adjust Slicer Settings
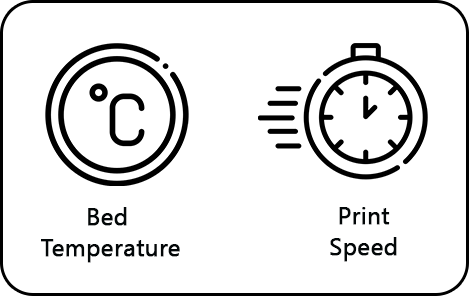
Sometimes the problem may be related to the bed temperature and print speed. Try to adjust these settings in your slicer software.
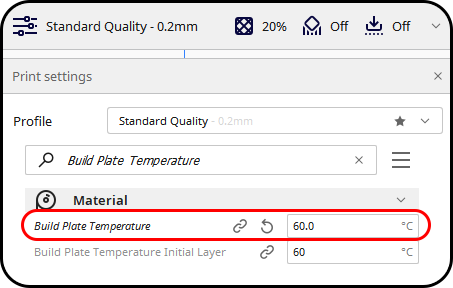
- Bed Temperature
In order to ensure good bed adhesion, try first increasing your bed's temperature by 5 °C increments. For PLA, start at 55 °C, and as required, increase the temperature incrementally up to 70 °C. However, don't set the bed temperature too high because this can cause a problem with removing parts.
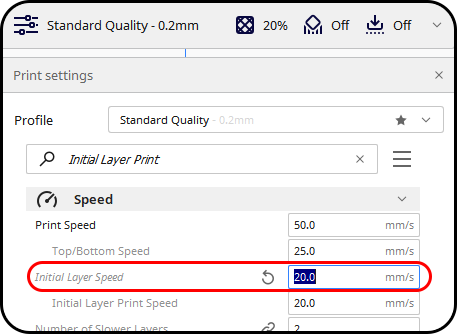
- Print Speed
The next setting you should change is print speed. To start, set your first layer speed to 25 mm/s, and as required, decrease it in increments of 5 mm/s.
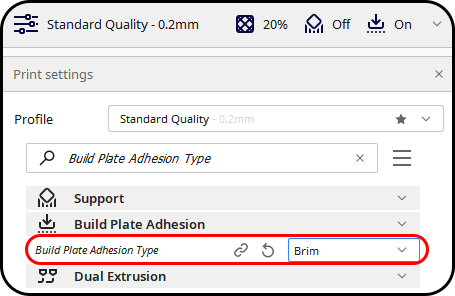
#5 Add Brim or Raft
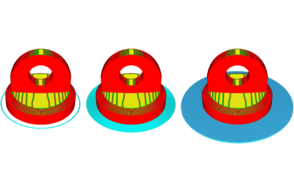
Some slicer settings default to using a skirt adhesion, which is helpful to detect issues prior to beginning a print. However, a skirt doesn’t make any difference in bed adhesion for the print itself; a brim or a raft can help support bed adhesion.
A brim is a layer of material that extends along the print bed from the edges of a 3D print and a raft is a horizontal latticework of filament that is located underneath your part. Your 3D printed part will be printed on top of this raft, instead of directly on the build platform surface. However, A raft consumes a lot of filament, so it is recommended to start with a brim and then try a raft if that doesn’t work.
Resources
Related Products
 -15%
-15%Artillery Genius Pro 3D Printer - Partially Ass...
Discontinued
x 1 unit(s)

Artillery Sidewinder X2 3D Printer - Partially ...
Not Available
x 1 unit(s)
-268x268.jpg "Artillery Hornet 3D Printer - Partially Assembled")
Artillery Hornet 3D Printer - Partially Assembled
Not Available
x 1 unit(s)