 International
 Singapore
 Malaysia
 Thailand
 Vietnam
Your shopping cart is empty!

Log Thermocouple Sensor Data to Google Sheets using CM4 Maker Board
- Abdul Salam A Haris
- 06 Apr 2023
- Tutorial
- 1143
In this tutorial, we will guide you on how to display temperature data from a thermocouple in a Google Sheet using the CM4 Maker Board.
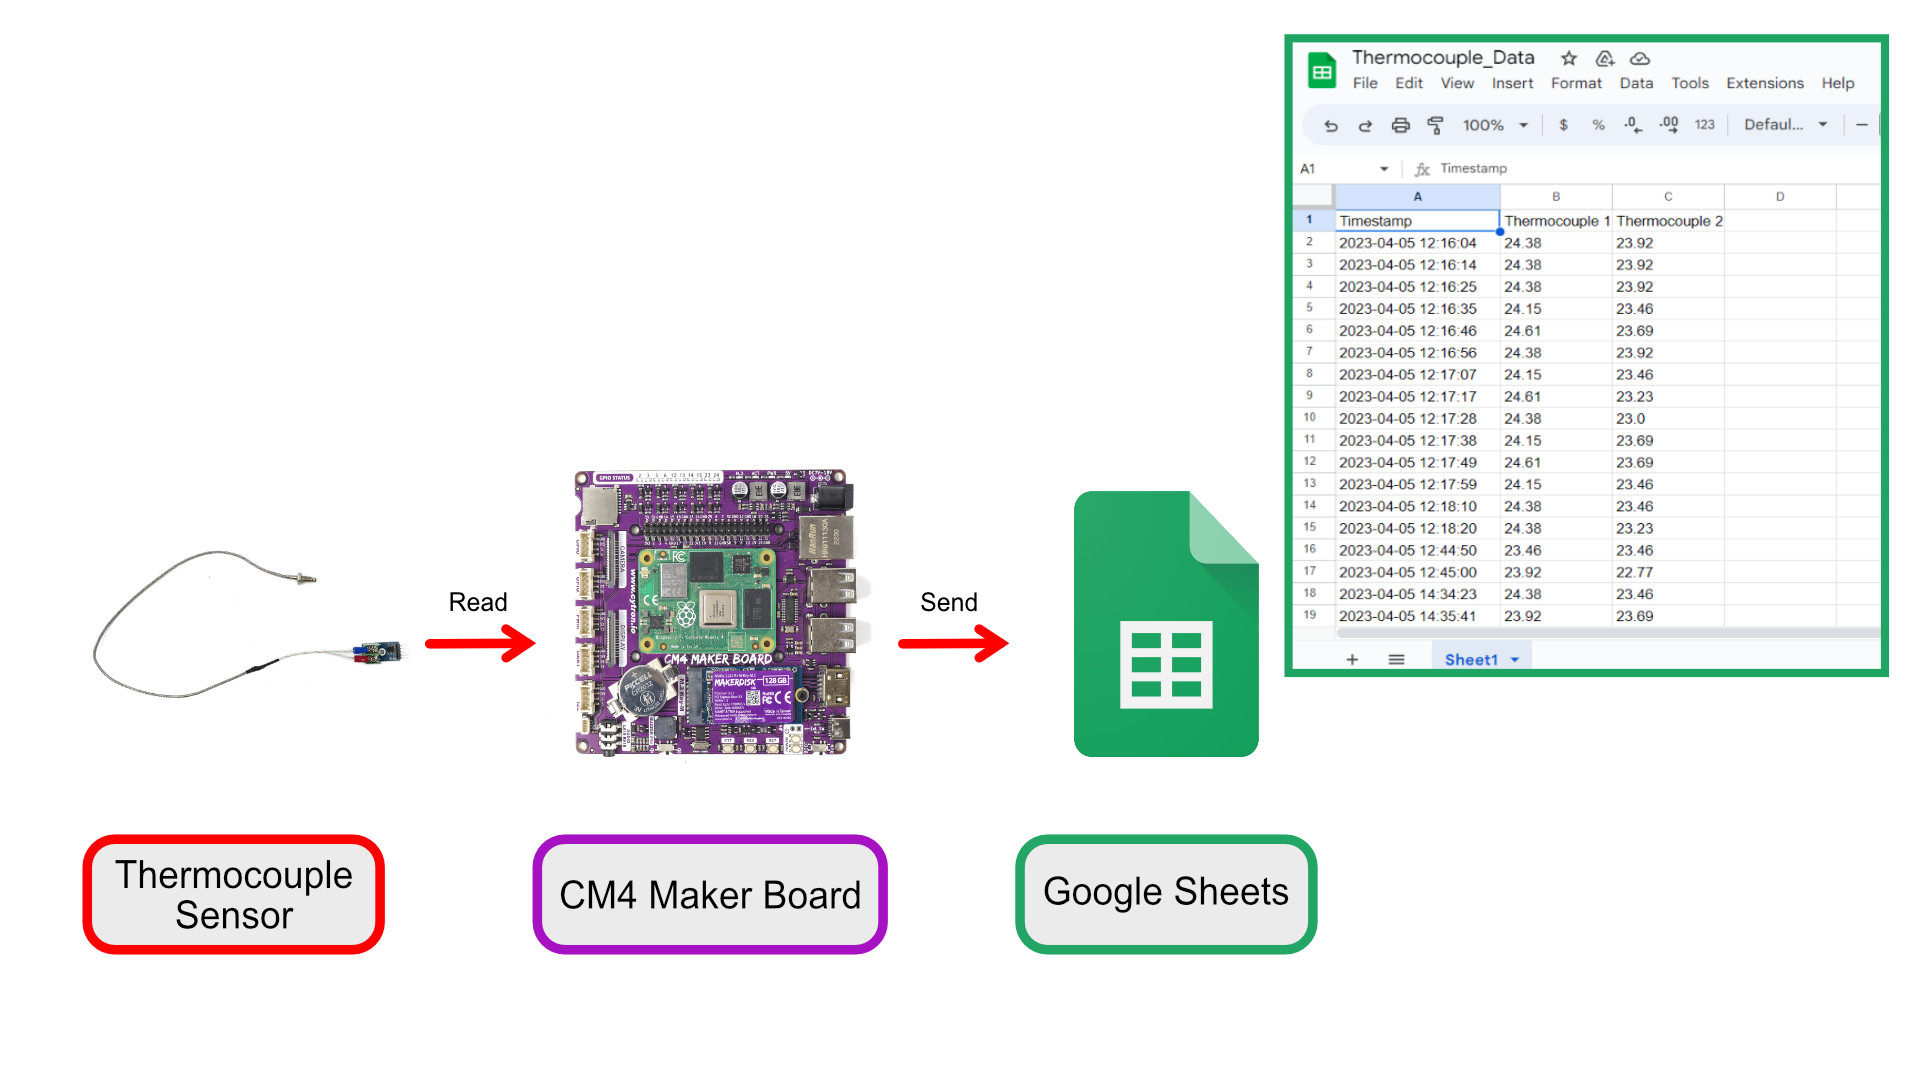
Flow Diagram for Data Logger
Hardware Components

x 1 unit(s)

CM4 Maker Board & Kits : Maker’s Carrier Bo...
$56.00++ $56.00
x 1 unit(s)
To begin, connect the MAX6675 thermocouples to the Grove port on the CM4 Maker Board. In this example, we will use two thermocouples.
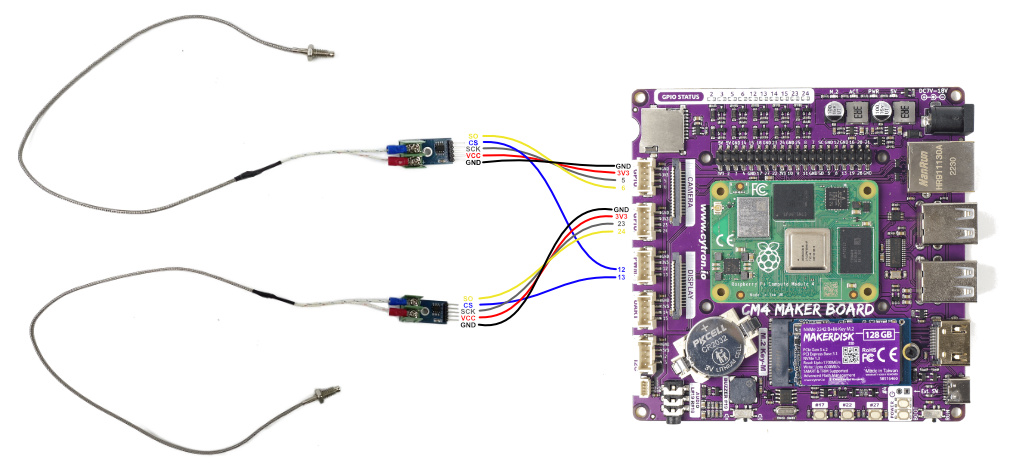
Thermocouples MAX6675 connected to the CM4 Maker Board Grove port.

The connection between thermocouples MAX6675 and the CM4 Maker Board Grove port.
Setting Up Google Credentials
1. To create new credentials, log in to Google Cloud.
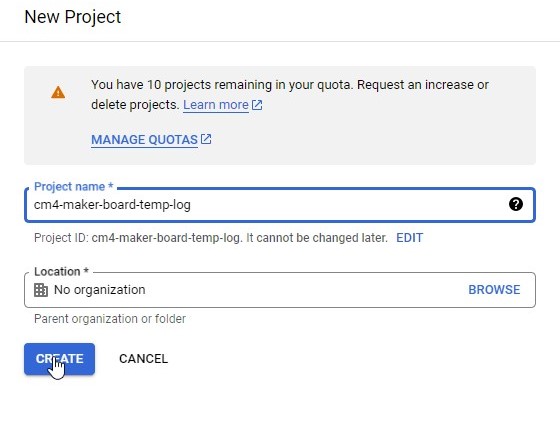
2. Click on "Select a project," then click on "New Project."

3. Fill in your project name and click "Create."
4. On the sidebar, navigate to APIs & Services > Library.
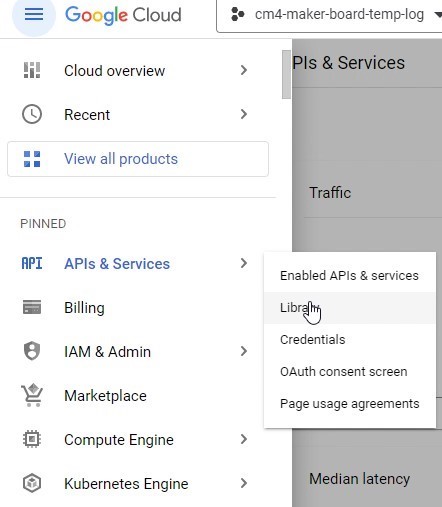
5. Search for Google Sheets API and Google Drive API, and enable them.
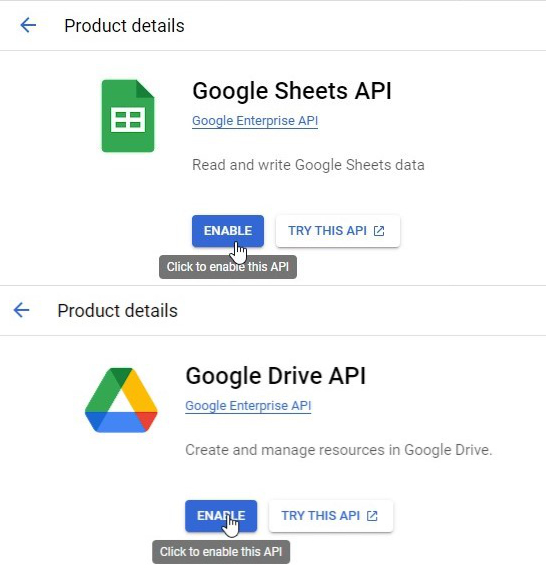
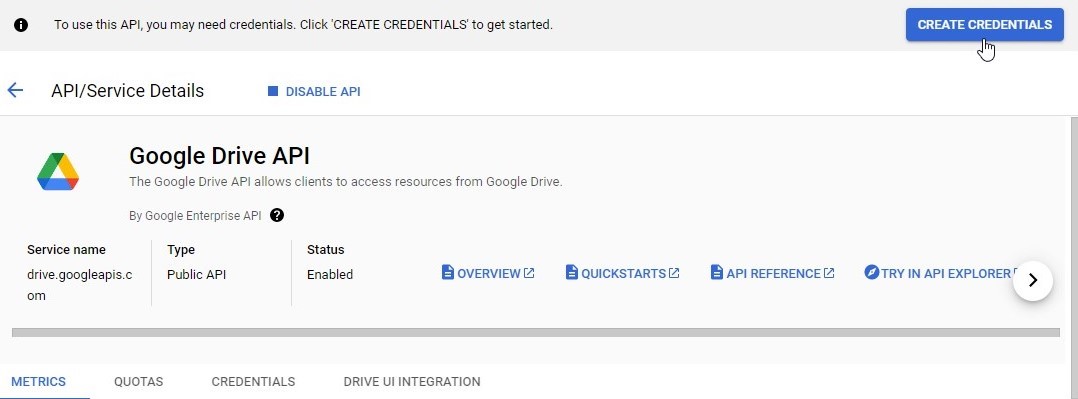
6. For the Google Drive API, click on "manage."

7. On the top right corner, click "Create Credentials."
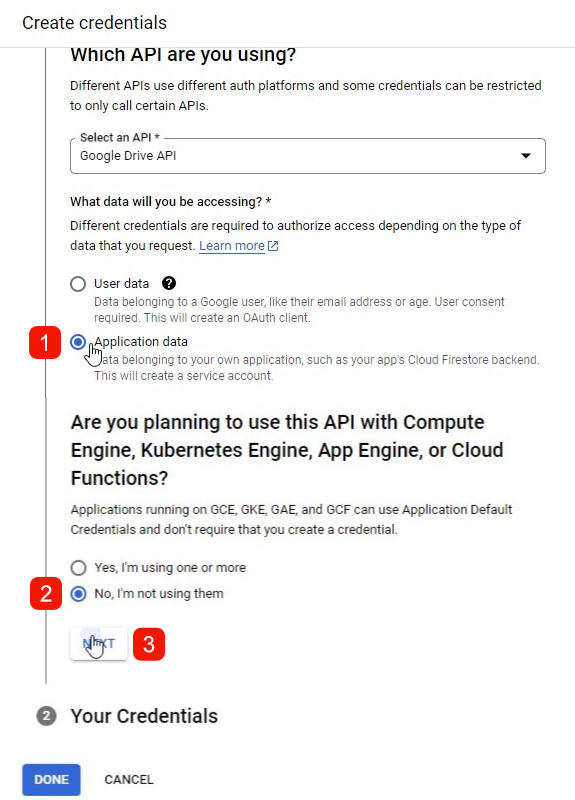
8. To allow access from the Python code in the next step, we need to create credentials for Google Drive. In the first and second selections, select "Application data" and "No, I'm not using them." Then, click "Next."
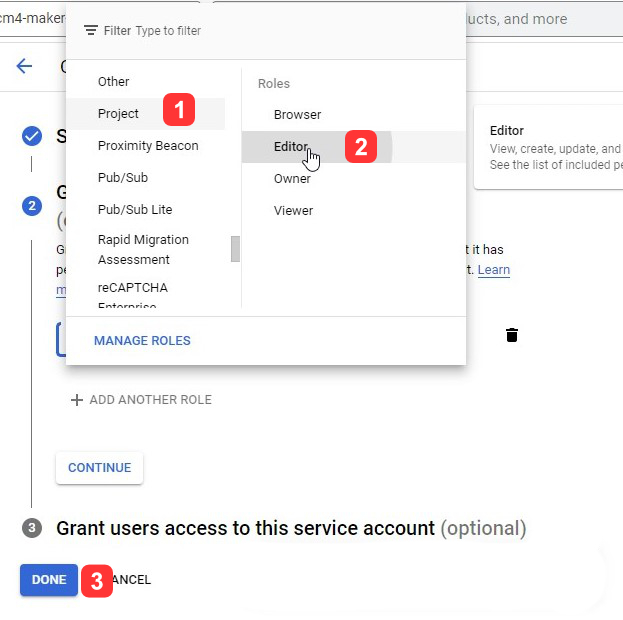
9. On the Service account details, insert your name (e.g., 'cytron').
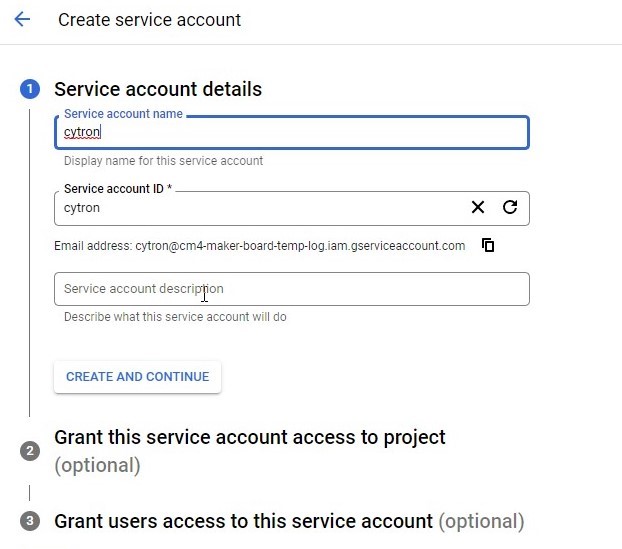
10. On the "Grant this service account access to the project" section, scroll down and select "Project > Editor," then click "Done."
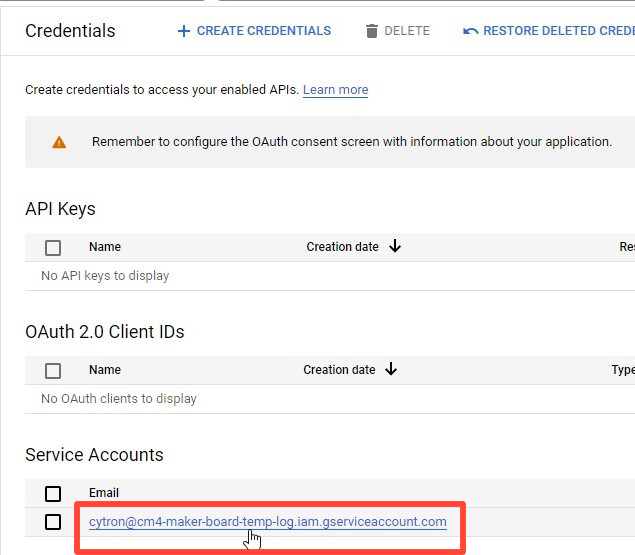
11. On the left sidebar, navigate to APIs & Services > Credentials and click on the email address link.
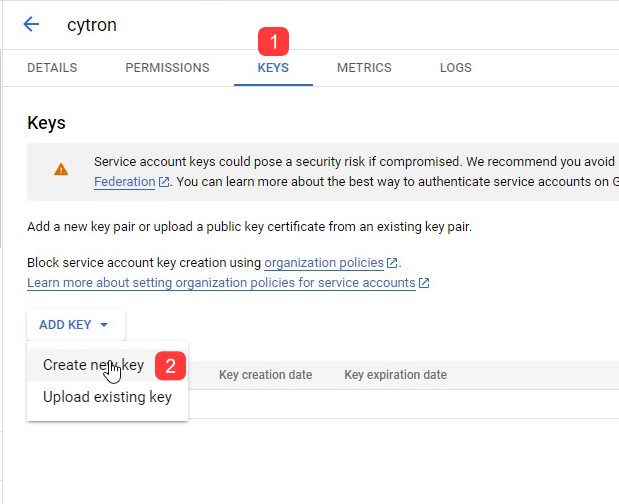
12. Click on the "KEYS" tab and select "Create New Key" under "Add Key."
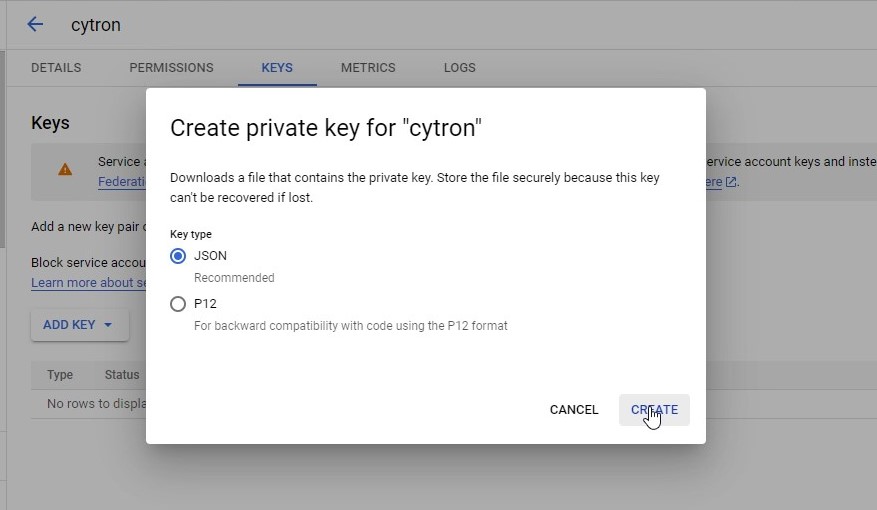
13. Choose the JSON file type and click "Proceed." The JSON file will be downloaded to your computer. Ensure this JSON file is in the same folder as your Python code file.
Install Required Libraries on Raspberry Pi CM4
pip install gspread

pip install oauth2client

pip install python-csv
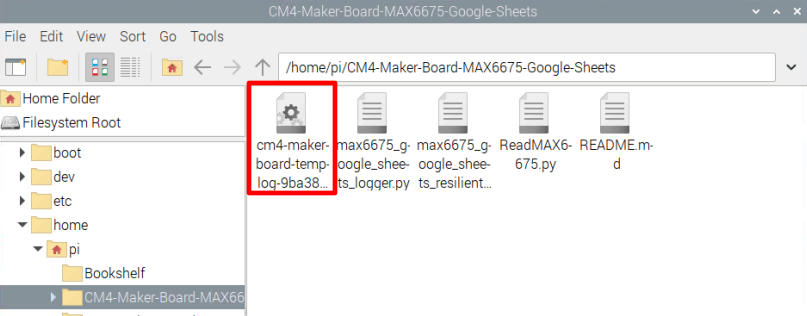
Download the code from Github to your home directory.
git clone https://github.com/CytronTechnologies/CM4-Maker-Board-MAX6675-Google-Sheets
Place the downloaded credentials in the same folder from GitHub. If you need to send the file from your computer to your Raspberry Pi, follow this tutorial on Send Files from Windows computer to Raspberry using VNC.
Run the Code
Open the max6675_google_sheets_logger.py file with an IDE like Thonny or Geany. Edit the JSON_FILE to match the JSON file's name in the folder. Change SHARE_WITH_EMAIL to the desired email address and SPREADSHEET_NAME to your chosen Google spreadsheet file title. Set the SENDING_INTERVAL to your preferred time interval for data updates. Be aware that the Google Sheets API has a quota limit for free accounts. Read more about usage limits.

Click “run” to execute the Python script.
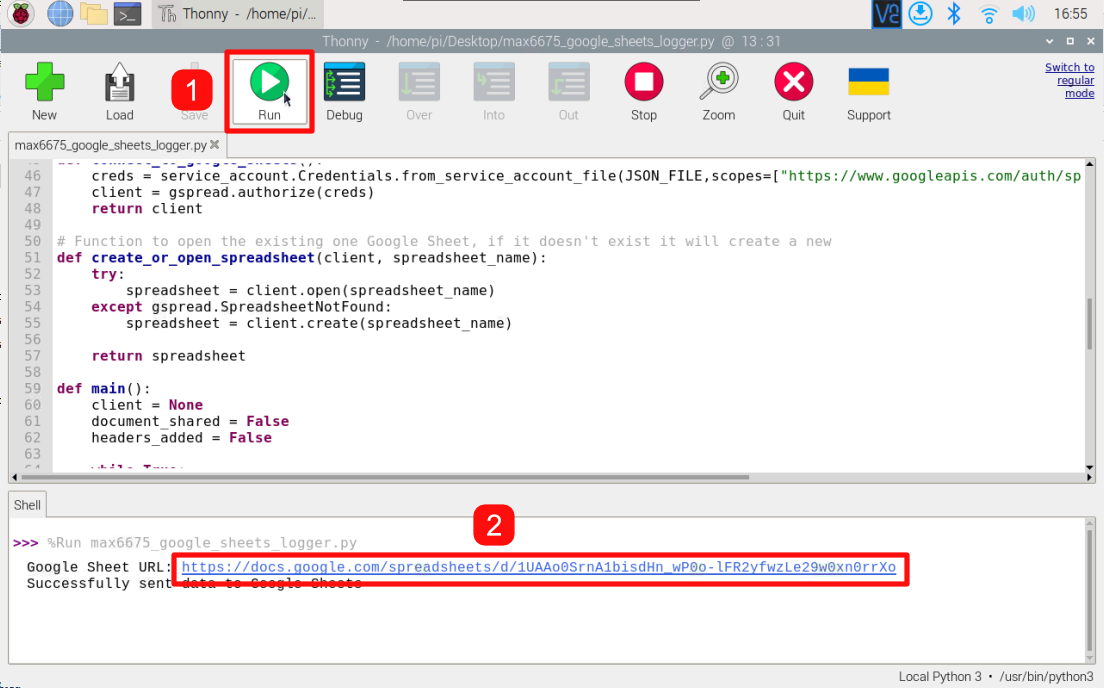
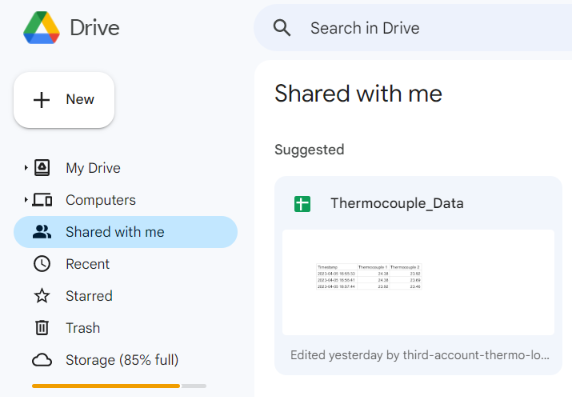
Access the data log from the sheet URL in the Python code or find it in the "Shared with me" section of Google Drive.
Open your Google spreadsheets and you should have the temperature data from both thermocouples tabulated on your sheet.
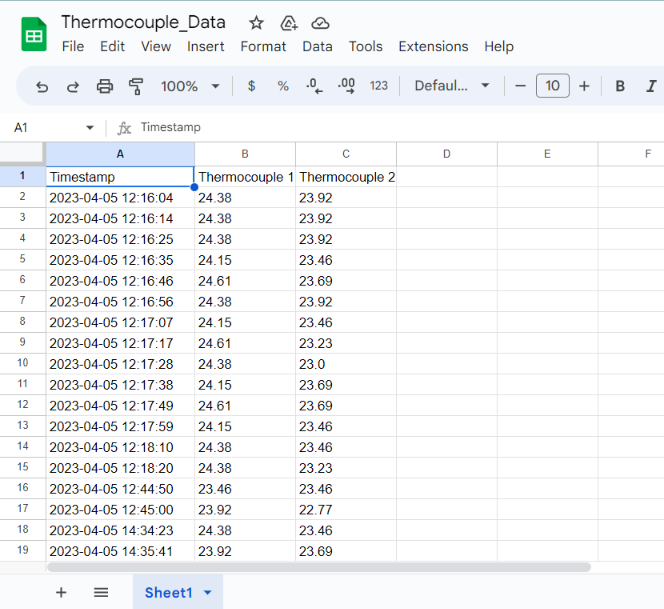
To share the spreadsheet, click the "Share" button and enter the desired email address.
Resilient Data Logger
For a more advanced approach, use the max6675_google_sheets_resilient_logger.py script to avoid data loss during connection errors or high-traffic server events. It saves data in a CSV file before uploading it to Google Sheets and resumes the upload once the connection is restored. This script also uses different threads to save data to a CSV file and upload it to Google Sheets, ensuring a more consistent time interval when reading the thermocouple sensor.
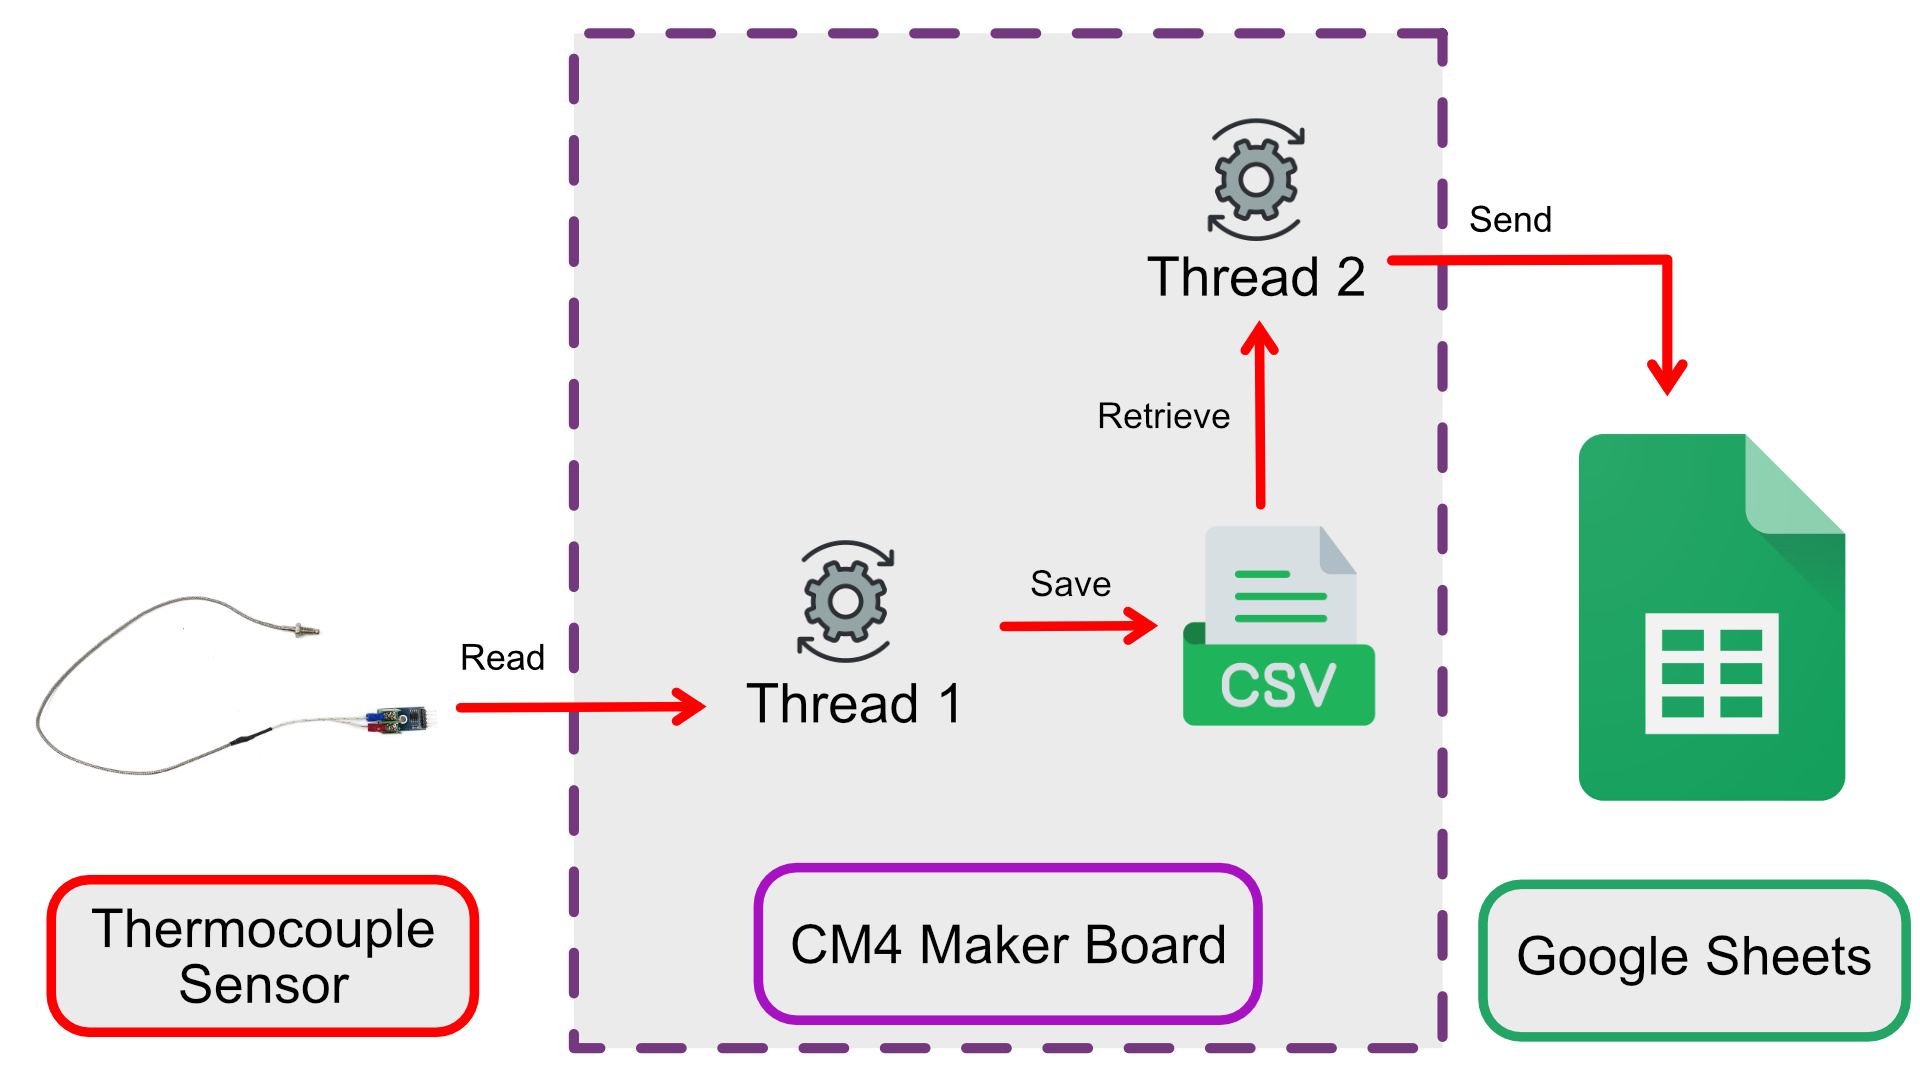
Flow Diagram for Resilient Data Logger
Setup Real Time Clock (RTC)
An RTC is a device that keeps track of the current date and time, even when your system is turned off. This can be useful for various applications, such as logging events or time-stamping files.
To set up an RTC on your system, you can follow these steps:
1. Synchronize system clock to hardware clock:
sudo hwclock -w
2. Synchronize hardware clock to system clock:
sudo hwclock -s
3. Read the hardware clock:
sudo hwclock -r
Related Posts

Getting Started with CM4 Maker Board
Getting started with CM4 Maker Board, learn how to boot up or install Raspberry Pi OS on the Raspberry Pi CM4 with micro SD card, SSD, and eMMC...