 International
 Singapore
 Malaysia
 Thailand
 Vietnam
Your shopping cart is empty!

AI HuskyLens With EDU PICO : Step-by-Step Guide
- Solehin Rizal
- 06 Jun 2024
- Tutorial
- 563
This comprehensive guide will walk you through using the HuskyLens AI camera with the EDU PICO board.We'll cover everything you need to know, from setting up the hardware and software to diving into 6 amazing projects.
Introduction about HuskyLens
HuskyLens is an easy-to-use AI machine vision sensor with 7 built-in functions: face recognition, object tracking, object recognition, line tracking, color recognition, tag recognition and object classification. Through the UART / I2C port, HuskyLens can connect to Arduino and micro:bit to help you make very creative projects without playing with complex algorithms.
For more information, you can check from HuskyLens Wiki .
Getting Started with HuskyLens and EDU PICO
Setting up your HuskyLens and EDU PICO :
1. Unboxing and Hardware Overview
Familiarize yourself with the HuskyLens and EDU PICO components and their functionalities.
2. Connecting the Hardware
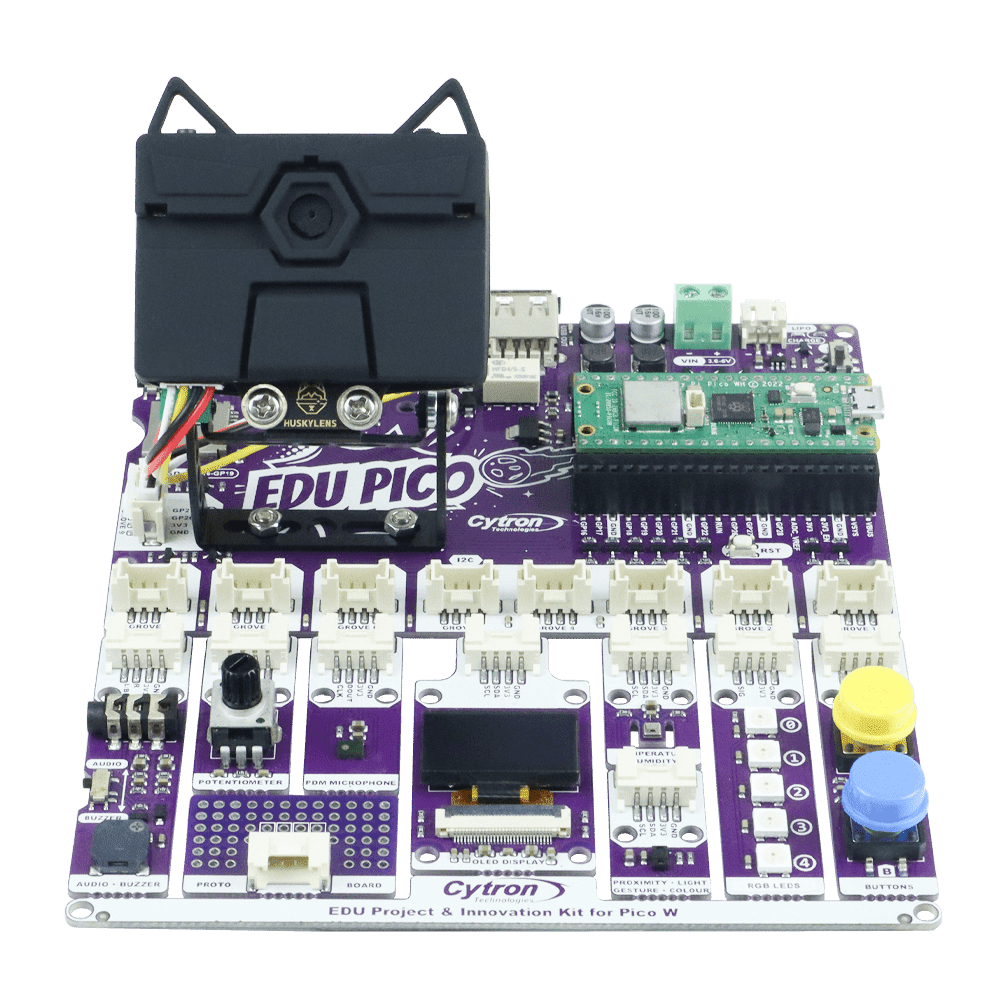
Attach the HuskyLens to the EDU PICO board securely, ensuring a reliable connection. You can check picture below for reference.
3.Installing Software
Installing Libraries : Install the HuskyLens libraries on your EDU PICO.
Download library here.
4.Optional Configuration
Configuring HuskyLens Functions: Optionally, if you want HuskyLens to learn multiple things for every function like face detection, object tracking, and others, follow these steps:
- Tutorial Step: Hold the function button on the HuskyLens and then enable "Learn Multiple".
Now you are ready to proceed to Chapter 1.
Hardware Components
-268x268.jpg "Gravity HuskyLens - AI Machine Vision Camera with Silicone Case")
Gravity HuskyLens - AI Machine Vision Camera wi...
$79.75 $79.75
x 1 unit(s)
")
EDU PICO with AI Kit (Pico W included)
$139.23 $139.23
x 1 unit(s)
Related Posts
